Tracking gas usage with ESPHome, Home Assistant, and TCRT5000
In 2019, I built an energy monitor to keep track of our electricity consumption. Then, in 2021, Home Assistant added an Energy Management feature that keeps track of electricity and gas usage. So naturally, I had to make my gas meter smart as well.
Meet my gas meter
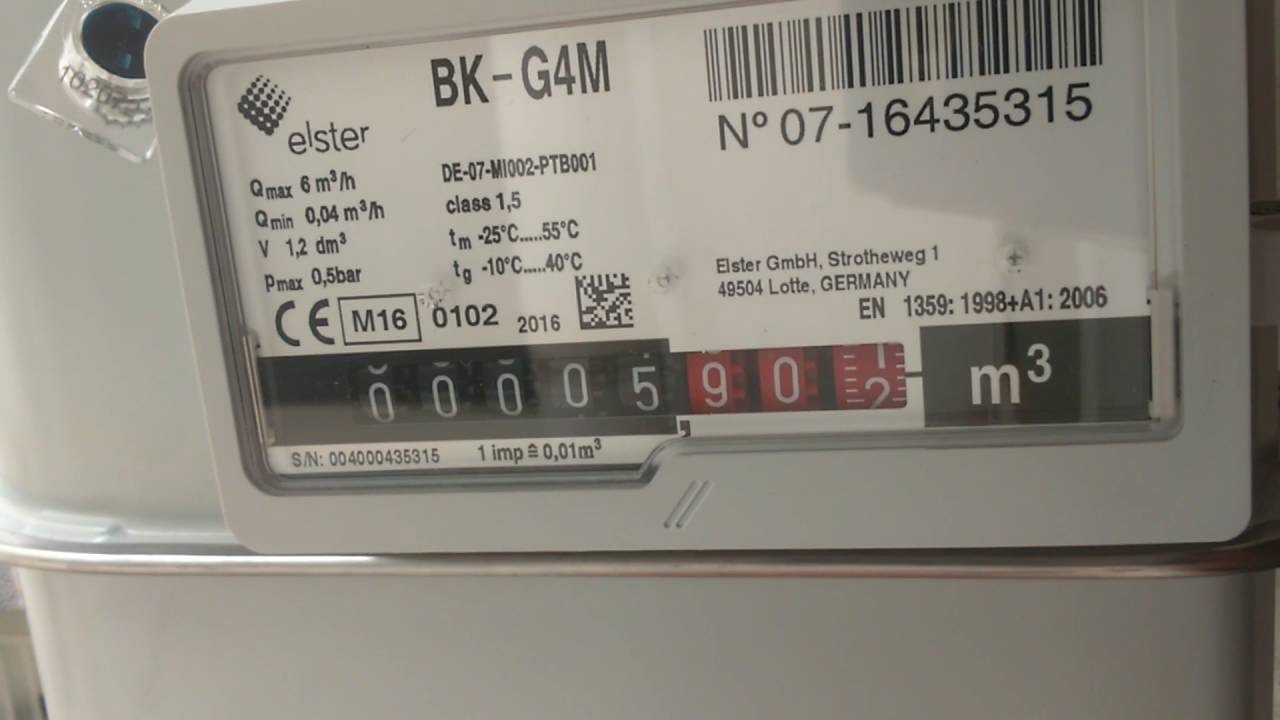
My gas meter is an Elster BK-G4M, a model that is quite common in Belgium. It's an analog meter with a rotary dial that has a magnet on the last rotary element. To make this a "smart" meter, all I have to do is count how many times the magnet makes a full turn and multiple by 0.01 to get my actual gas usage in m³. Easy!
Side note: the utility company in Belgium is actually rolling out digital electricity and gas meters with a P1 port that you can interface with. It's very cool, but the rollout is quite slow. So for the time being, I will retrofit my analog meter.
Elster sells a reed contact that is specifically designed to be mounted onto these meters. They cost around €50, which I found expensive given that this is just a reed contact that reacts to the magnet inside the meter.
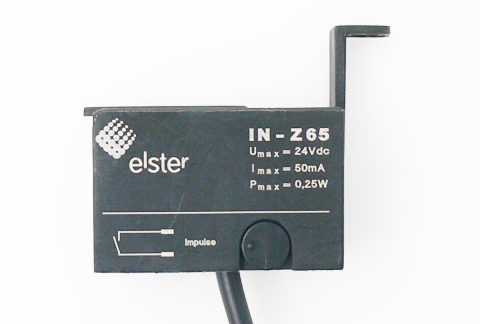
Instead, I decided to build one myself. I bought a bunch of reed switches for less than $1 and 3D printed this clip to hold the reed switch in the correct place. I then connected the reed switch to an ESP32 and waited for it to register my gas usage.
Unfortunately, I got no measurements. The reed switch didn't get closed by the magnet on the rotary dial of my meter. I tried repositioning the reed switch, but to no avail.
I then found a forum post that suggested the magnet inside my meter is very weak or isn't a magnet at all. It could be a mirror instead.
TCRT5000: optical measurement
So how can I detect a mirror passing? One solution would be to shine a laser on the dial and measure how much light is being reflected. More light reflects when the mirror passes in front of the laser.
A few searches later, I came across the TCRT5000 sensor which uses infrared light to do precisely this. This is often used for proximity or line detection. A classic use-case for this type of sensor is a line-following robot.
I bought a pack of these sensors (which only cost $5) and used poster putty to stick one on the glass plate of my gas meter.
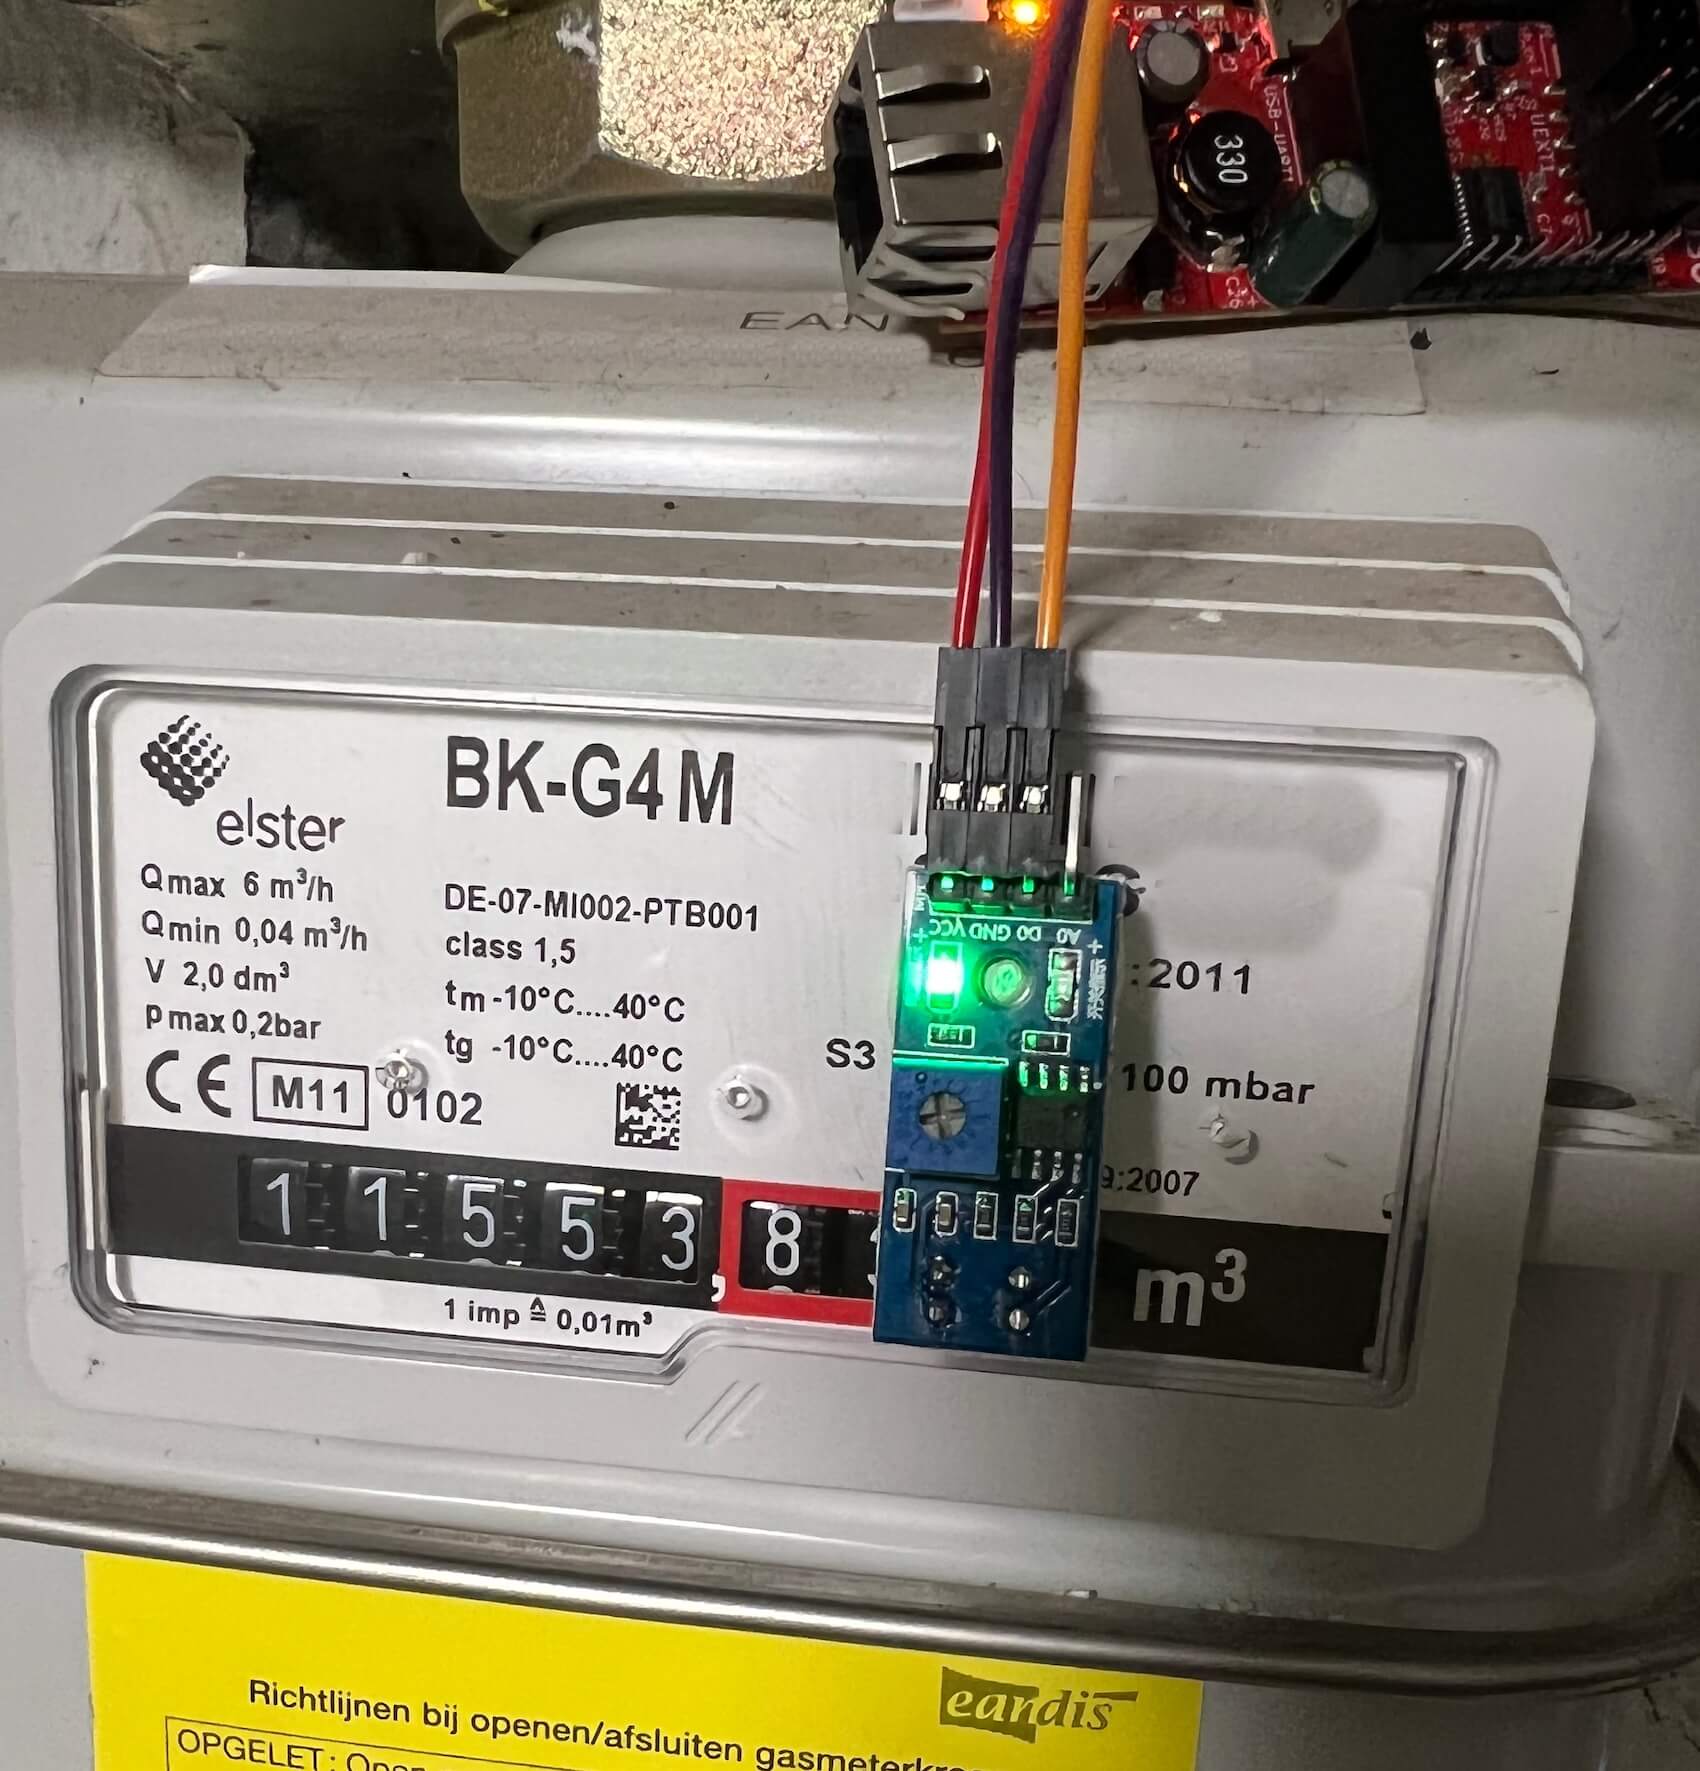
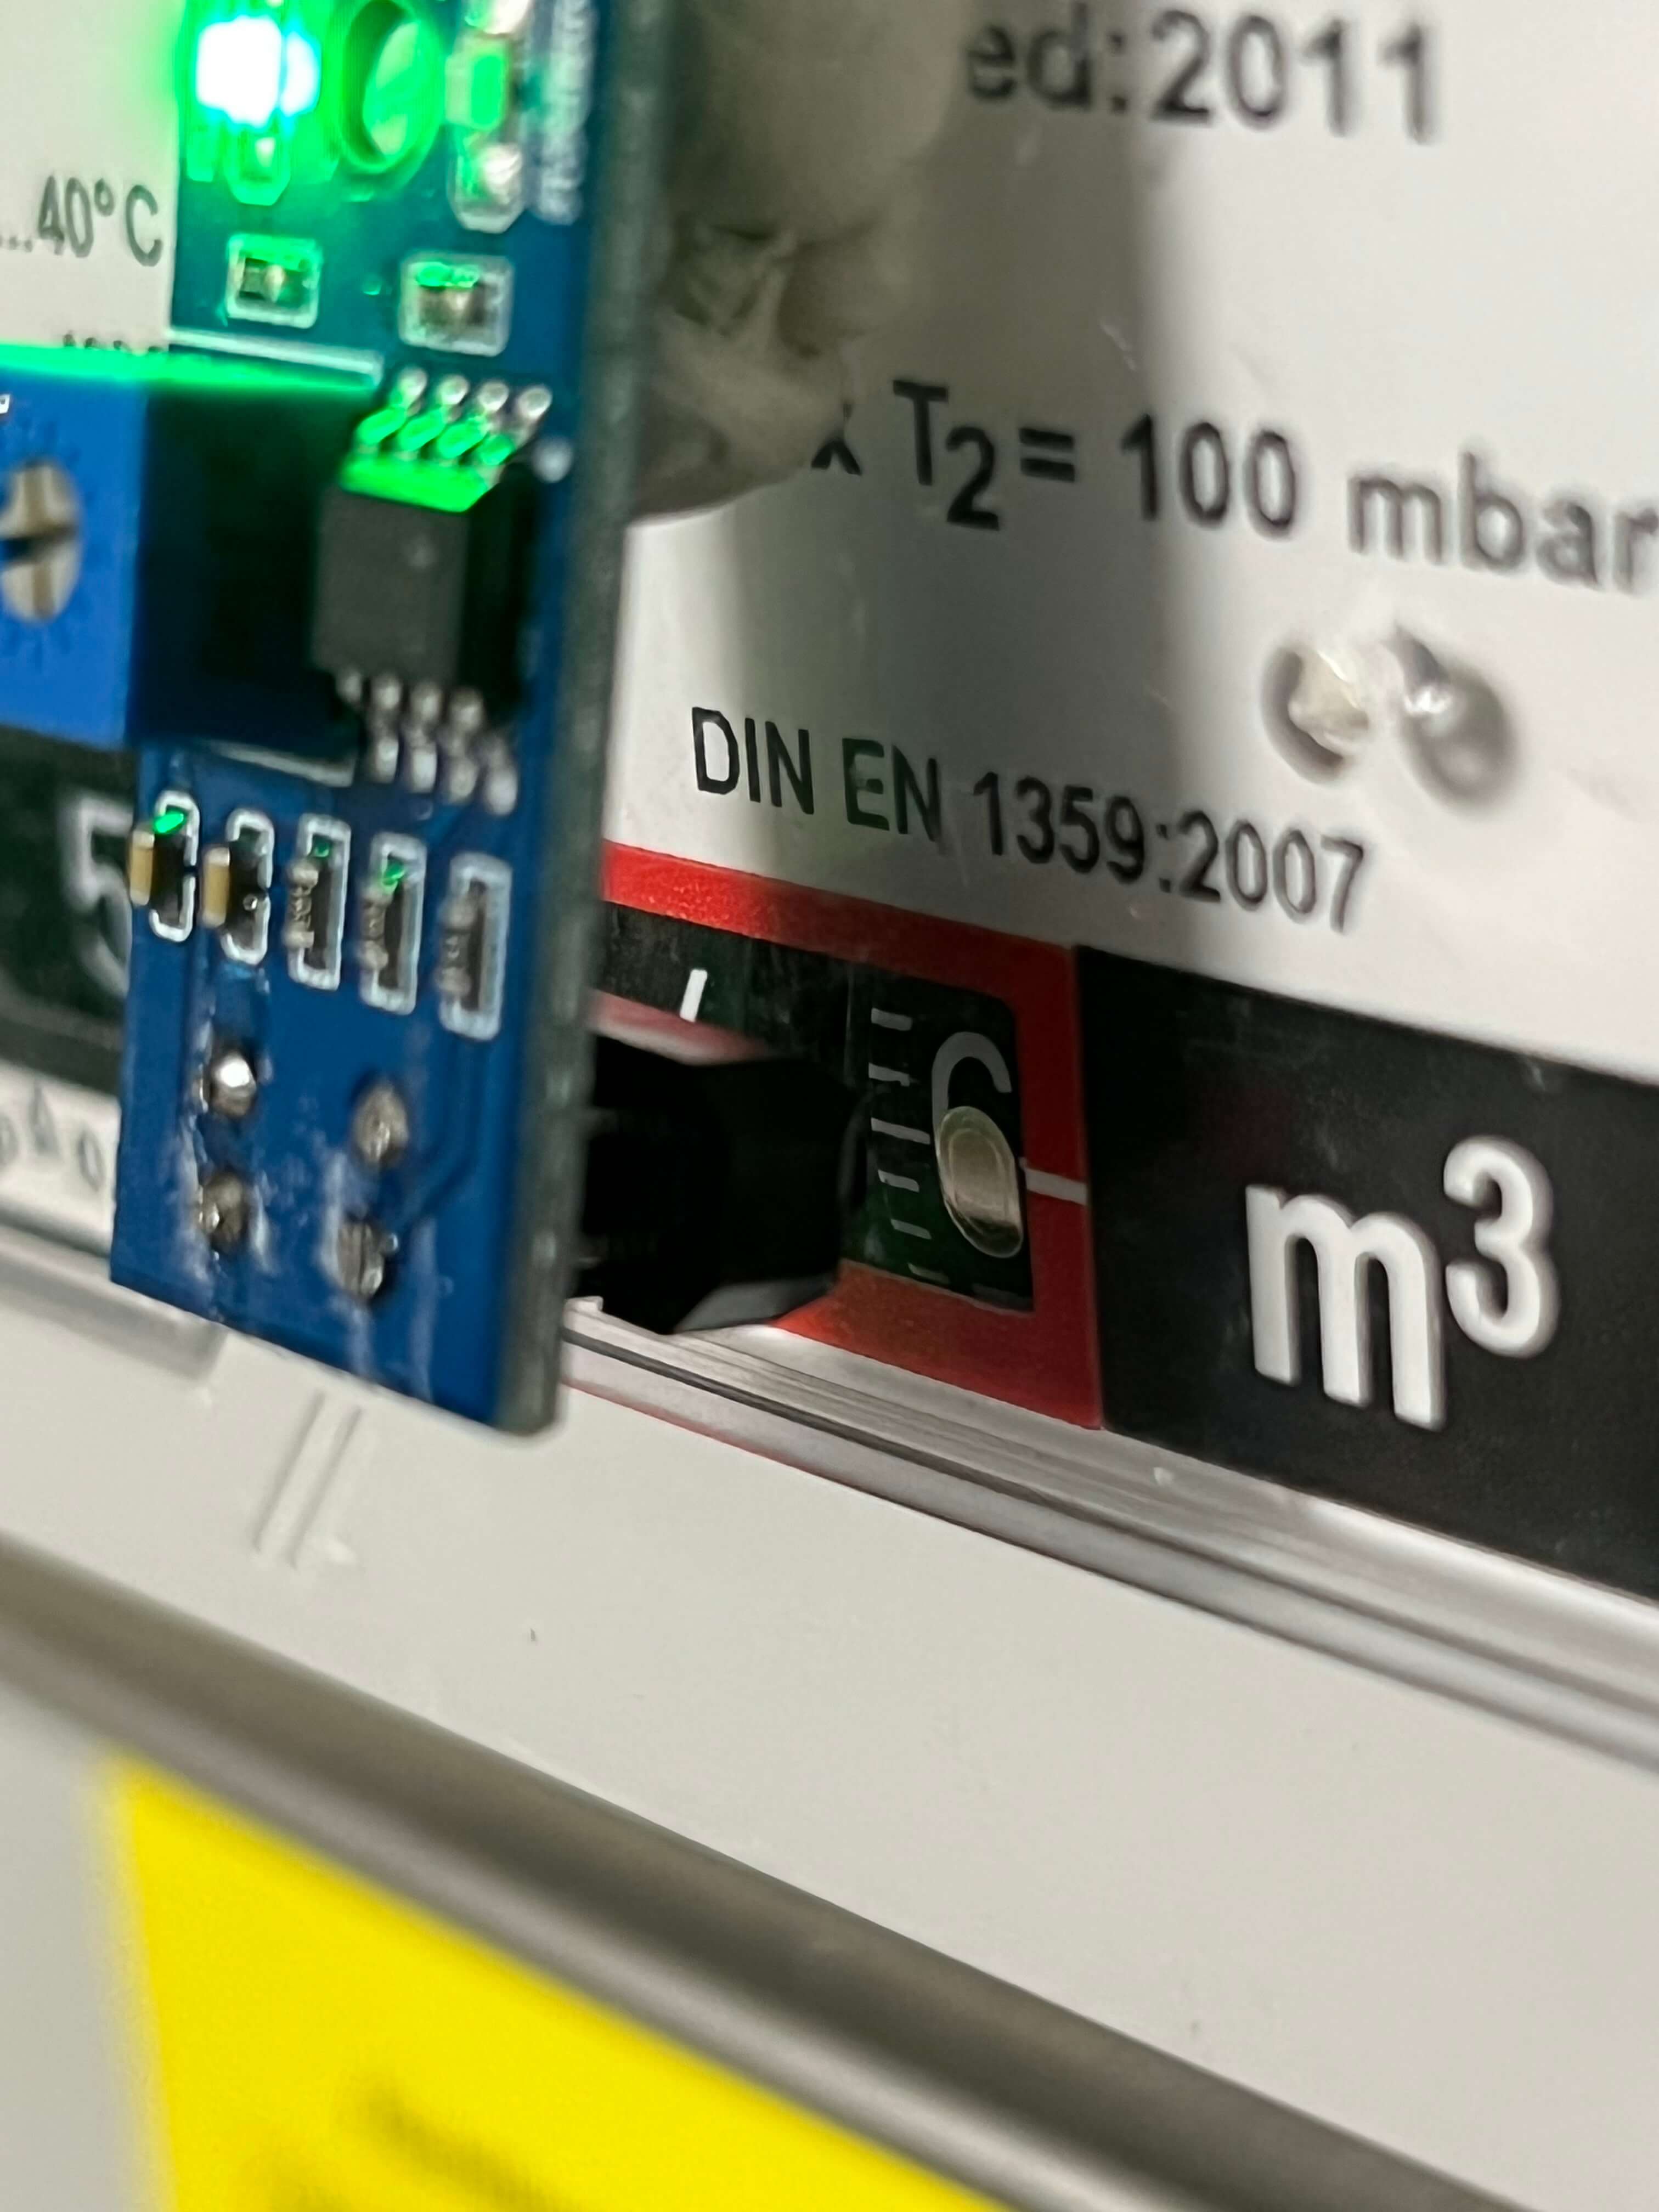
The sensor is powered by either 3.3V or 5V and has two outputs: a digital one (D0) and an analog one (A0). I connected the analog output to an ADC input pin on my ESP32. But more on that later!
It's not the most practical sensor to attach to a gas meter. A flat one would've been easier. If you have any suggestions for alternative sensors: let me know!
Microcontroller
With the sensor in place, it was time to decide on which microcontroller to use. I'm a big fan of the ESP32 so naturally that's the one I chose. However, because my gas meter is close to my Ubiquiti networking gear, I wanted to try a board that has built-in ethernet. Why go wireless when you can go wired, right?
I then discovered a board made by Olimex that not only has ethernet for data transfer but also for power (PoE). I already have a PoE switch, so that means a single ethernet cable can connect the board to my network and power it! Best of all: it only costs €25!
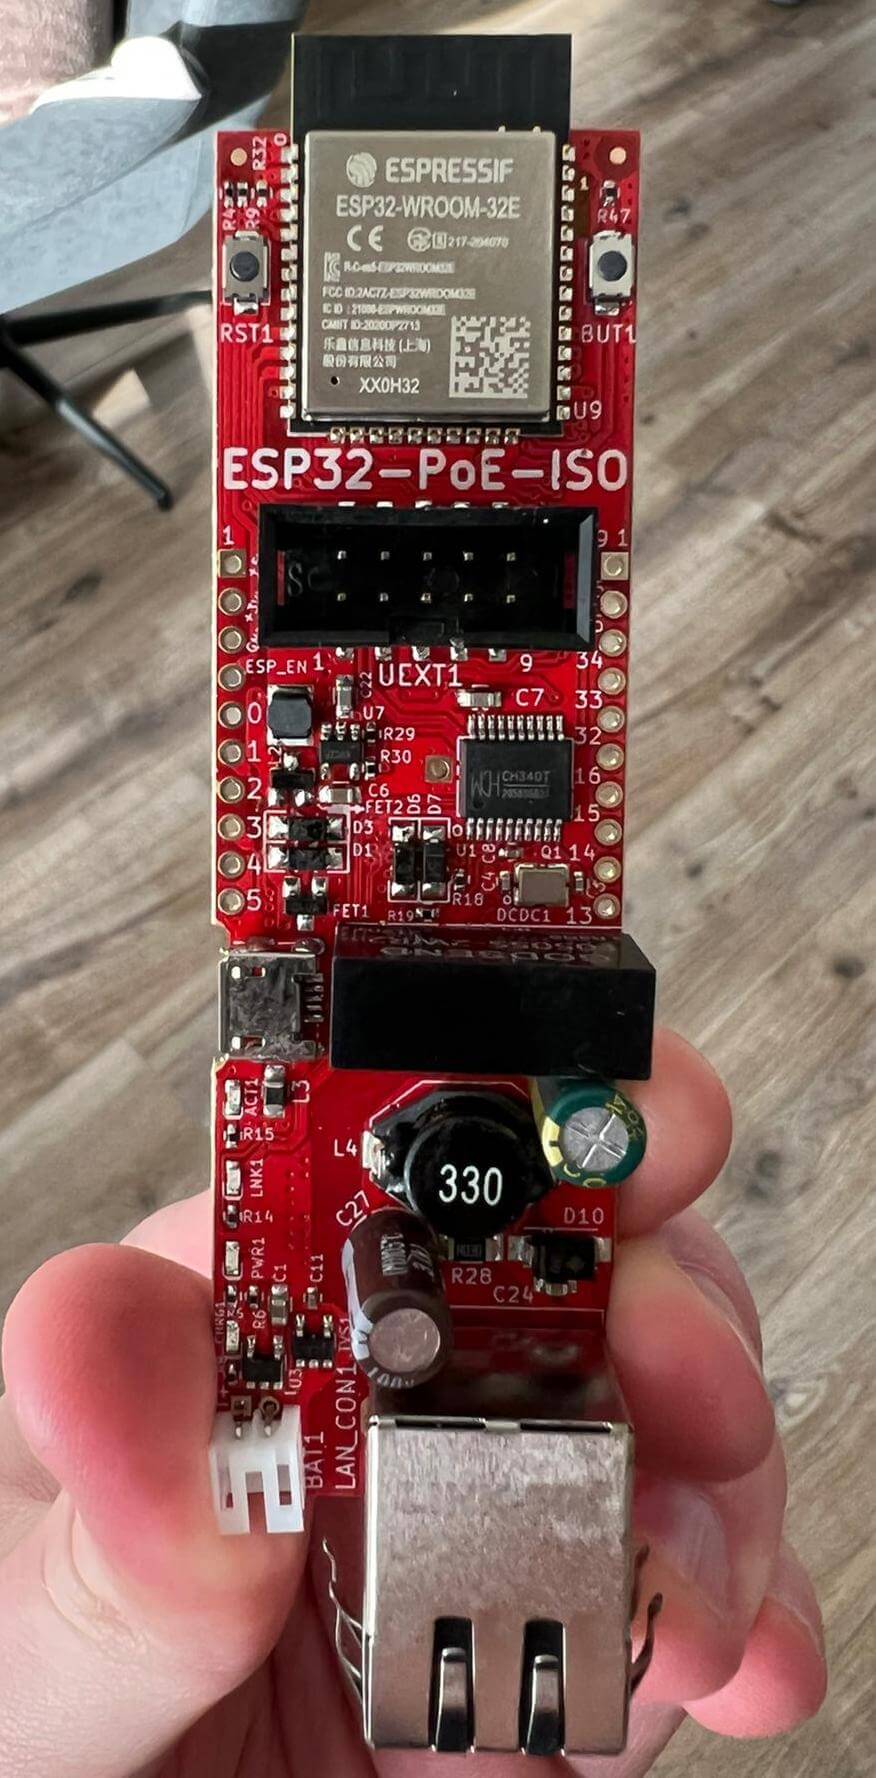
Note: Olimex has multiple versions of this board. I chose the ESP32-POE-ISO model because it has galvanic insulation between the USB port and the PoE power supply. While the regular version is cheaper, it does not have this insulation. You could fry your computer's USB port if you plug it in while connected to PoE. I prefer to not blow things up, so I went with the ISO model.
This board also packs a ton of extra features, although I won't be using any of these:
- Built-in MicroSD card slot (could be useful for offline data storage)
- Low power consumption in deep sleep (200uA)
- LiPo battery charger and connector
- Battery level monitoring pin
- And the design is open-source!
ESPHome
With all the hardware done, I started working on the ESPHome configuration.
My first attempt at getting this to work was tricky: the digital output of the sensor was always HIGH. This was caused by infrared light being reflected by the glass cover of my meter.
Read about my original (hacky) implementation.
I started by using the built-in pulse_counter component, but quickly discovered that the digital output of my sensor isn't sensitive enough. The glass cover of my gas meter is so reflective that the digital output of the sensor is always 1.
Luckily, the analog output is more varied. The output voltage is around 0.25V when the mirror is not facing the sensor, and when it is, the voltage drops to 0.18V. That drop of 0.07V should be enough to build my own pulse counter.
Why did I have to build my own pulse counter? Because the built-in version only supports digital inputs, not analog ones.
Here's what I came up with:
---
substitutions:
 devicename: "gas-meter"
 friendly_name: "Gas meter"

esphome:
 platform: ESP32
 board: esp32-poe-iso
 name: $devicename
 comment: $friendly_name
 build_path: .builds/$devicename

ethernet:
 type: LAN8720
 mdc_pin: GPIO23
 mdio_pin: GPIO18
 clk_mode: GPIO17_OUT
 phy_addr: 0
 power_pin: GPIO12

api:
 password: !secret esphome_api_password
 encryption:
   key: !secret esphome_encryption_key

ota:
 password: !secret esphome_api_password

logger:

globals:
 - id: last_pulse_value
   type: float
   restore_value: false
   initial_value: '0.0'

 - id: total_pulses
   type: float
   restore_value: false
   initial_value: '0.0'

sensor:
 # This sensor exposes the total_pulses variable to Home Assistant and
 # converts it to m³ (1 pulse = 0.01m³ on my meter)
 - platform: template
   name: "Gas used"
   device_class: gas
   unit_of_measurement: "m³"
   state_class: "total_increasing"
   icon: "mdi:fire"
   accuracy_decimals: 2

   # 1 pulse on my meter equals 0,01 m³
   lambda: |-
       return id(total_pulses) * 0.01;

 - platform: adc
   id: adc_value
   internal: true  # No need for this in Home Assistant
   pin: GPIO32
   attenuation: 11db

   # Take a measurement every 100ms but only report the average
   # every second. This is to overcome the noisy ADC on the ESP32.
   update_interval: 100ms
   filters:
     - throttle_average: 1sec

   # When a new voltage measurement is received, calculate the
   # difference with the previous voltage. If it's larger than
   # a certain treshold, increase the pulse counter.
   on_value:
     then:
       - lambda: |-
           float last_reading = id(last_pulse_value);
           float current_reading = id(adc_value).state;
           float diff = last_reading - current_reading;

           if(diff > 0.019){
             id(total_pulses) += 1;
           }

           id(last_pulse_value) = current_reading;
Side note: if you're interested in learning how I structure my YAML files for ESPHome, check out this post.
At the top of the file, I defined two global variables for my pulse counter:
last_pulse_valuealways stores the last value that came from the sensortotal_pulsesstores how many times the mirror has passed in front of the sensor
The most interesting part is the lambda function. It compares the current voltage level with the previously measured one. If the difference is high enough, it increments the total_pulses variable. This threshold (for me 0,019V) can easily be changed for your setup (different sensor, different input voltage, different reflection on the gas meter, ...)
I also added a filter to clean up the noisy ADC of the ESP32. I let the ADC take 10 measurements (once every 100ms) and then calculate the average. This resulted in much more stable readings!
update_interval: 100ms
filters:
  - throttle_average: 1sec
After publishing this blog post, a reader reached out with a solution: replace the sensor’s cap with a custom designed one:
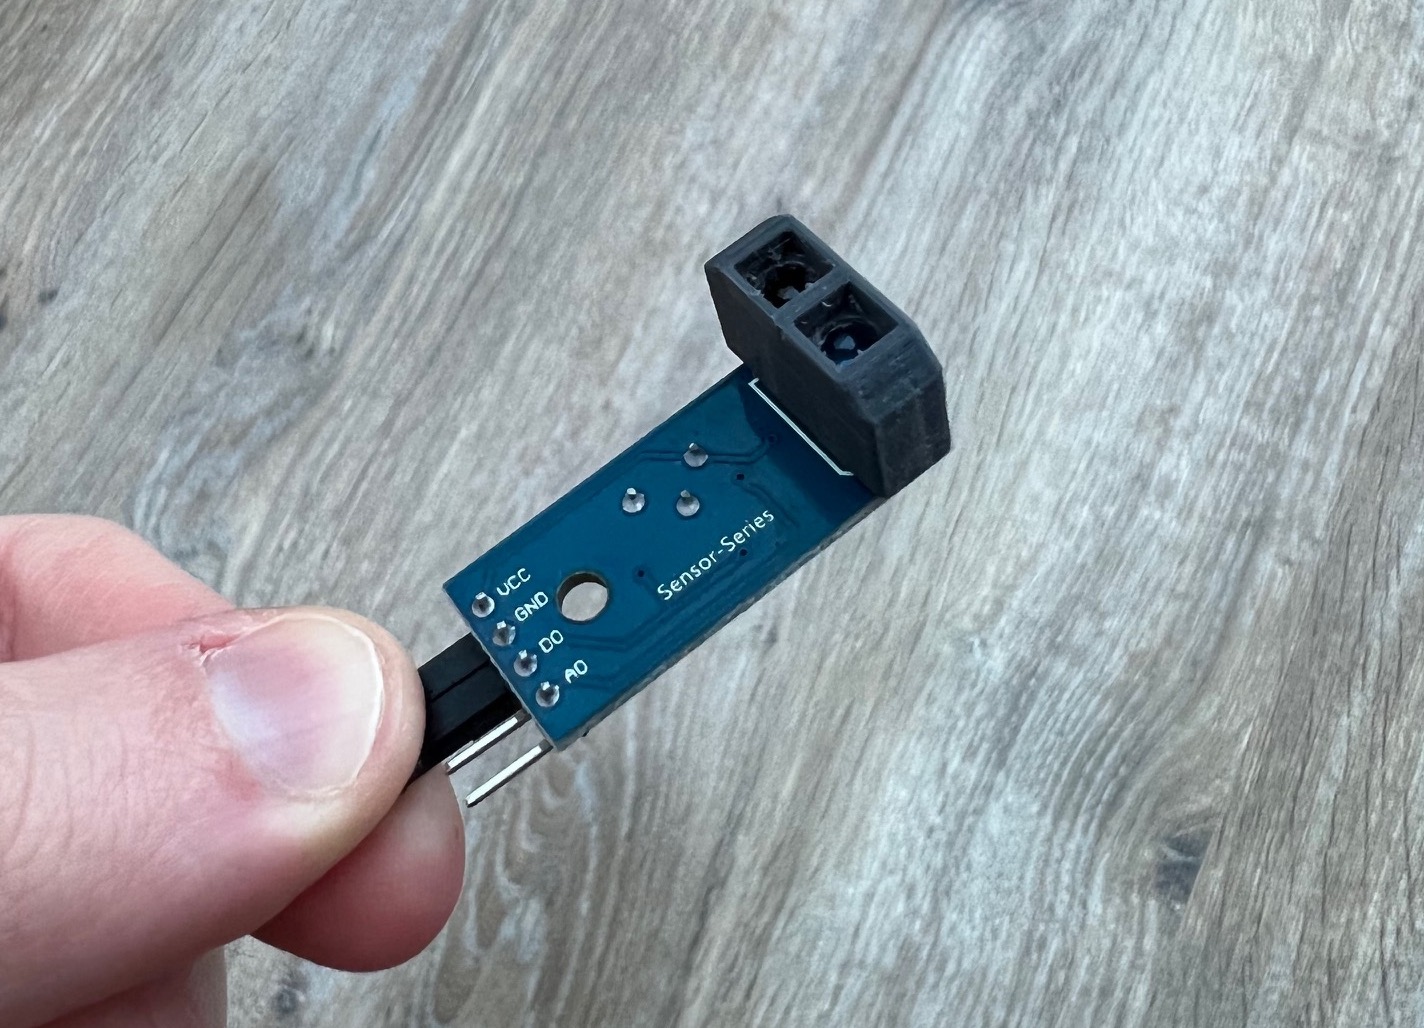
You can download the STL file for it here. This little cap makes sure that the infrared light stays separated from the sensor until it hits my meter’s glass cover.
Now I could write the ESPHome configuration for it. Normally you would use a pulse_counter to count how many times the sensor is triggered. Unfortunately for me, the sensor sometimes rapidly switches from ON to OFF for no good reason, resulting in bad readings. To overcome this, ESPHome has an internal_filter option that can ignore pulses shorter than a given timeframe. Unfortunately, on the ESP32 that interval can only be set to 13us, and I needed about 100 milliseconds.
So I implemented my own pulse_counter by using a global variable, a binary_sensor with a delayed_on filter and a template sensor:
---
substitutions:
  devicename: "gas-meter"
  friendly_name: "Gas meter"

esphome:
  platform: ESP32
  board: esp32-poe-iso
  name: $devicename
  comment: $friendly_name
  build_path: .builds/$devicename

ethernet:
  type: LAN8720
  mdc_pin: GPIO23
  mdio_pin: GPIO18
  clk_mode: GPIO17_OUT
  phy_addr: 0
  power_pin: GPIO12

api:
  password: !secret esphome_api_password
  encryption:
    key: !secret esphome_encryption_key

ota:
  password: !secret esphome_api_password

logger:

globals:
  - id: total_pulses
    type: int
    restore_value: false
    initial_value: '0'

# This is mainly here because the internal_filter of the pulse_counter on ESP32
# can only be set to a maximum of 13us, which is way too low. The TCRT5000
# sometimes rapidly switches from ON to OFF, causing a lot of "ghost" pulses.
# The delayed_on filter will make sure that the sensor stayed ON for at least
# 100ms before increasing the counter.
binary_sensor:
  - platform: gpio
    id: internal_pulse_counter
    pin: GPIO32
    internal: true
    filters:
      - delayed_on: 100ms
    on_press:
      then:
        - lambda: id(total_pulses) += 1;

sensor:
  - platform: template
    name: "Gas used"
    device_class: gas
    unit_of_measurement: "m³"
    state_class: "total_increasing"
    icon: "mdi:fire"
    accuracy_decimals: 2
    lambda: |-
        return id(total_pulses) * 0.01;
Side note: if you're interested in learning how I structure my YAML files for ESPHome, check out this post.
Integrating with Home Assistant
All that's left now it to add the sensor to Home Assistant and configure it for the Energy dashboard. As always, it was automatically discovered, and all I had to do was give Home Assistant the API password.
A few hours later, and after adding the sensor to the Energy dashboard, my energy distribution card showed my gas usage:
![]()
I can now see how much electricity we've consumed, how much we generated ourselves through solar panels, and how much gas we've used for heating and hot water.
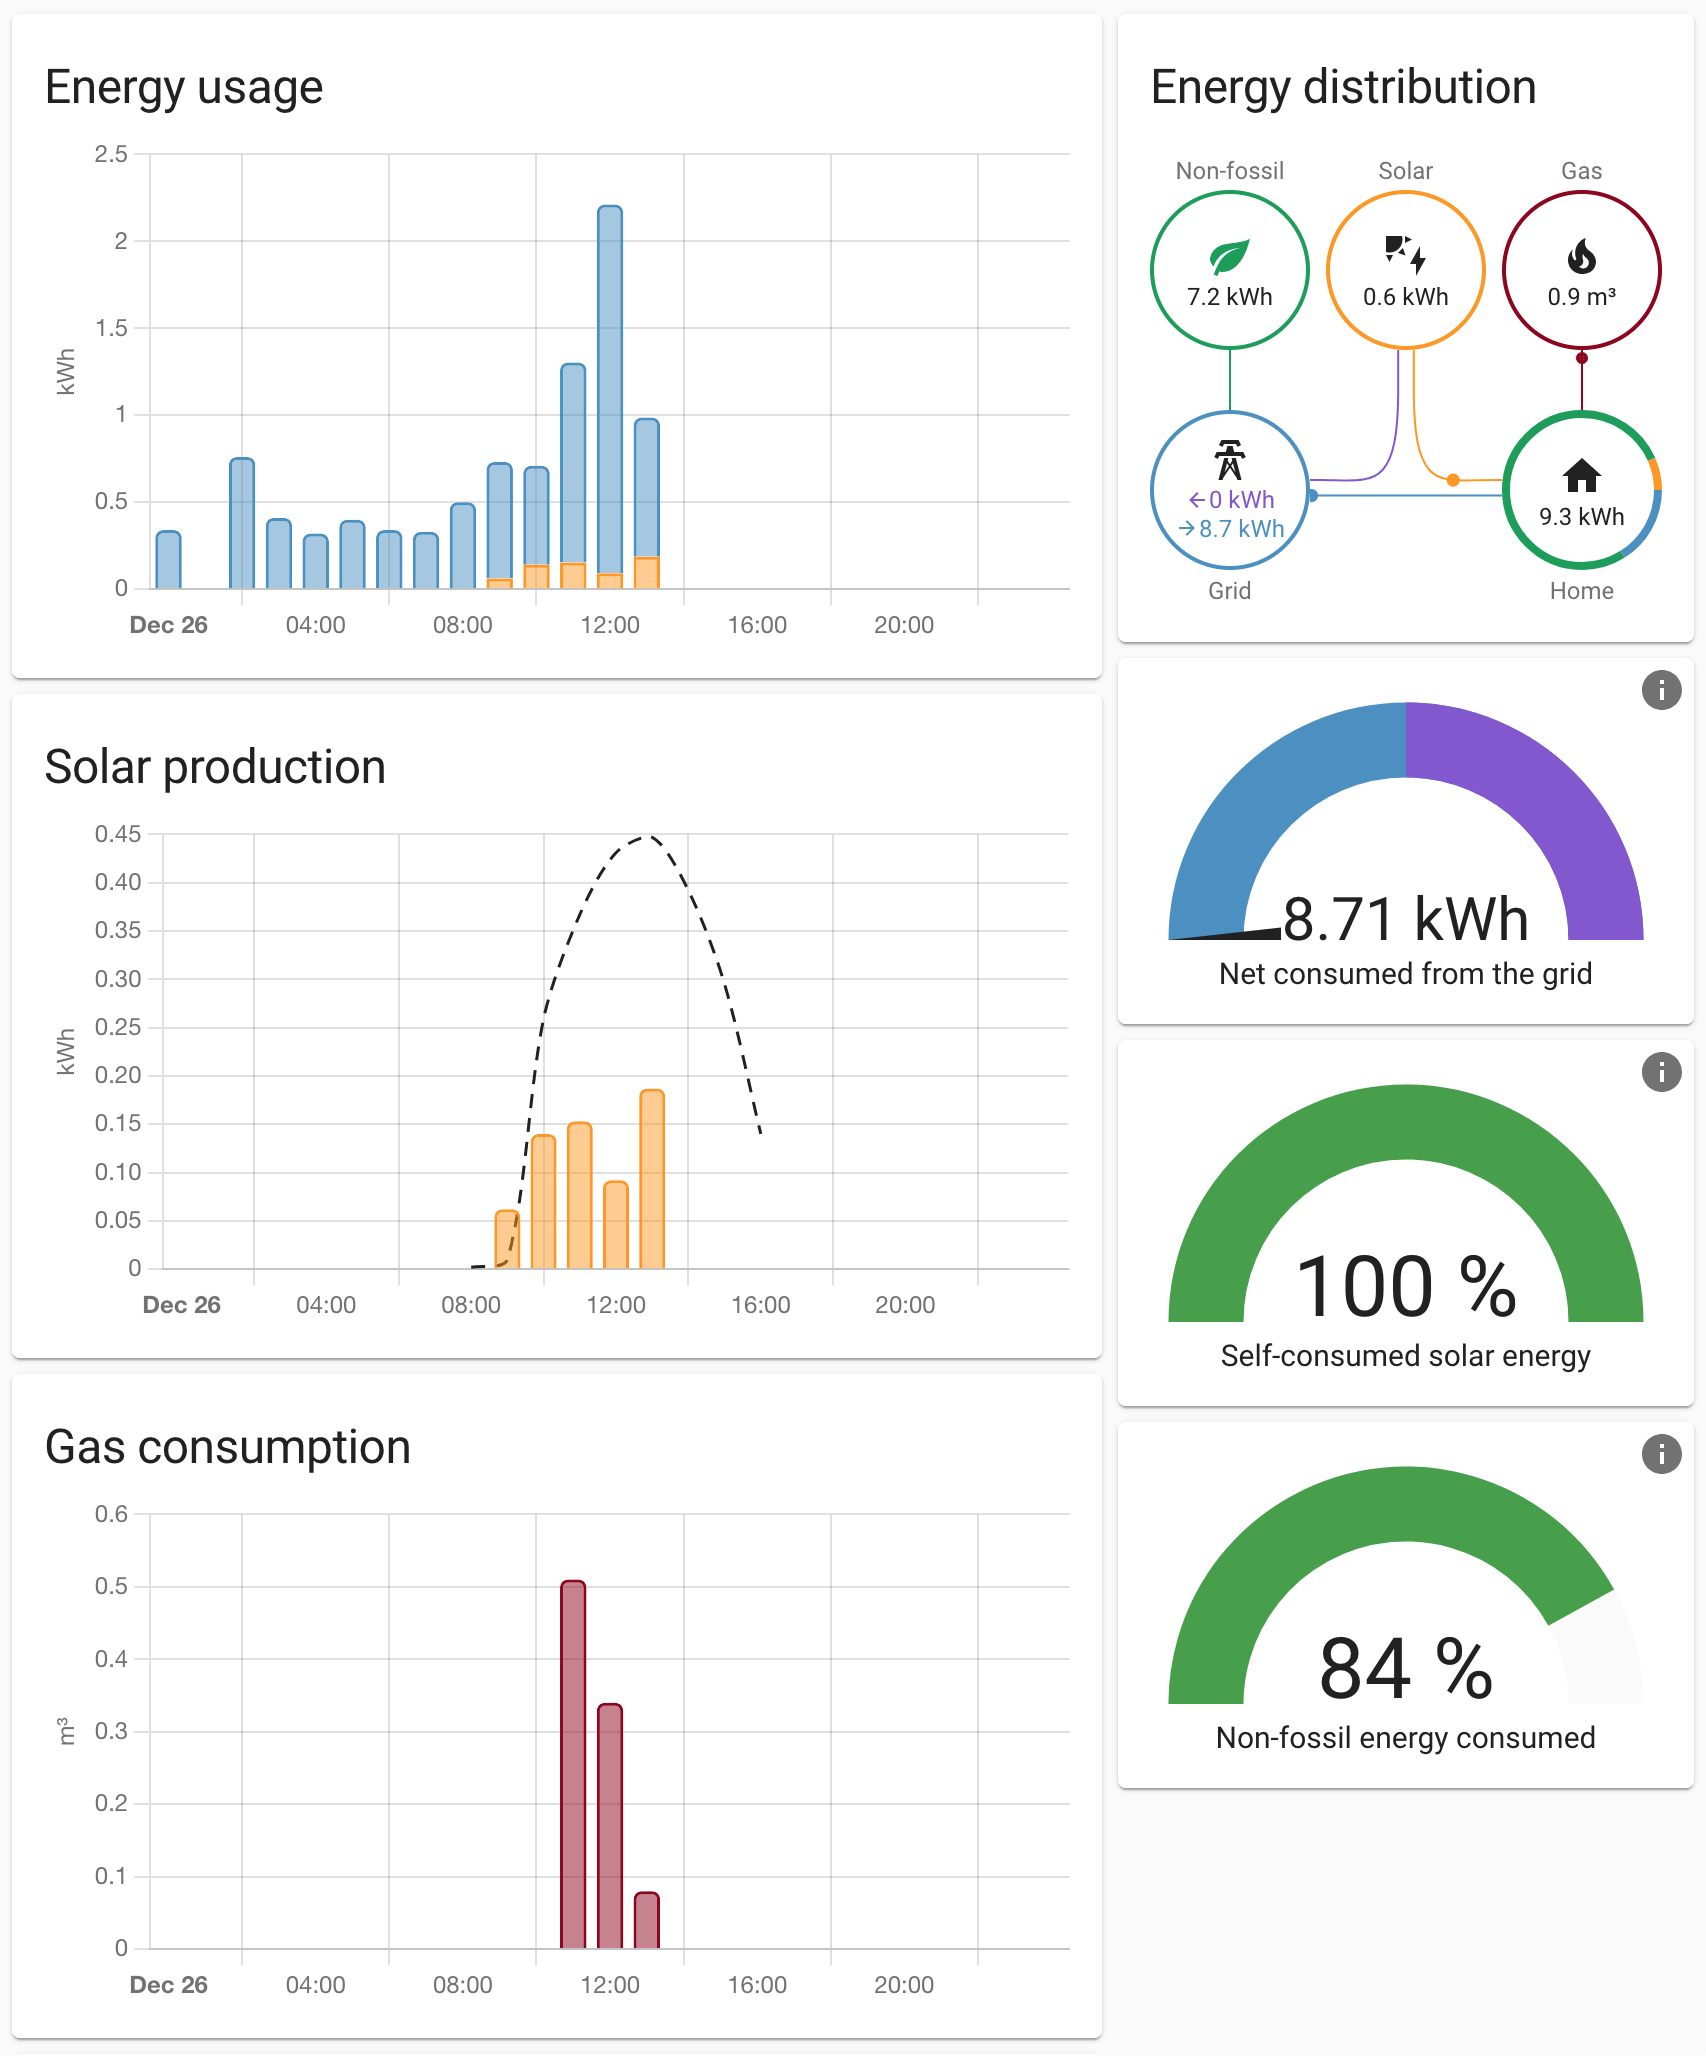
And here's our gas usage for the entire second week of January 2022:
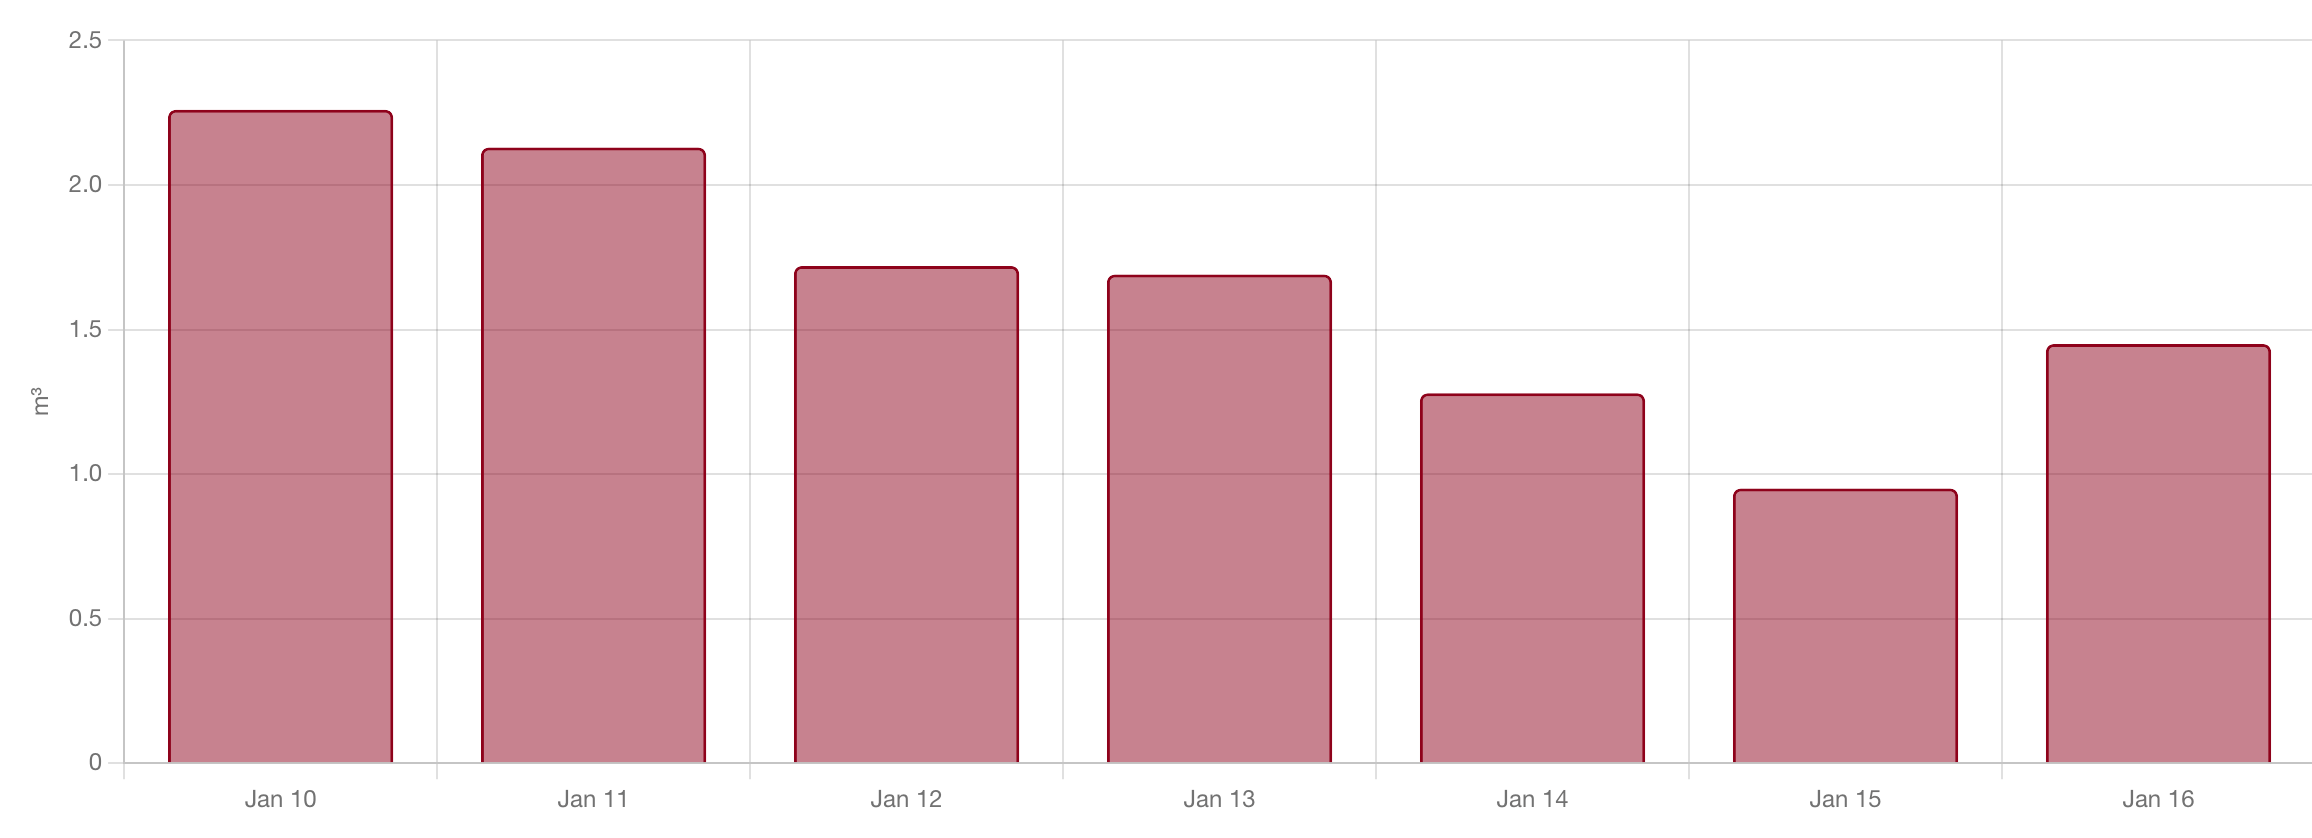
Keep in mind: our house has been renovated almost 10 years ago. It's insulated to conform to older standards and is nowhere near efficient in today's standards.
Accuracy testing
Okay, I'm measuring gas usage. But how accurate are these numbers? To find out, I added a utility meter to Home Assistant:
utility_meter:
  gas:
    source: sensor.gas_used
I then set the value of this utility meter to the value of my actual gas meter by calling the utility_meter.calibrate service:
service: utility_meter.calibrate
target:
  entity_id: sensor.gas
data:
  value: '11577.645'
After two weeks, I compared the virtual utility meter with my actual one. And much to my surprise, they were still in sync (within 1 m³).
Okay, I have to confess: this project didn't go THAT easy. I had to tweak my DIY pulse counter many times before I landed on this version. At first, I looked at absolute voltage levels, which fluctuate and caused it to measure 3 times more gas than we actually consumed. It would also get stuck in a loop when the mirror stopped in front of the sensor. I have fixed those issues, and my sensor has been running reliably for the last 4 weeks.
Why keep track of gas usage?
But Xavier, you ask. Why would you keep track of your gas usage? What will you do with this data?
To be honest, I don't know yet. For now, I want to monitor our gas usage and see if we can make tweaks to lower our consumption. For example: is it better to keep the house at 18°C over night or should we let it cool down further and heat it up in the morning? The theory says we should do the former, but now I can test this in the real world.
I could also use it to see how efficient my gas burner is. In Belgium, we're obliged to have burners inspected and cleaned every 2 years. Will cleaning the burner impact our gas usage, or is it mainly a safety thing?
I'm sure I'll find something interesting in the data. And if I do, I'll update this post or tweet about it.
Conclusion & next steps
What was supposed to be an easy project turned into somewhat of a challenge. But in the end, everything worked out, and the sensor has been working reliably for the last 2 weeks. Once again, ESPHome has proven itself as a very versatile tool.
All that's left now is to design and 3D print a case to protect the microcontroller from the "harsh" and dusty conditions in my basement.

