Building a killer NAS with an old Rackable Server
Like many others, I'm generating a lot of digital data. Constantly taking photos, writing scripts, taking notes, coding projects, and making videos. I'm storing all these files on Google Drive, which has been very reliable but also a bit risky. What if Google closes my account? Or loses my files?
Time to set up a NAS so I can backup my files locally!
My current situation
When I first attempted to solve this problem, I wanted everything to be as cheap as possible. I already had a home server running Proxmox, so I figured I could buy an external hard drive enclosure and run OpenMediaVault.
So I bought a 4-bay Yottamaster USB enclosure:
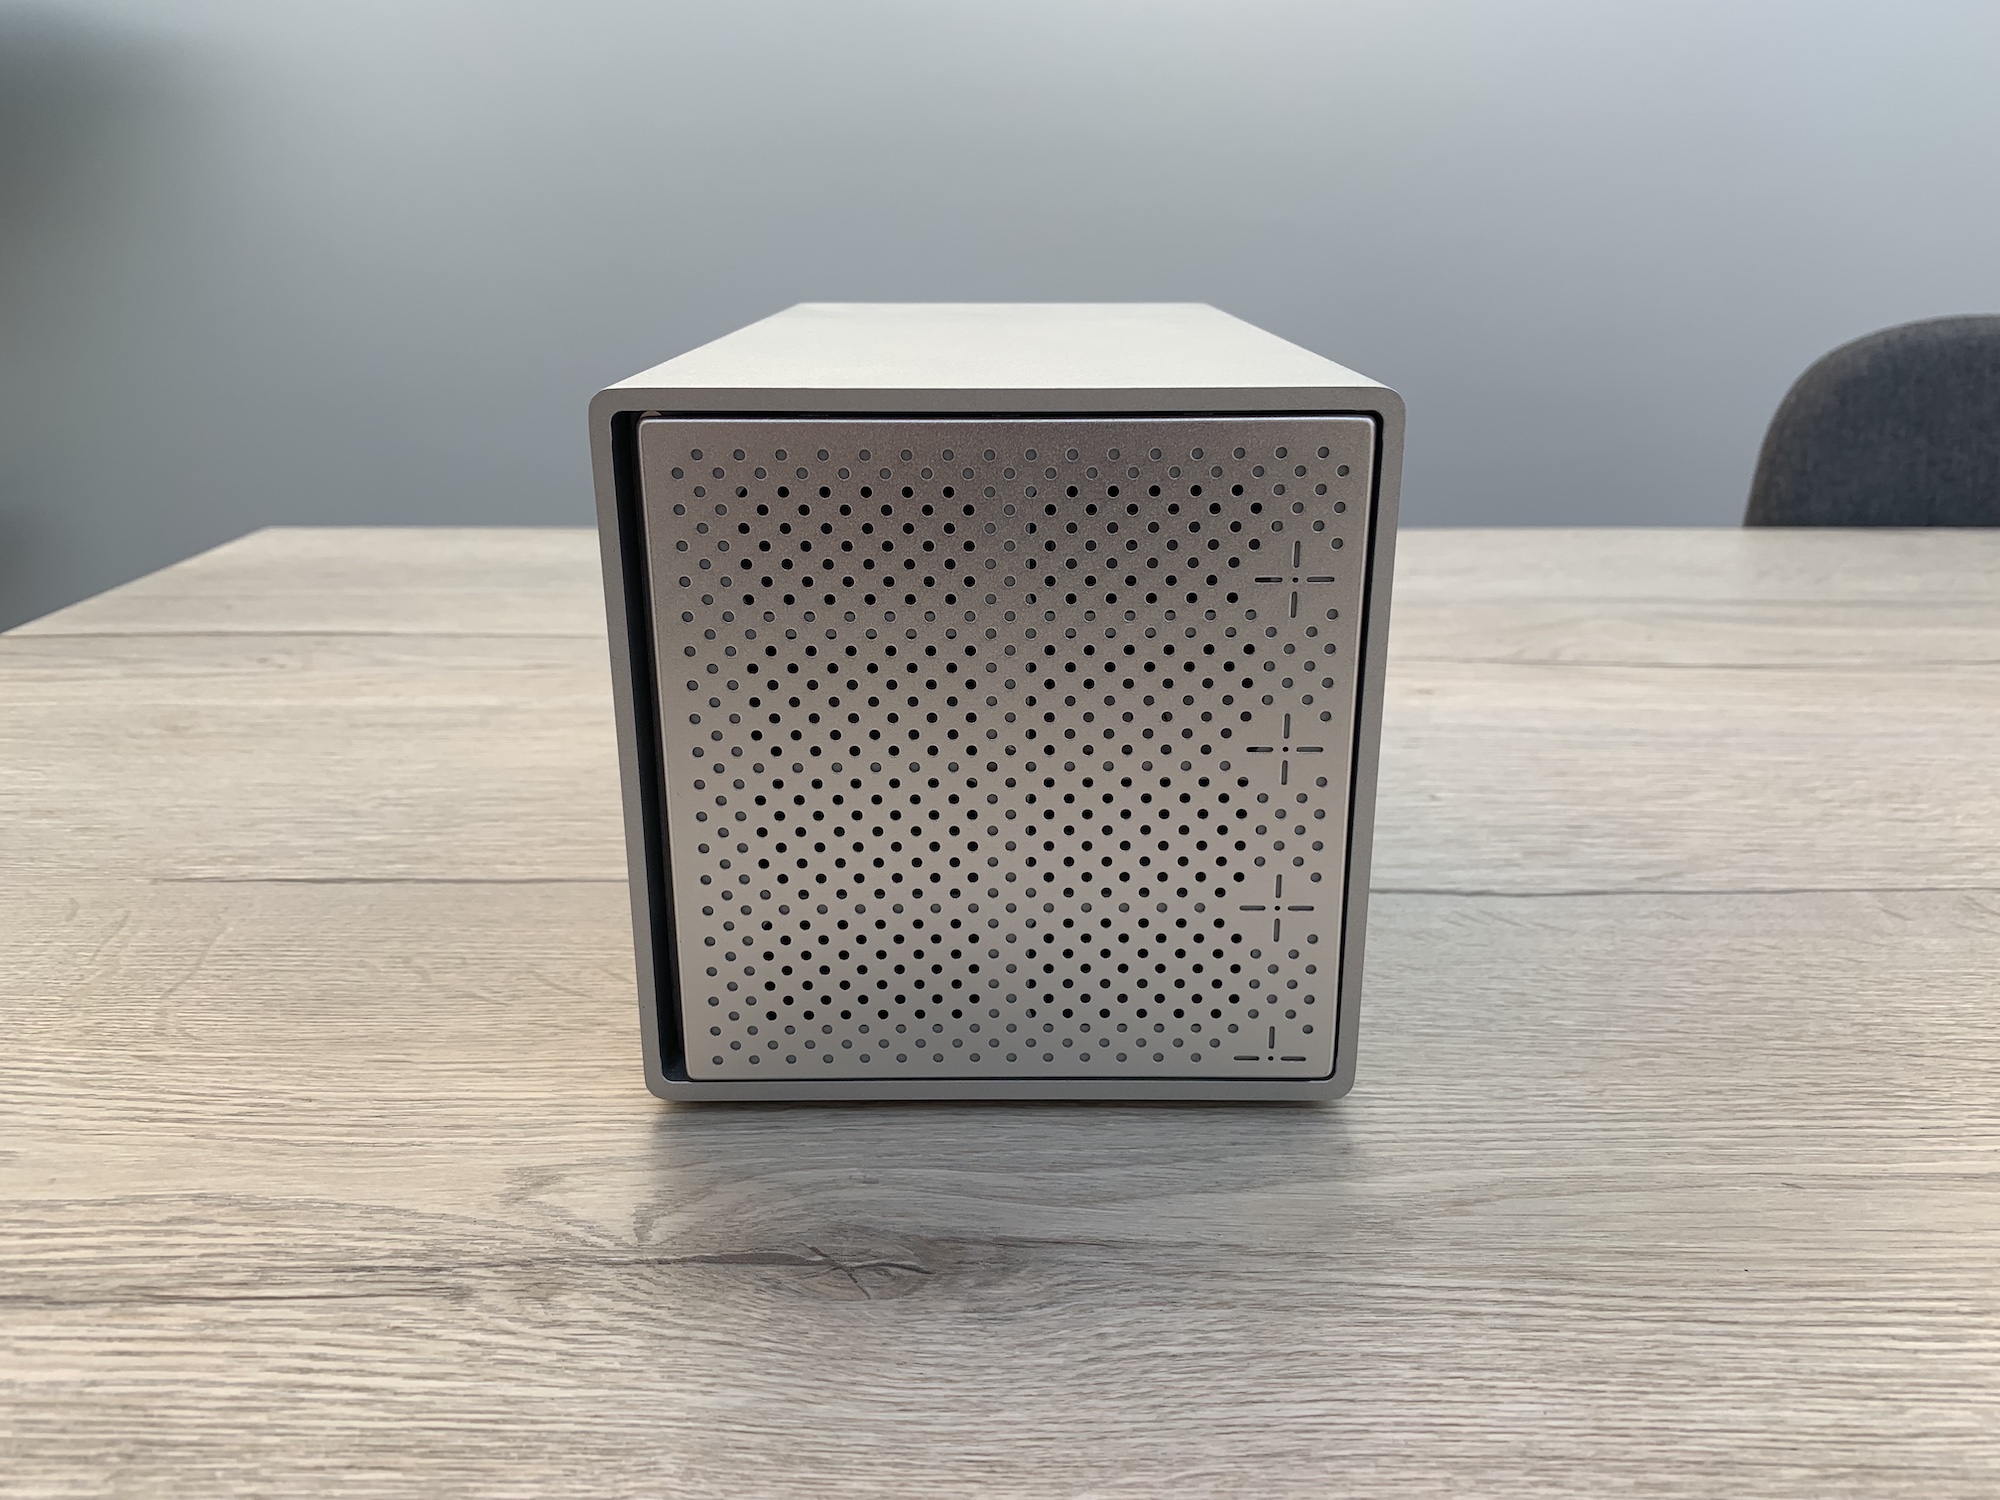
I then created a virtual machine on my Proxmox server and installed OpenMediaVault onto it. For ultimate flexibility, I decided to run a combination of MergerFS and SnapRAID. These allow me to mix different filesystems, use drives of various capacities without any overhead, and still have parity protection!
Does it work?
Kind of.
Performance-wise, everything is okay thanks to the USB3.1 interface. The enclosure also passes along SMART data of the drives to OpenMediaVault, and it can spin them down as well. The only problem is that the enclosure needs to be started manually by pushing a button on the back. Whenever it loses power, it won't start up on its own. A similar thing would happen when the OpenMediaVault would crash: the enclosure detected no activity and powered itself down indefinitely.
And then there are the OpenMediaVault issues. It would often crash without reason and sometimes even refused to boot with weird kernel panics. Then there's the web UI, which I found confusing with lots of options scattered throughout. Maybe part of my problem was related to the fact that I was using a USB enclosure.
Looking for a better solution
Time to look for a better solution. So I made a wishlist:
- Room for expansion. My storage needs will only increase over time.
- Swap OpenMediaVault for UnRAID
- No external enclosures. Use SATA ports!
- I have a short-depth 19" server rack, so it would be cool if the new solution were rack-mountable.
I did think about buying an actual NAS from QNAP or Synology, but I found those to be very expensive and somewhat limited in processing power.
Enterprise gear to the rescue!
I learned from watching Linus Tech Tips videos that old enterprise gear is often worth a look. So I browsed eBay, and while I found many storage servers, none would fit in my short 19" rack.
Then I came across a thread on ServeTheHome about old Rackable storage servers. They have 12 hard drive bays, a SATA backplane, and best of all: they're half-depth!
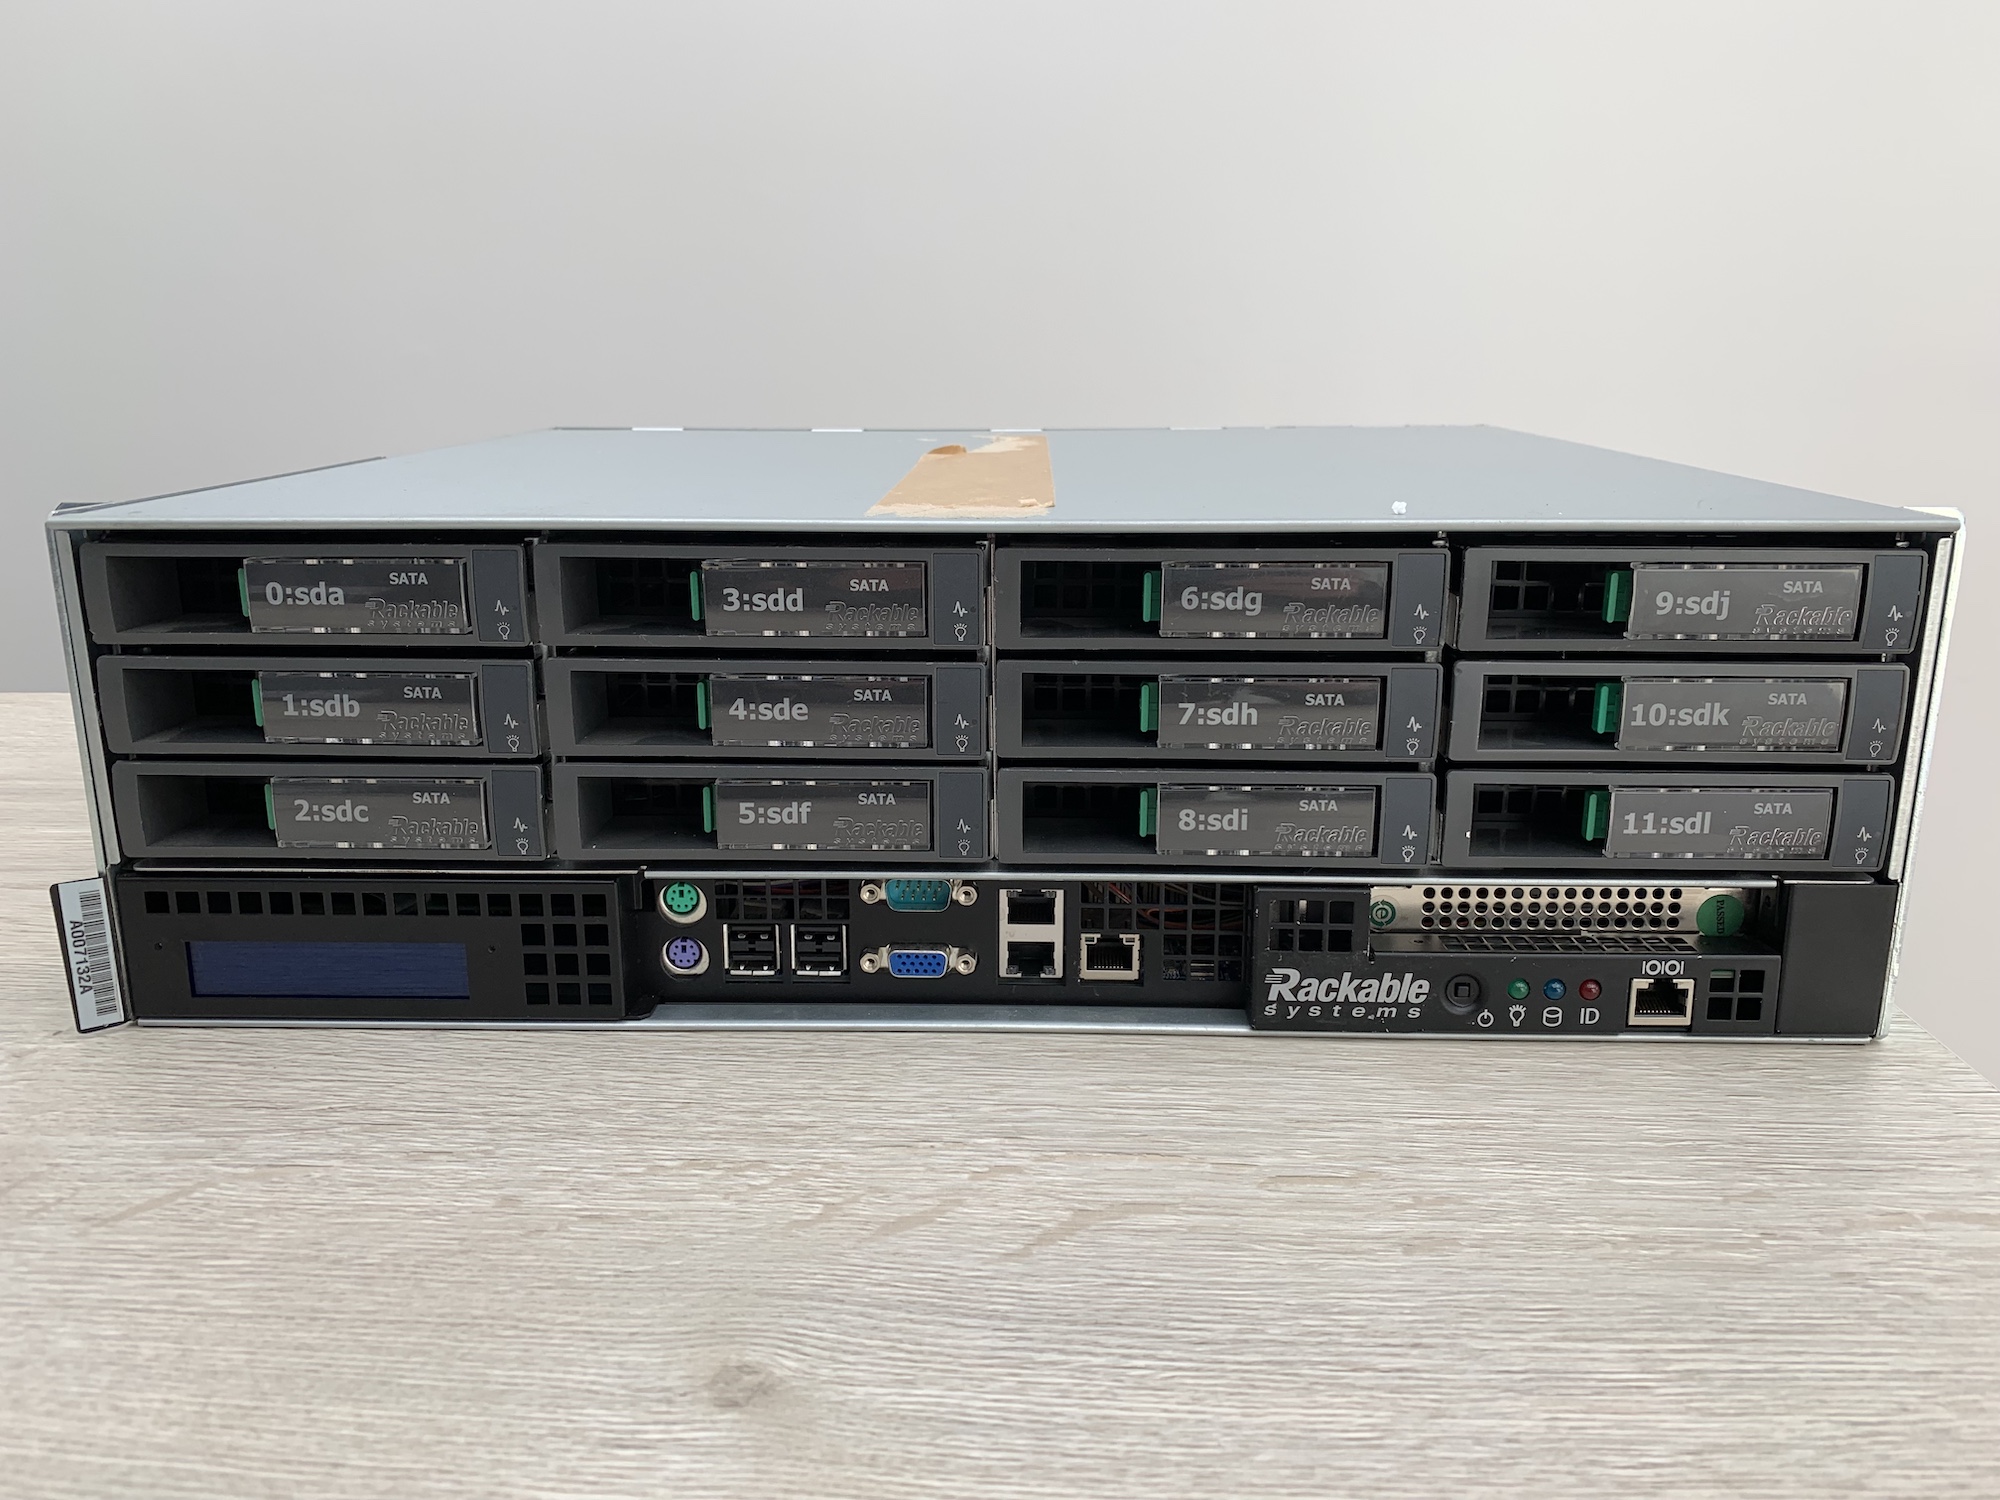
Here are the specs:
- Motherboard: Arima NM46X
- CPU: Dual socket, AMD Opteron 2212HE
- Memory: 16GB DDR2 667MHz (8GB for each processor)
- You can see the memory being counted while the system boots. Been a while since I've seen that.
- RAID Controller: AMCC 3ware 9650SE-12/16ML
These specs are worthless by today's standards, but that doesn't matter if I can repurpose the 12-bays and SATA backplane.
Some users on the ServeTheHome Forum reported that you could swap out the motherboard for a regular ATX one. That was enough to convince me! So I bought one of these for £45 and paid £55 for shipping (in total about $100).
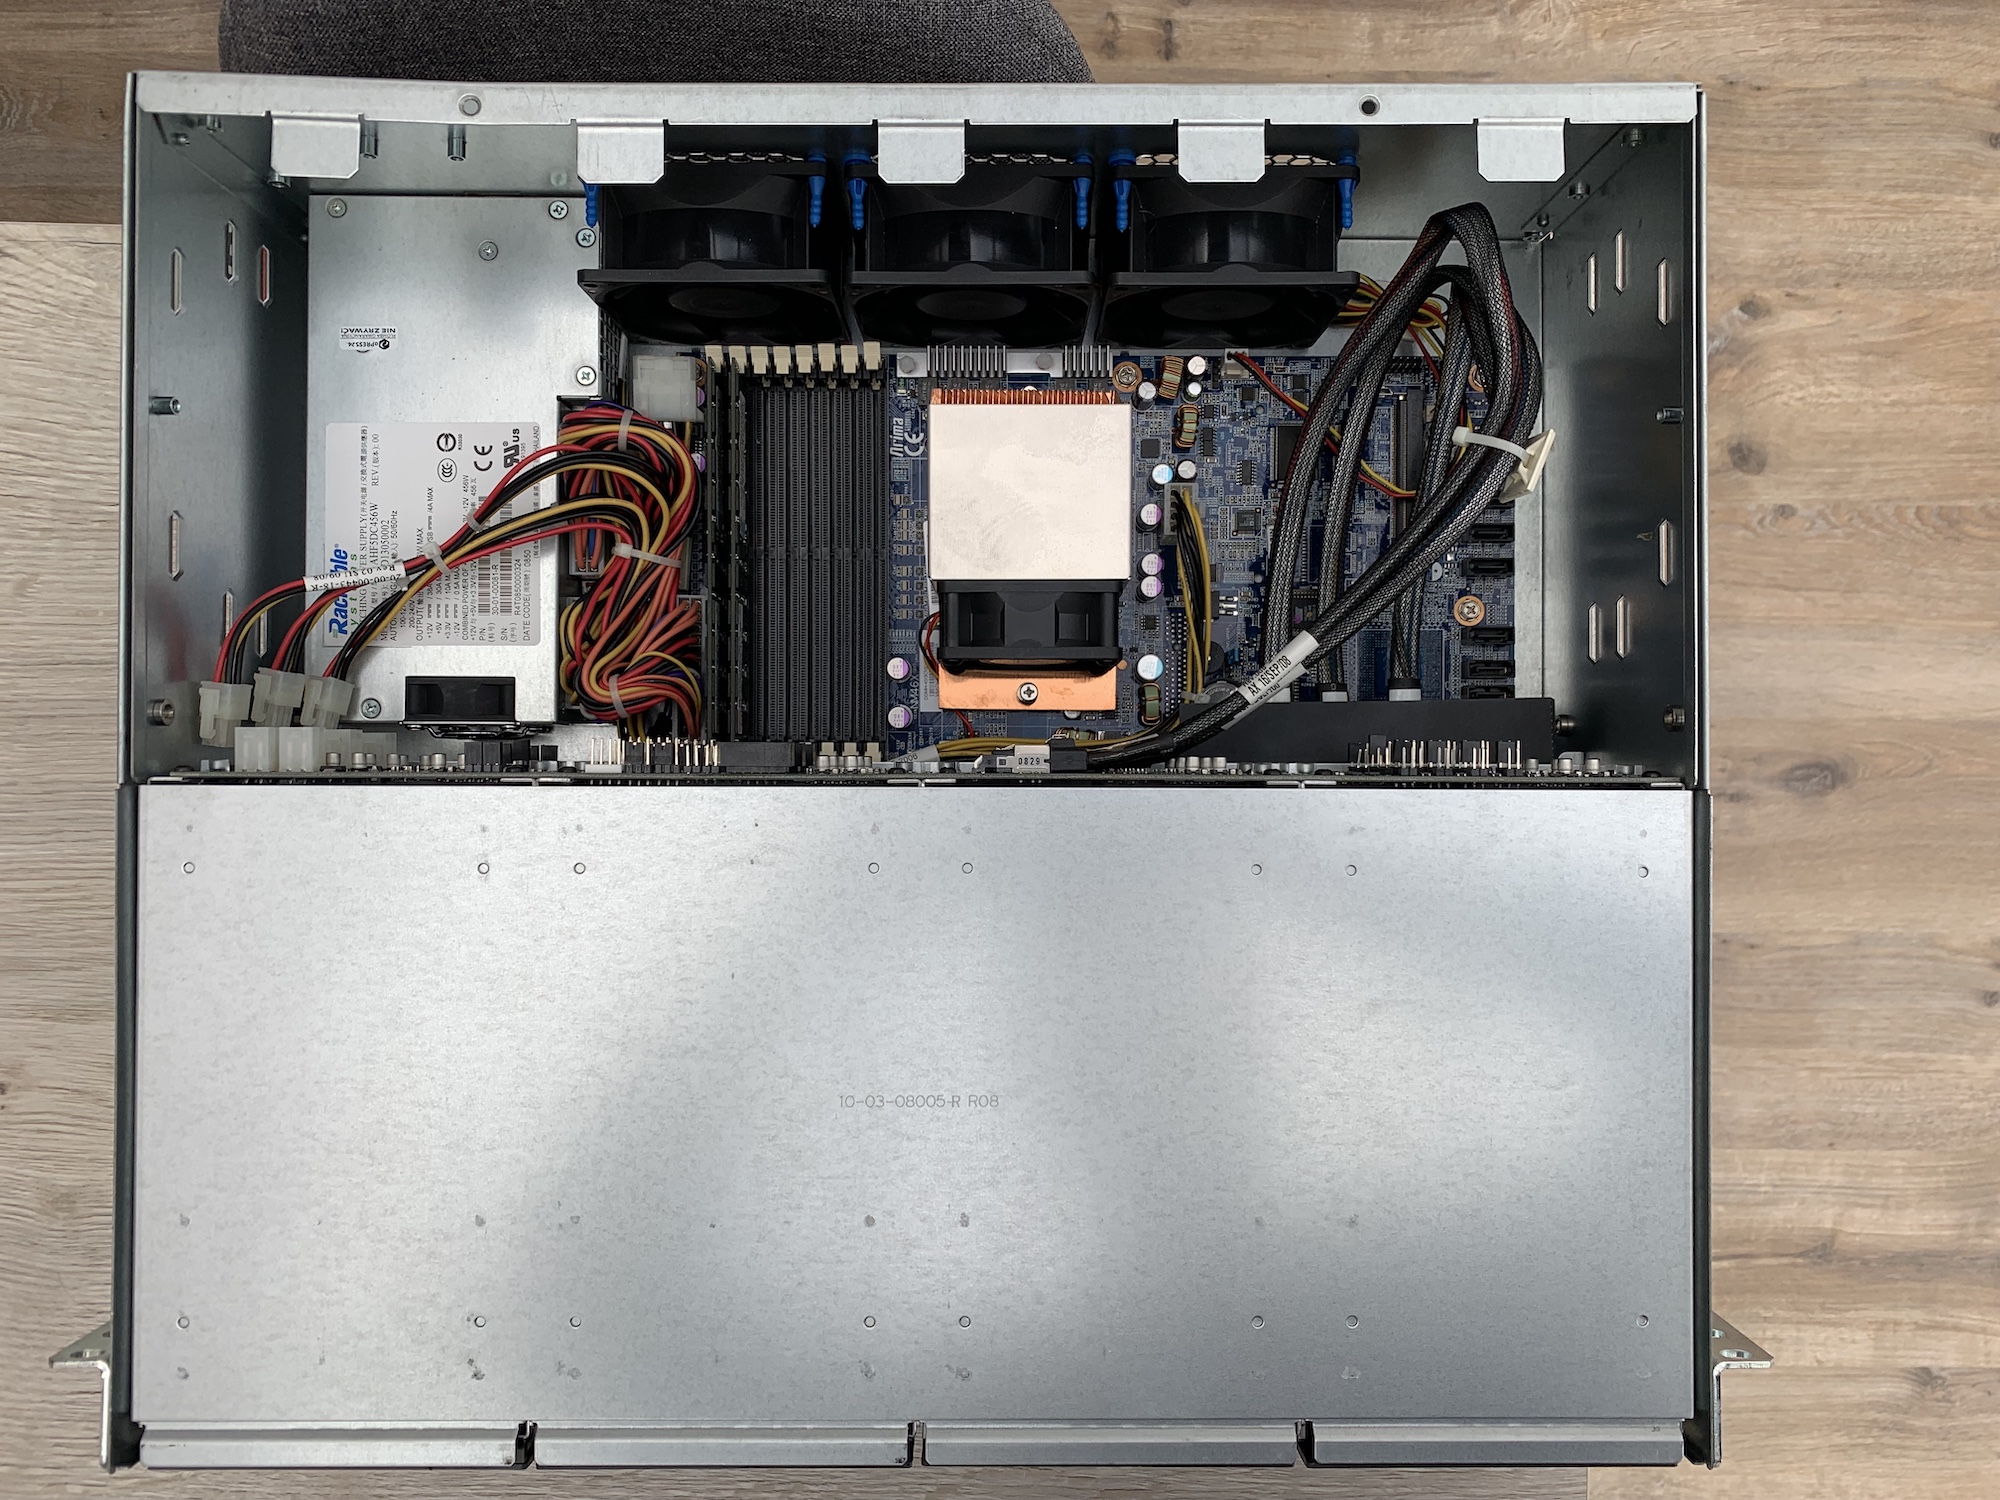
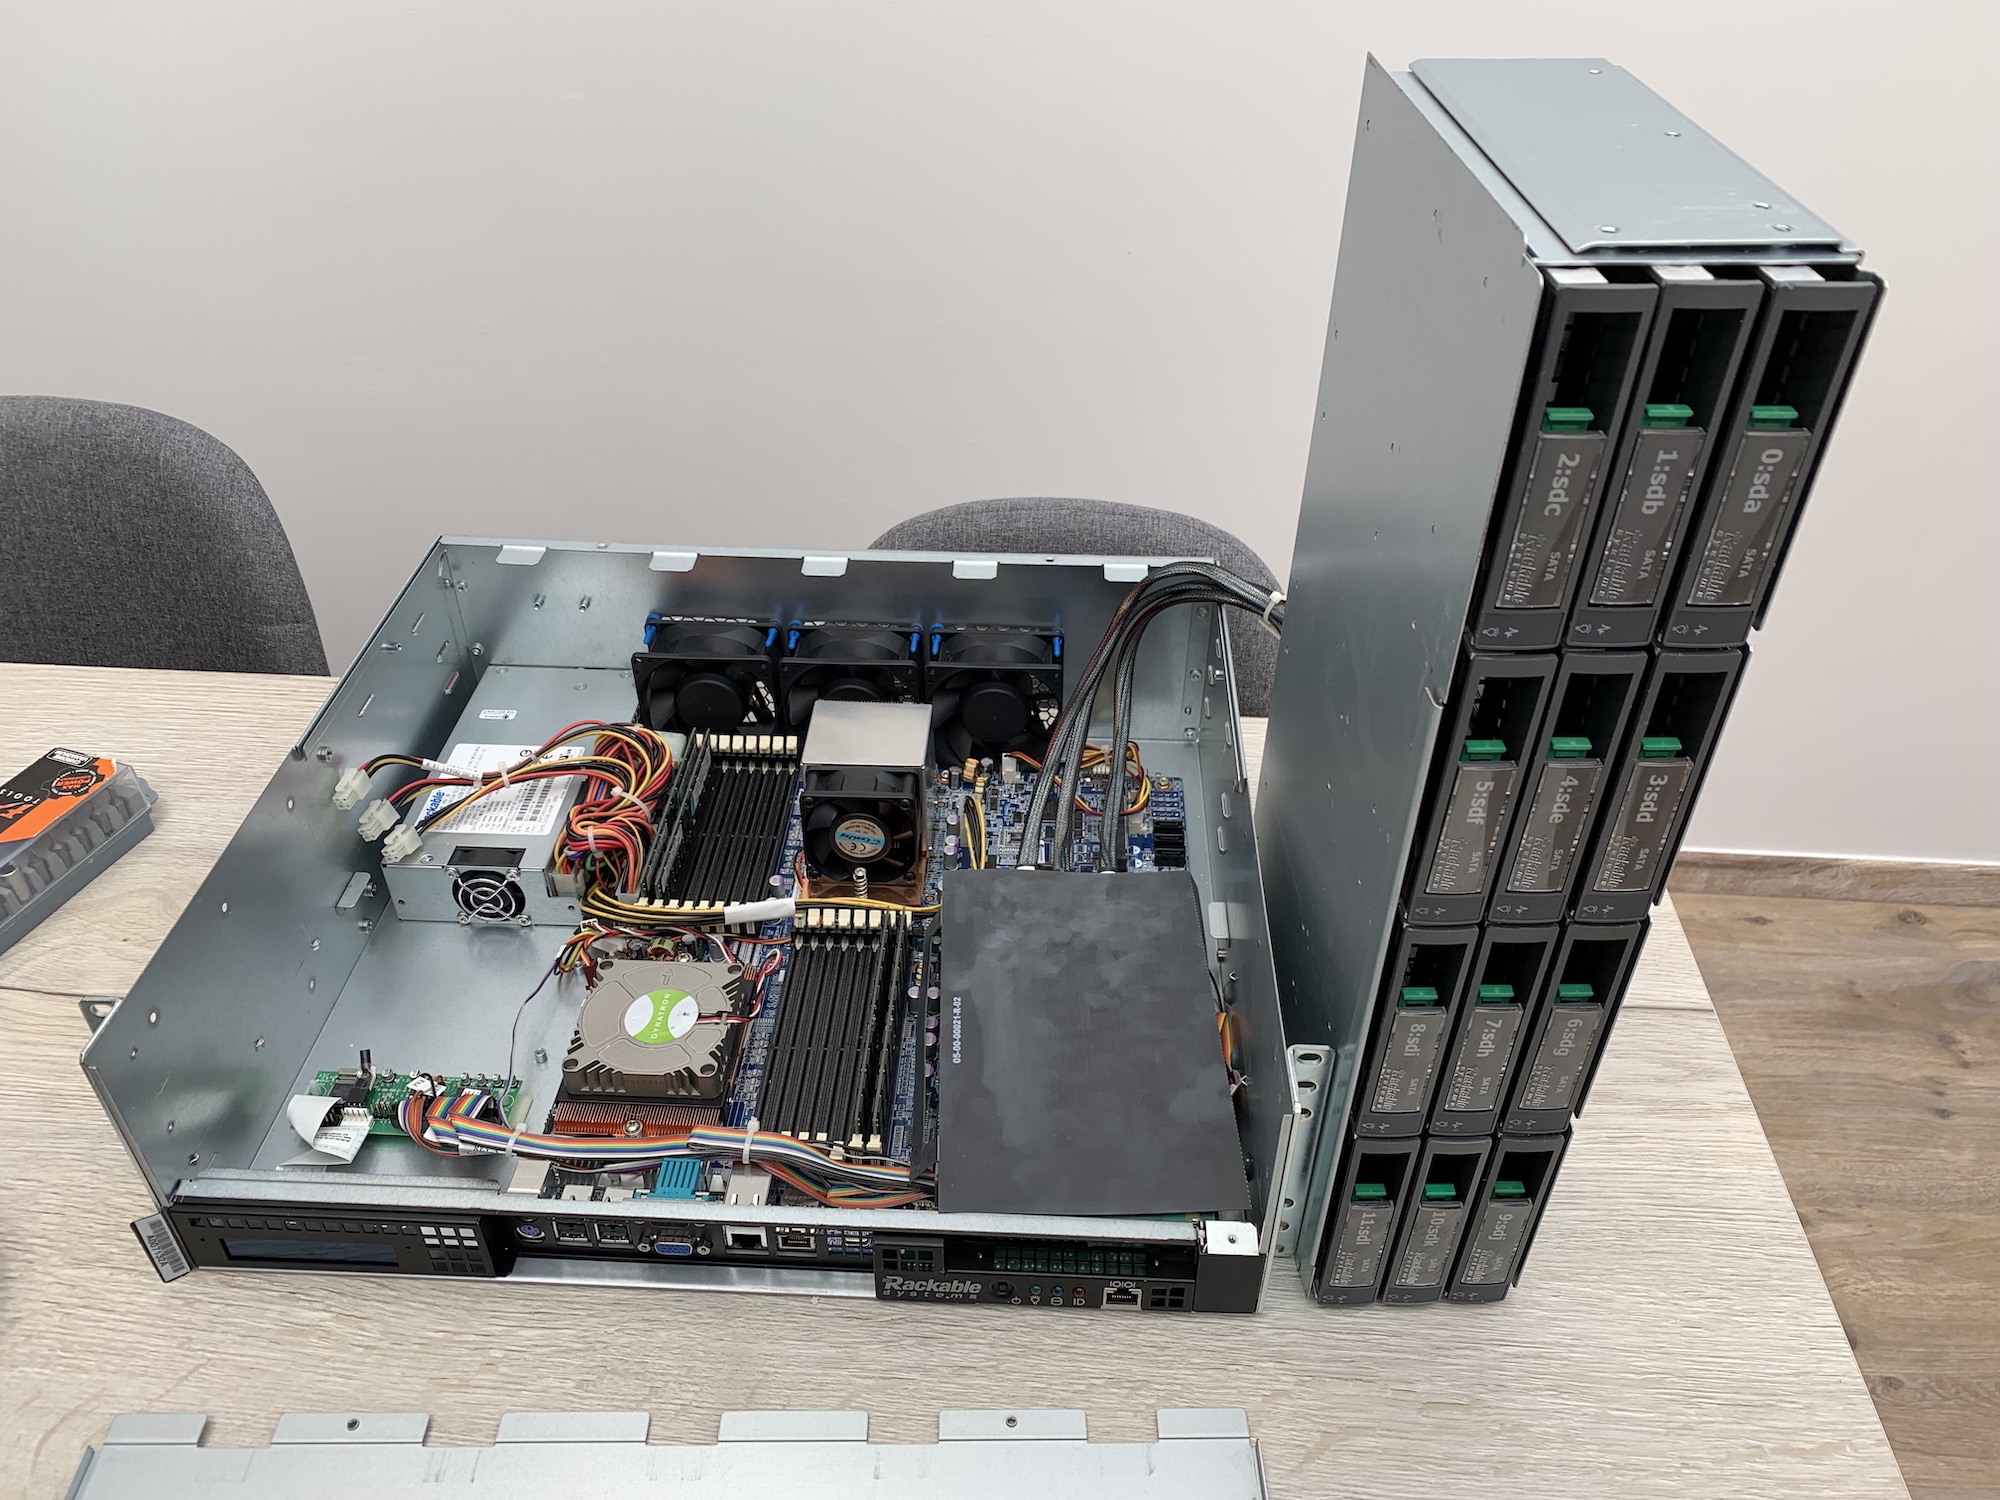
Testing the hardware
The server shipped from Poland and arrived in Belgium about 3 days later. I started by verifying if the hardware was working correctly. I was particularly interested in the SATA backplane. If that was broken, I could effectively throw away the entire thing.
I inserted a few SSDs into the slots, and the RAID controller detected them. Unfortunately, the controller can't pass through the raw disks. Even in JBOD mode, it messes up the SMART stats and serial numbers. So I need to buy a separate SATA controller or HBA card. More on that later.
I then tested the backplane separately by using a reverse breakout cable to convert a single SF8087 port into 4 SATA ports. I plugged them into a motherboard, and the drives showed up with a 6Gbps link! That's exactly what I needed.

Gutting the case, replacing components
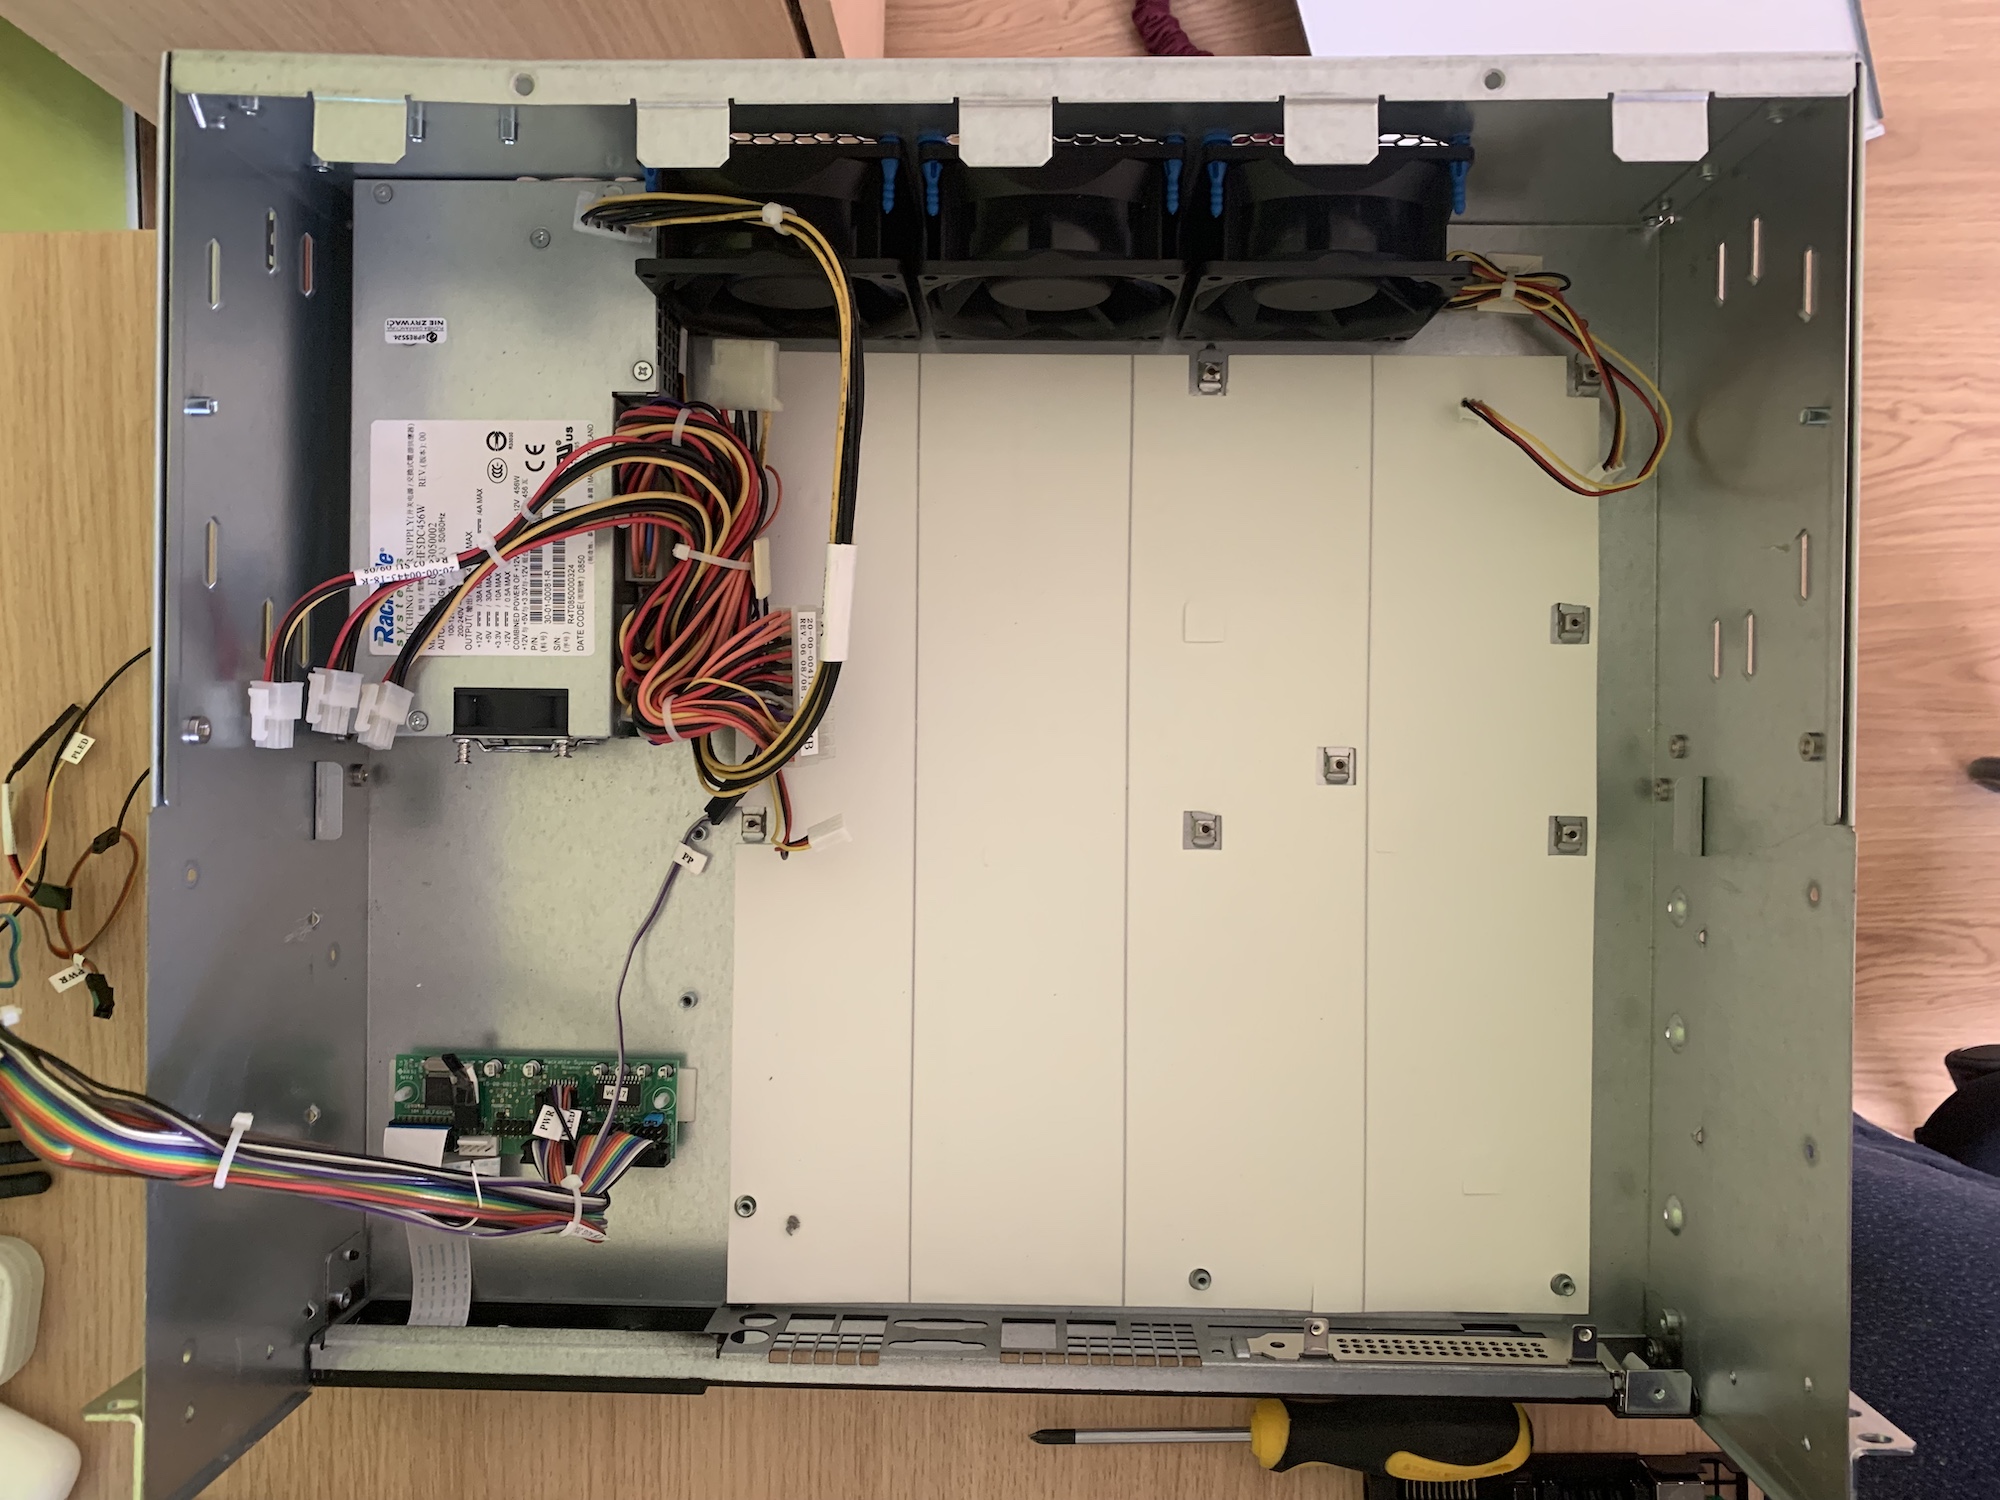
Everything I care about is working, so it was time to gut the case and remove the motherboard, fans, and PSU.
I then installed a regular ATX power supply (which requires some metal cutting) and the motherboard of my old Hackintosh. Everything fits nicely because all the standoffs are in the correct place.
I only had to cut the metal in the front (to make room for the IO) and at the back for the power supply.
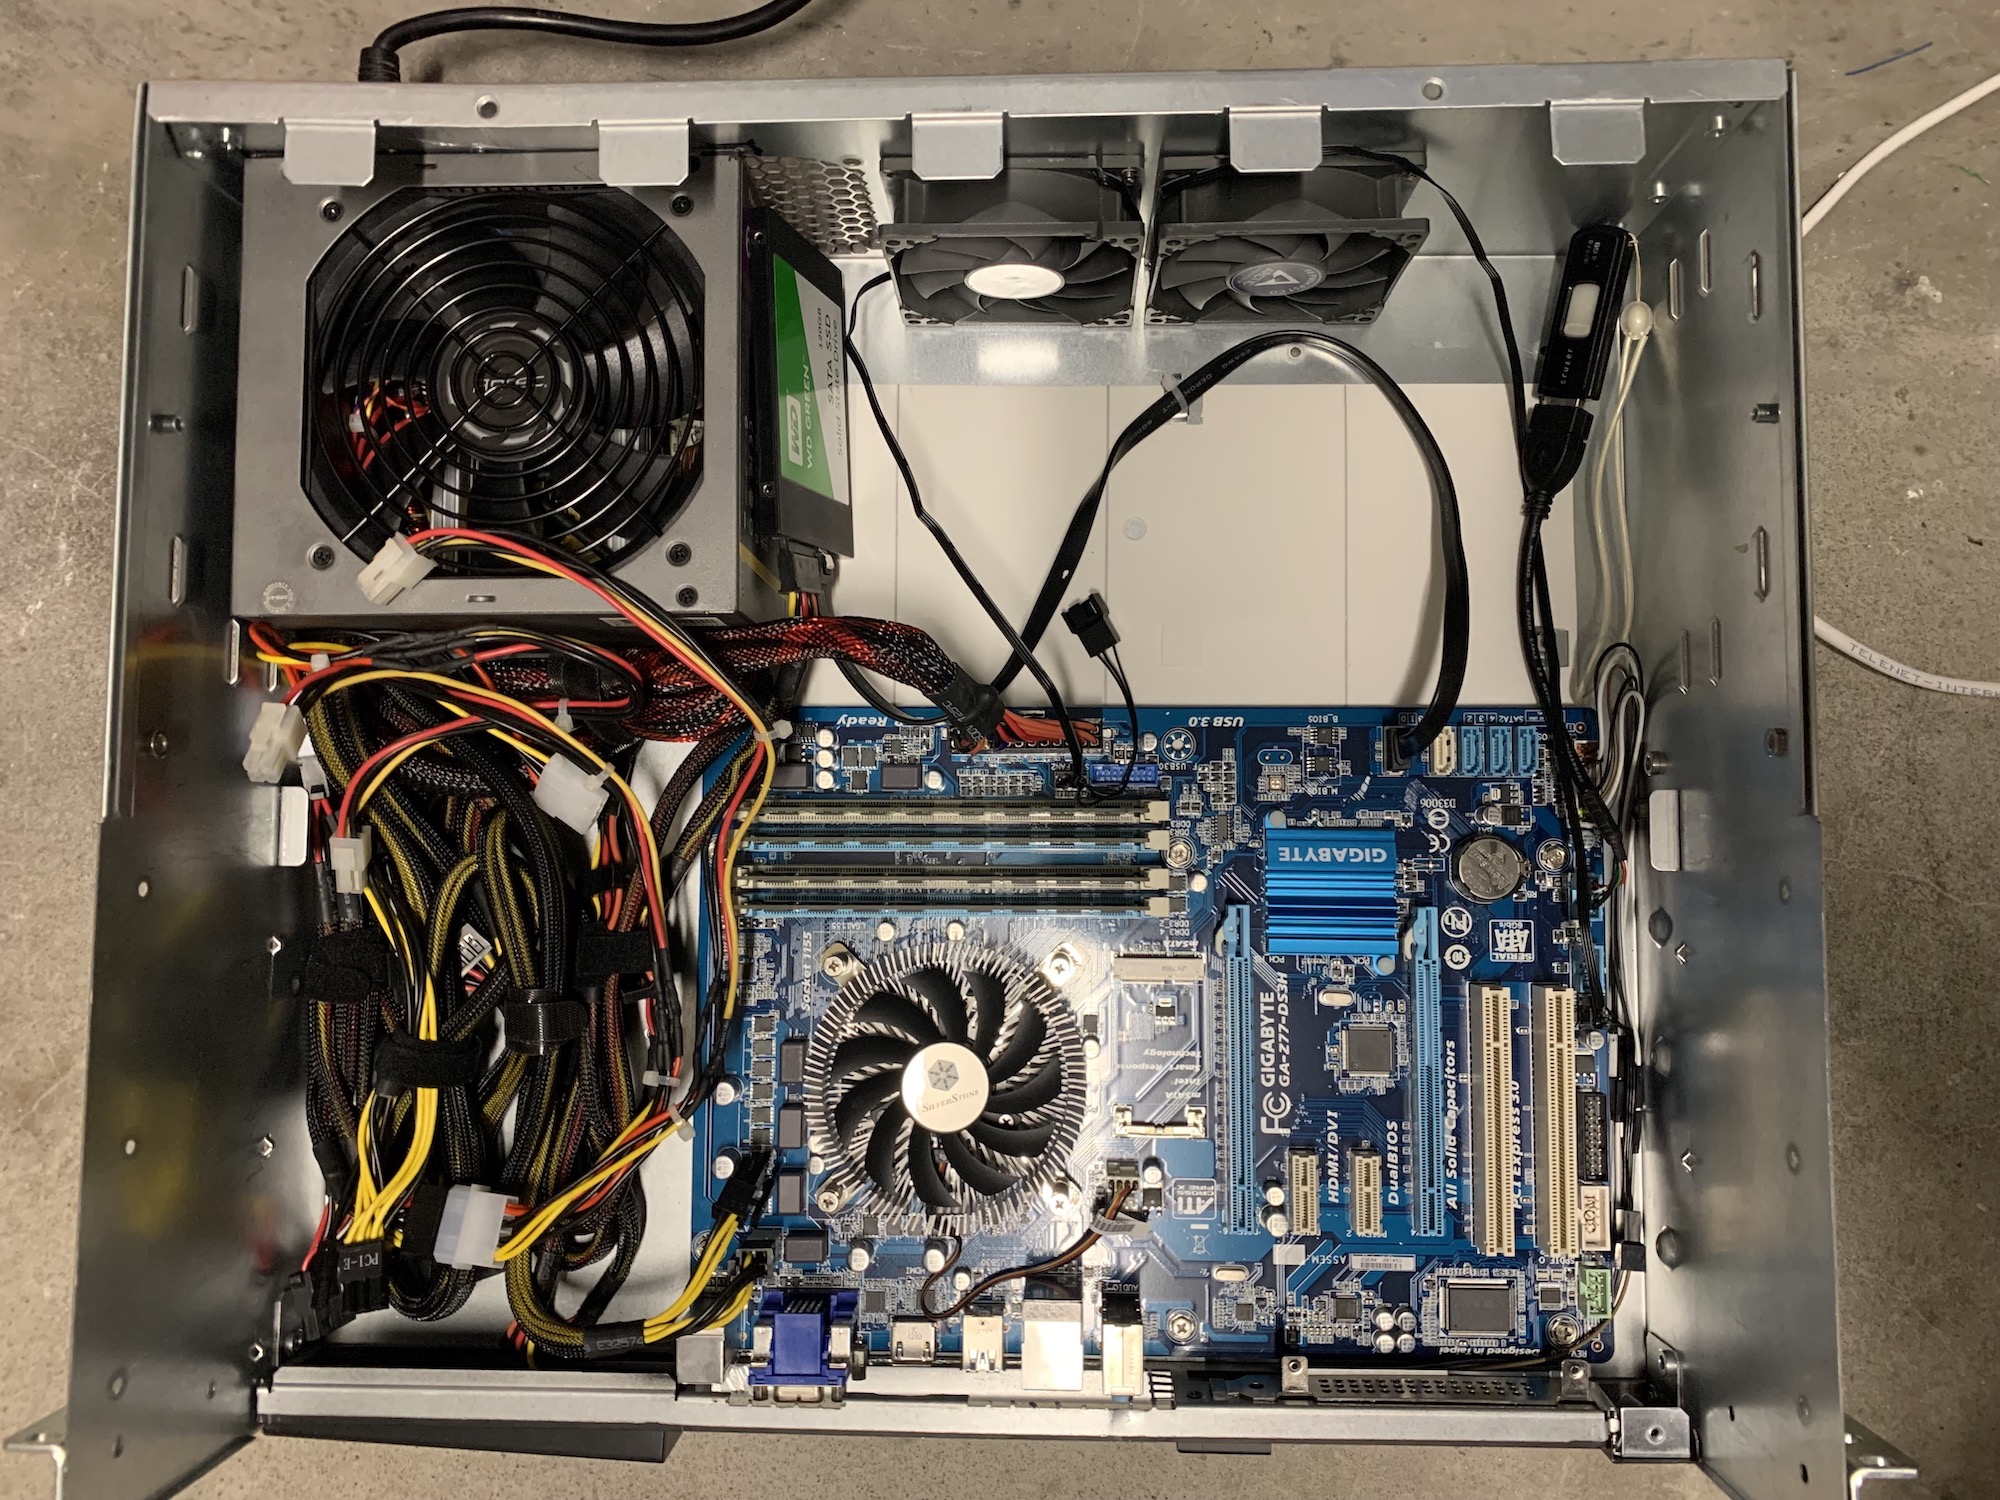
I also replaced the case fans because the original ones are crazy loud! Because the drive cage is right on top of the motherboard, you'll also need a low-profile CPU cooler. I went with one from SilverStone, which should be sufficient for my CPU.
Powering the SATA backplane
Next, I needed to figure out how to power the SATA backplane with my new power supply. The backplane uses a special type of Molex connector that is not found on ATX power supplies:
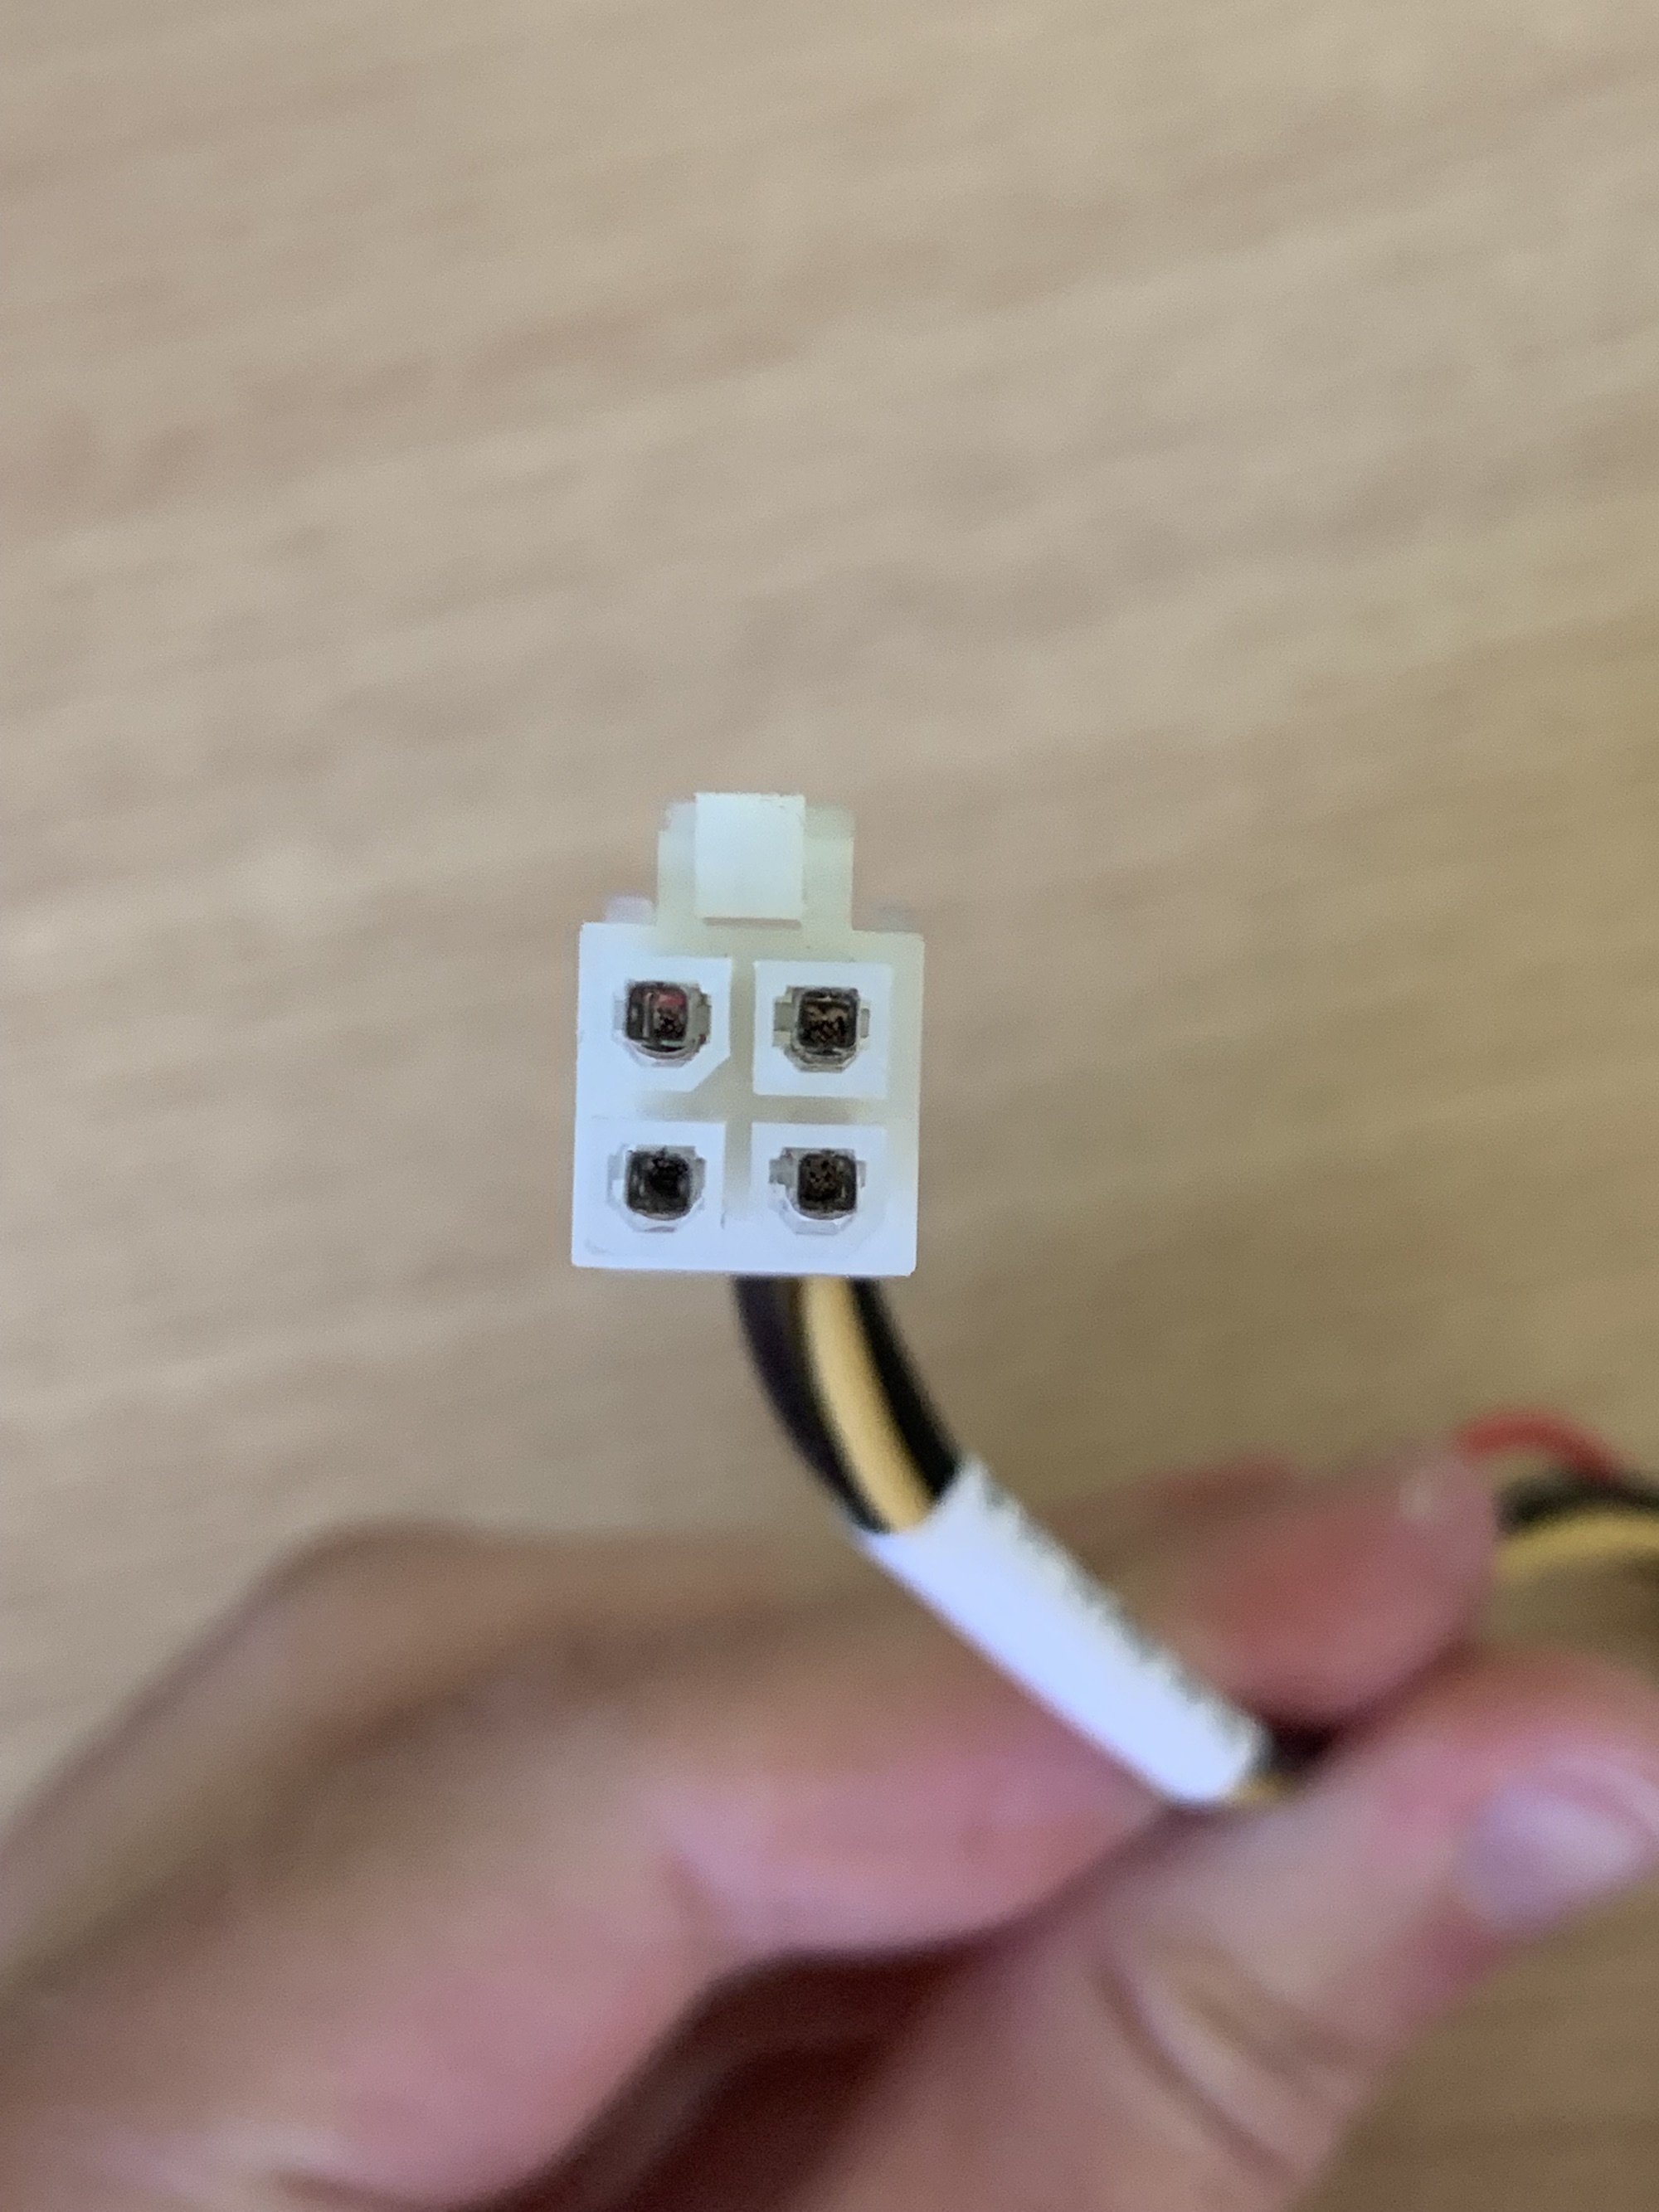
It turns out that this connector is very similar to regular Molex. The voltages are the same.
One option was to cut a Molex connector of my power supply and solder on these special connectors. However, I didn't want to damage my PSU cables. I ordered two Molex splitters to sacrifice instead:
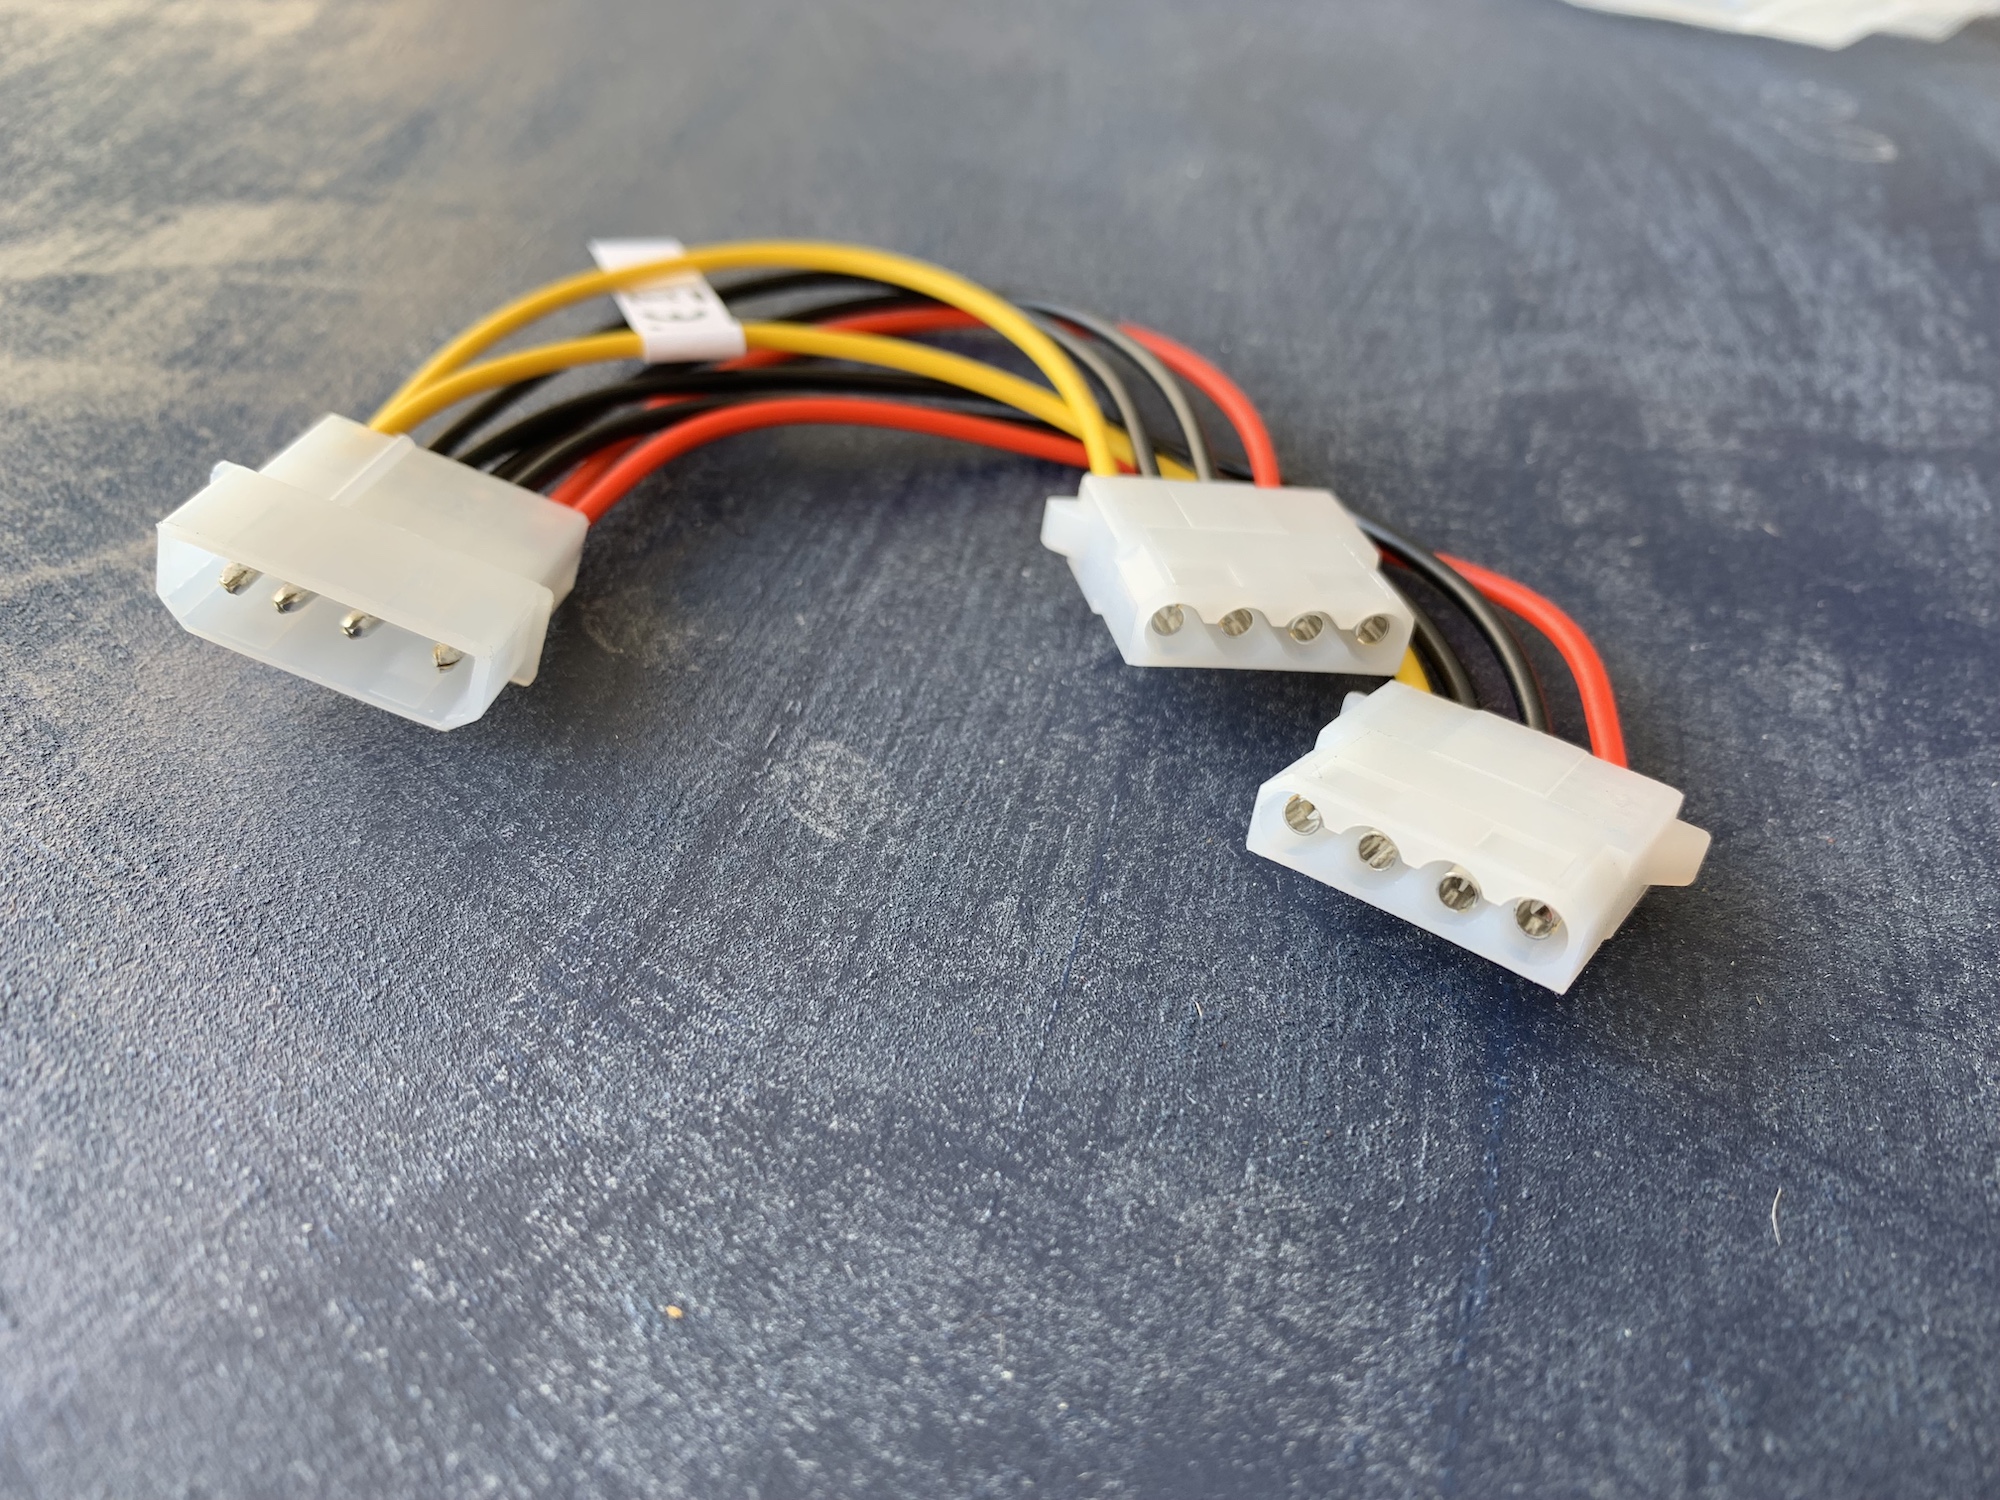
I cut off the ends and soldered them onto the original cables of the backplane. So it's regular Molex as input, special Molex as output:
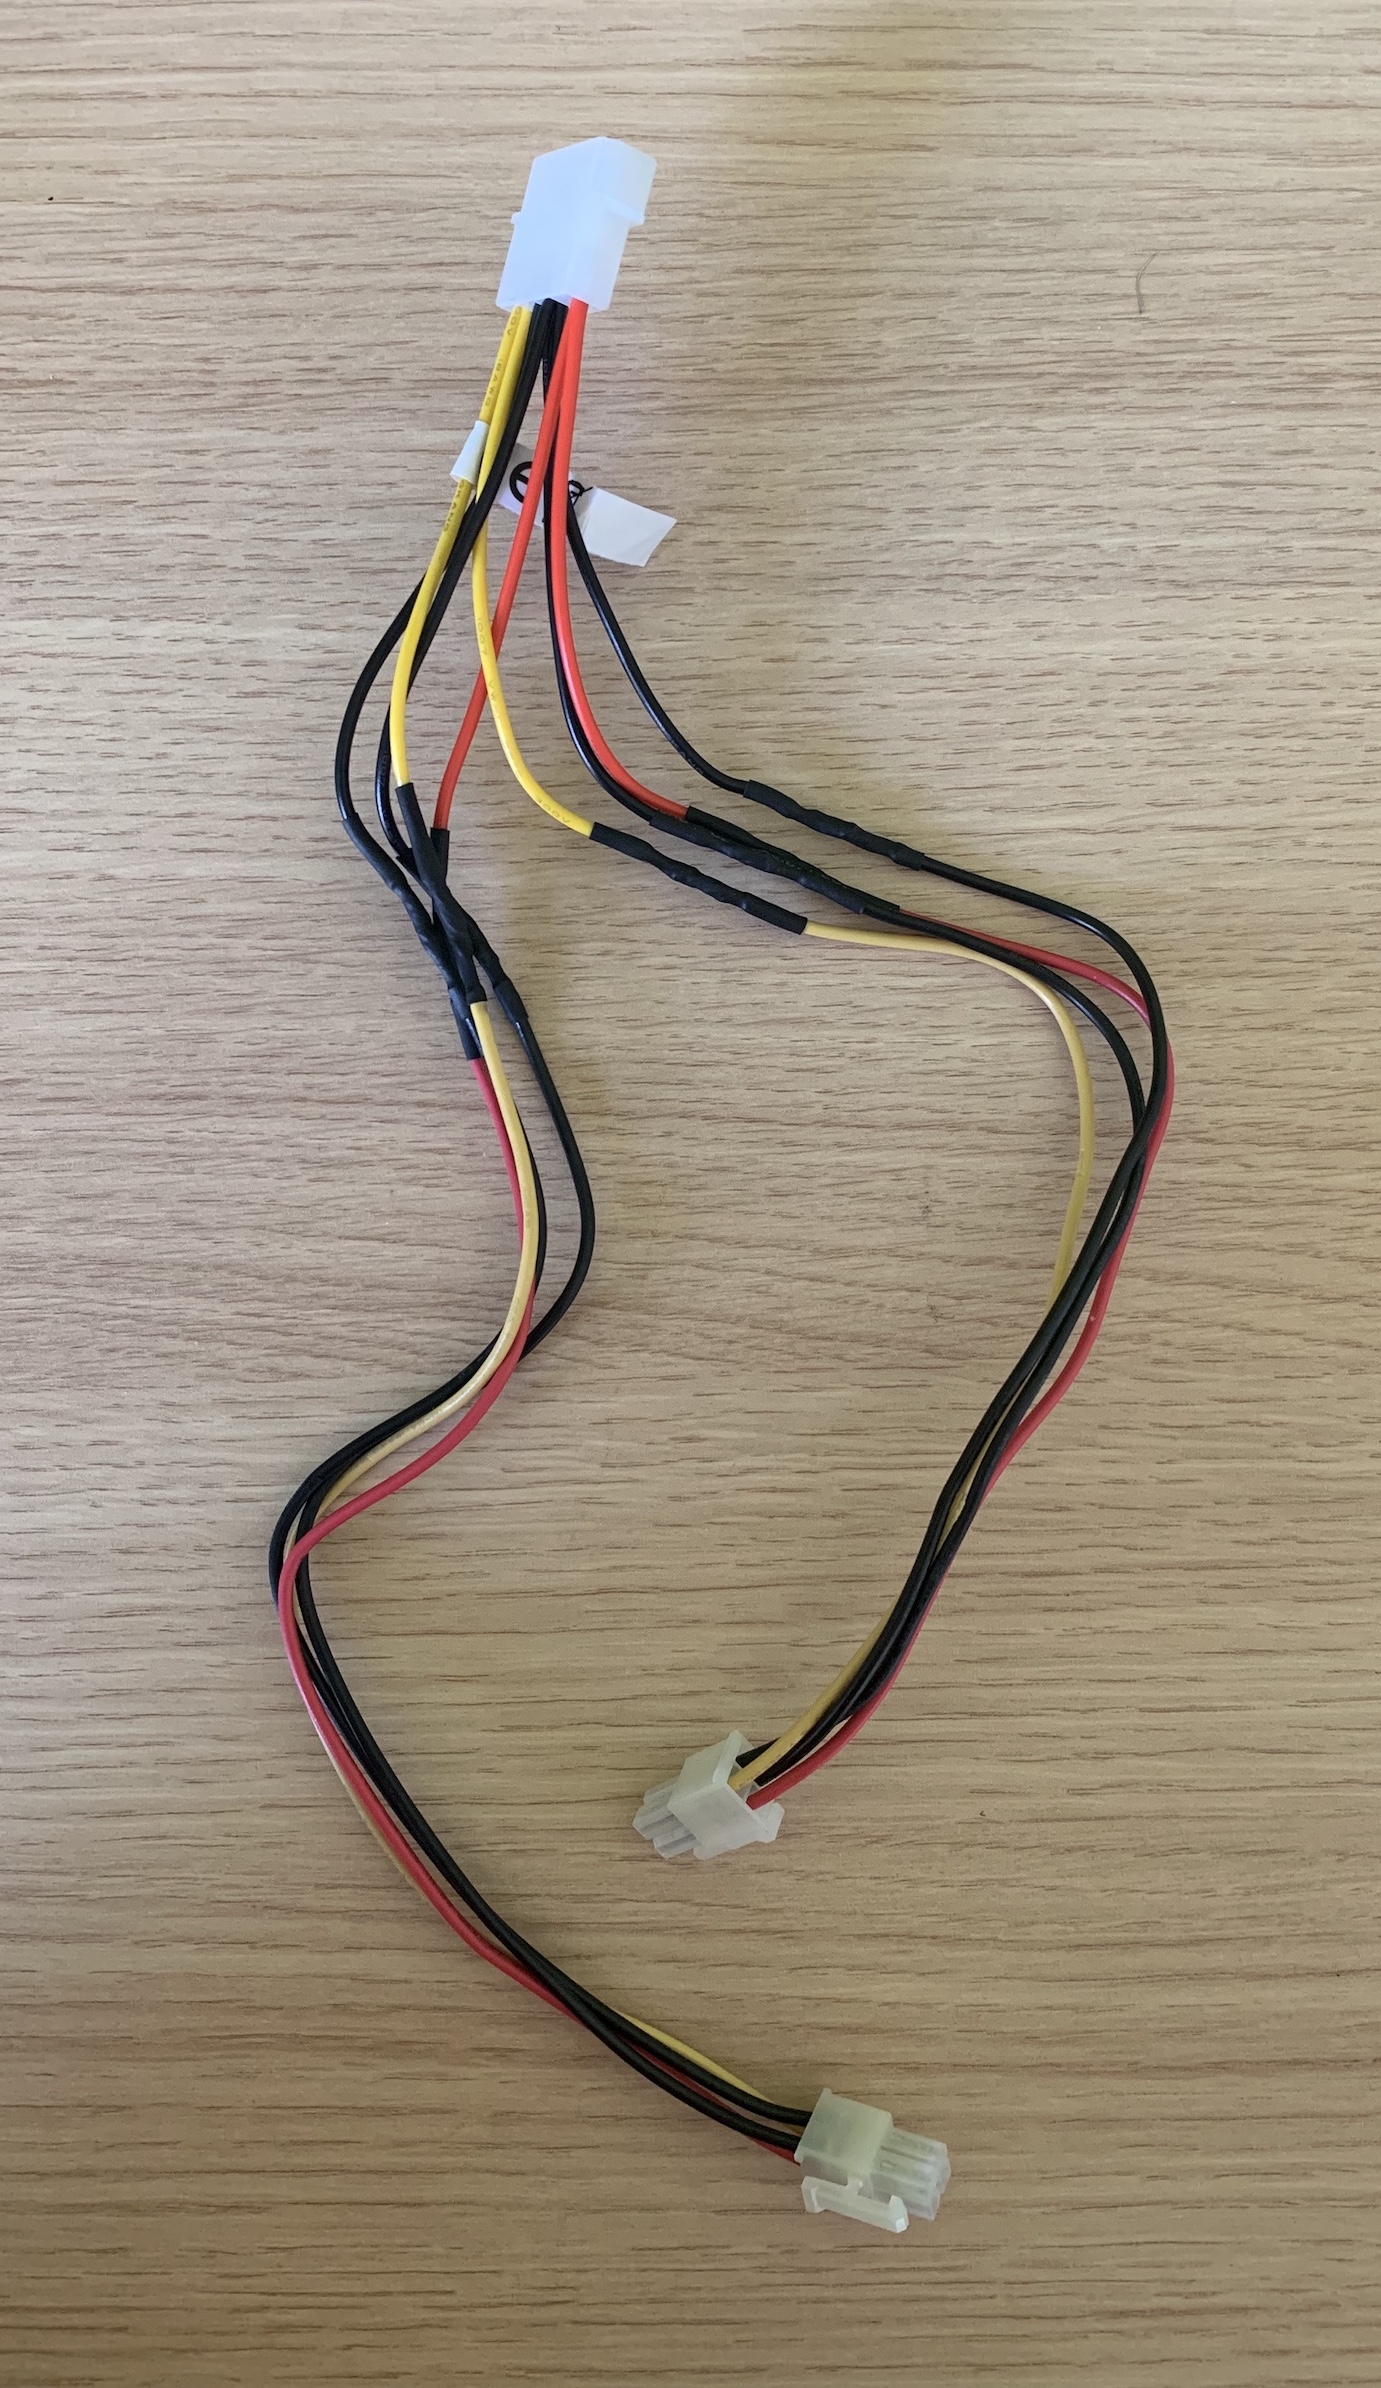
With these, I could hook up the backplane to a regular ATX power supply (without cutting any of those wires).
Connect the front panel
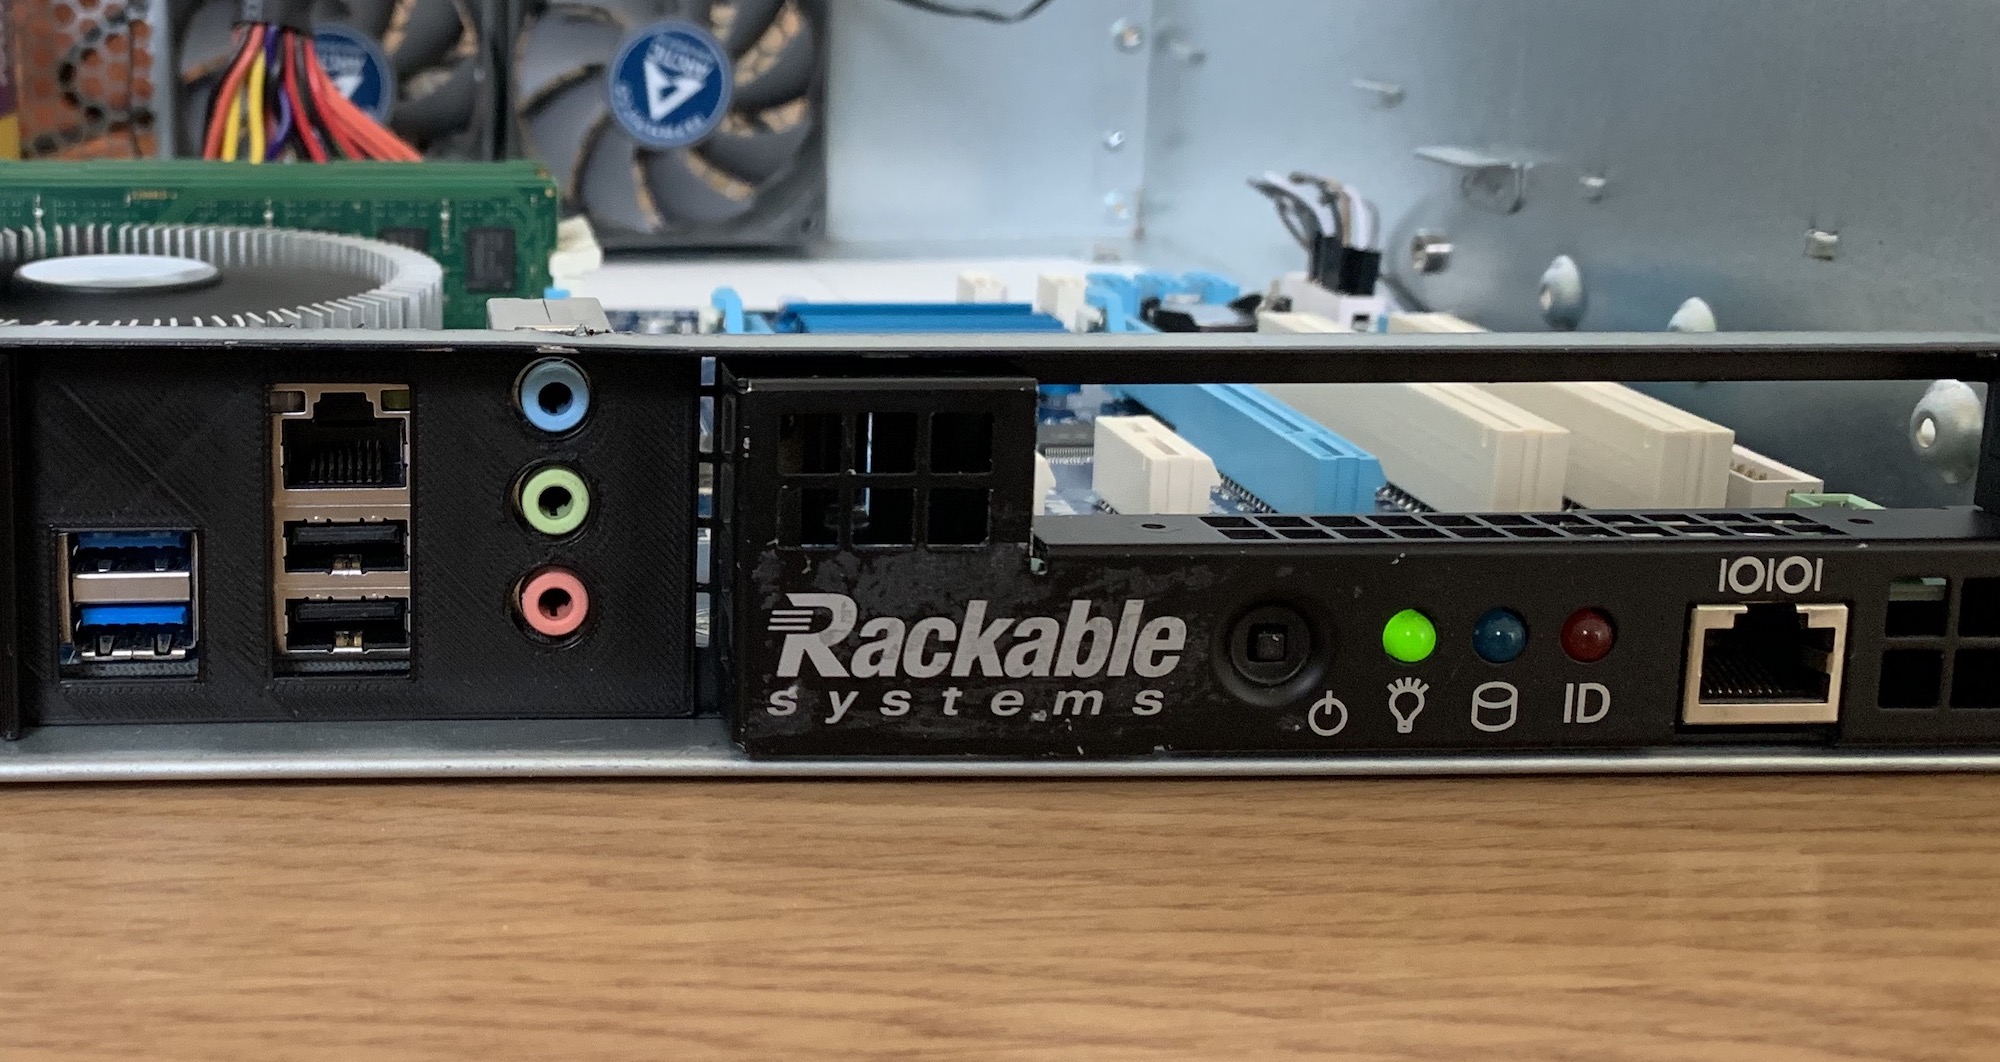
Next up: connecting the front panel to the motherboard. This version has a power button, 3 LEDs, and a management port. The management board won't be recoverable because that requires a proprietary controller.
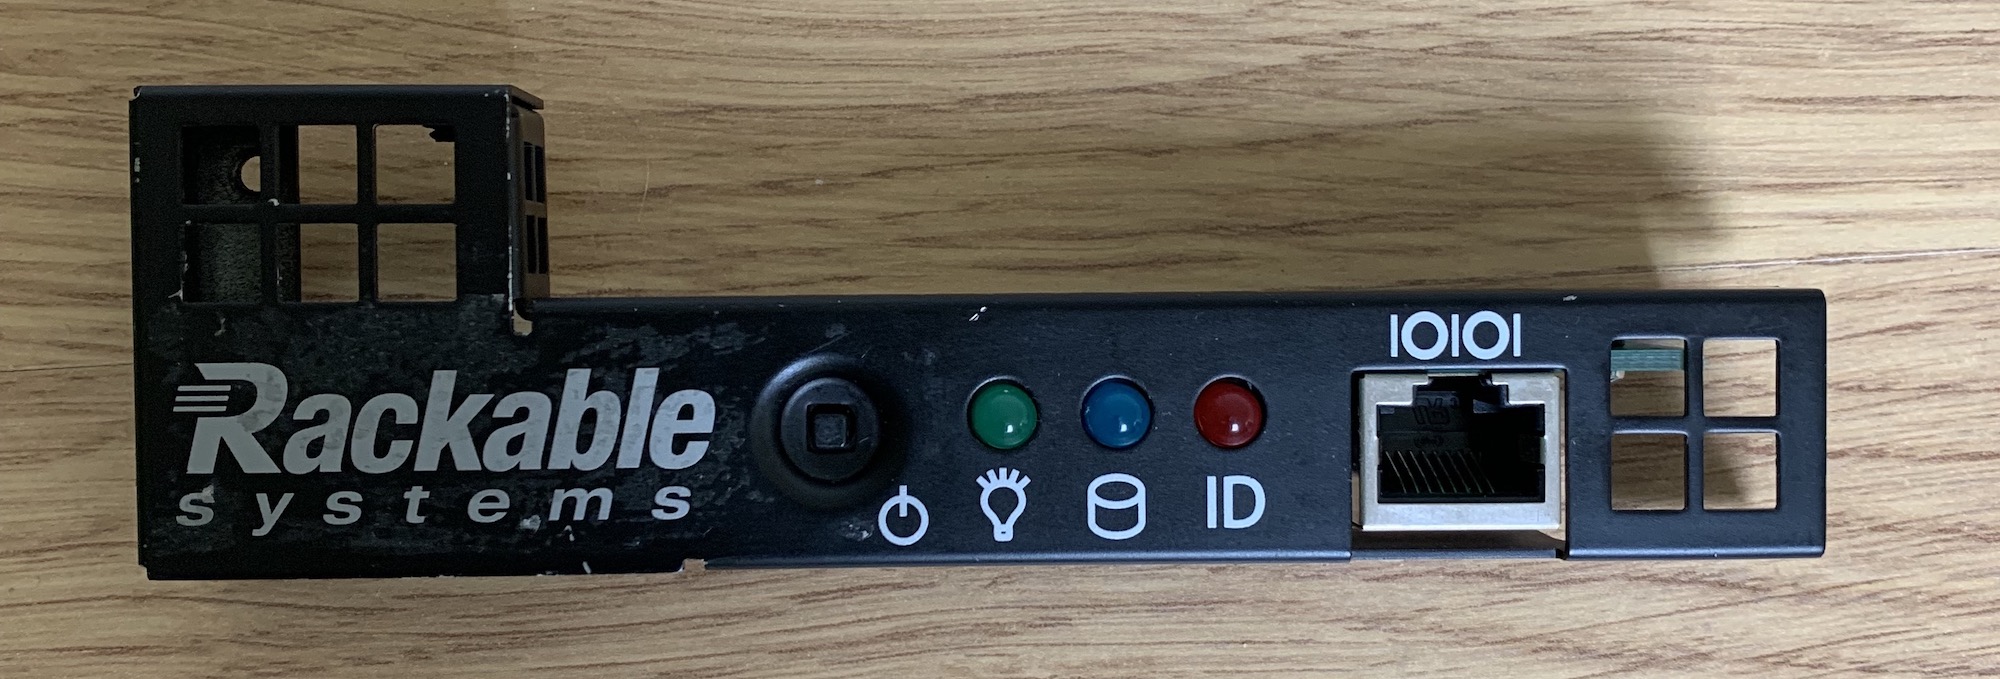
But the power button and LEDs can be wired up like with any other computer case. The connections are clearly labeled at the back:
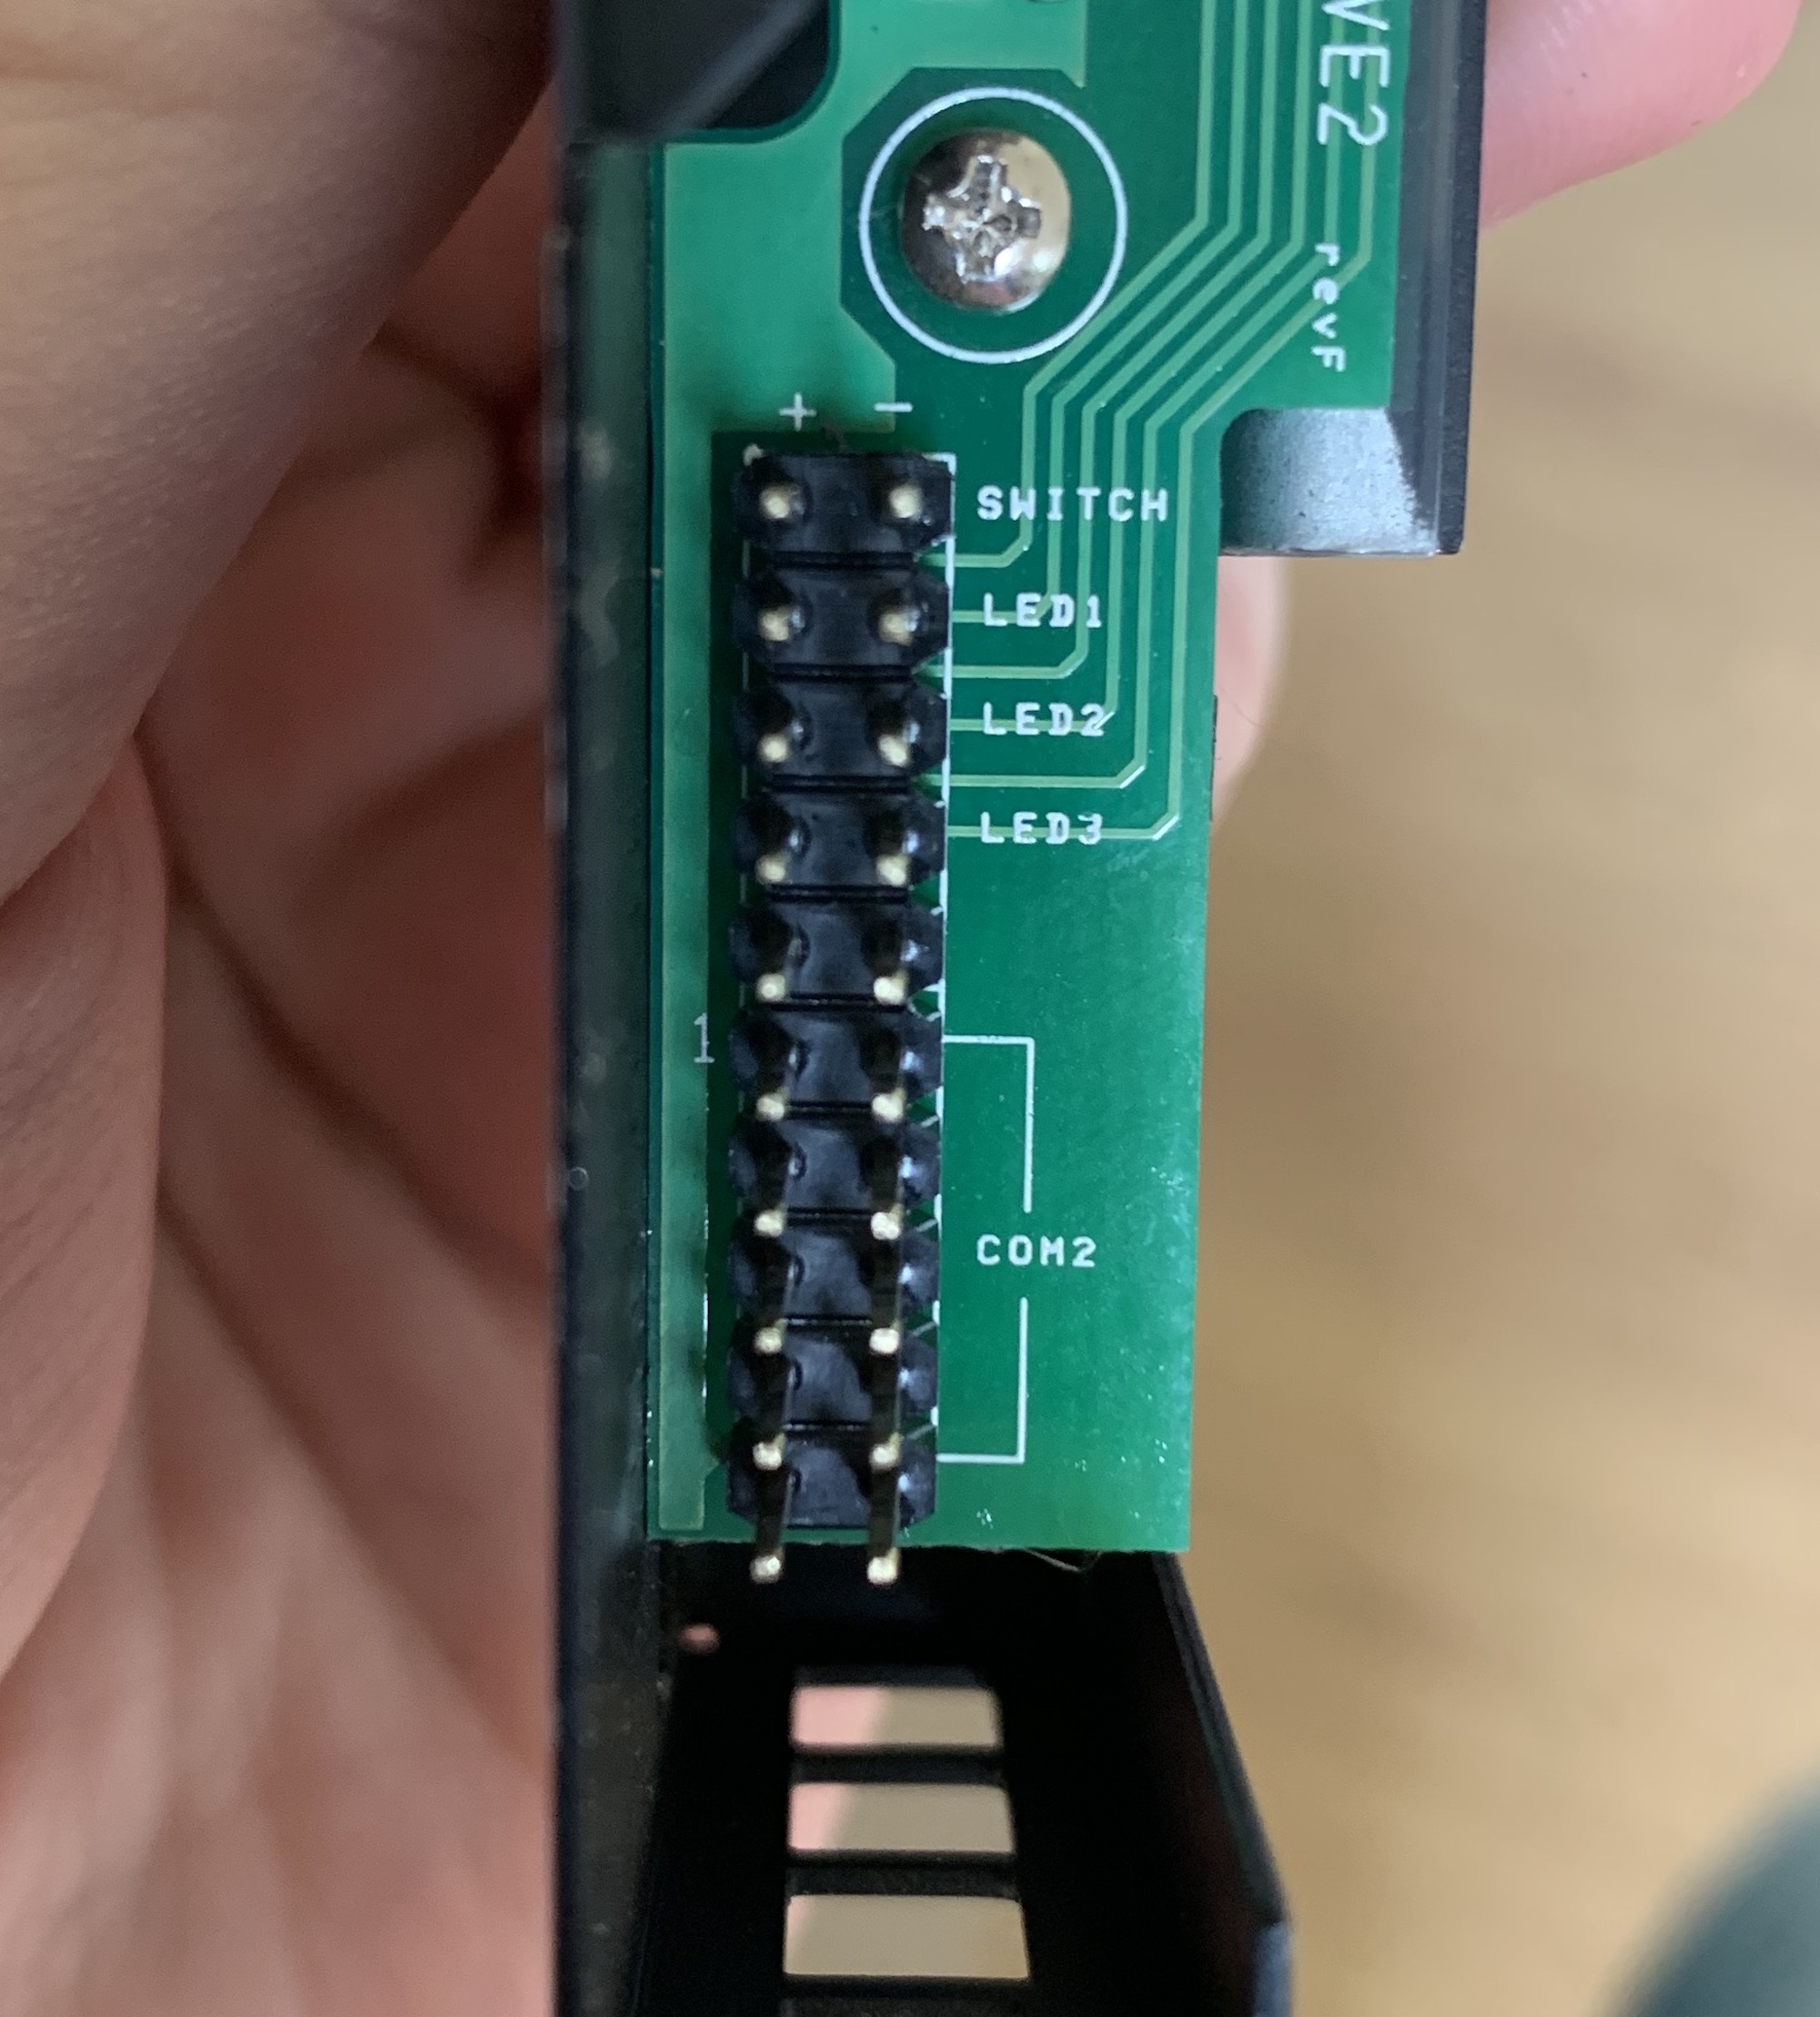
I used regular Dupont cables (the ones you use for Raspberry Pi projects) to connect these to the motherboard. I did have to cut down the plastic covers a tiny bit because of the restricted height:
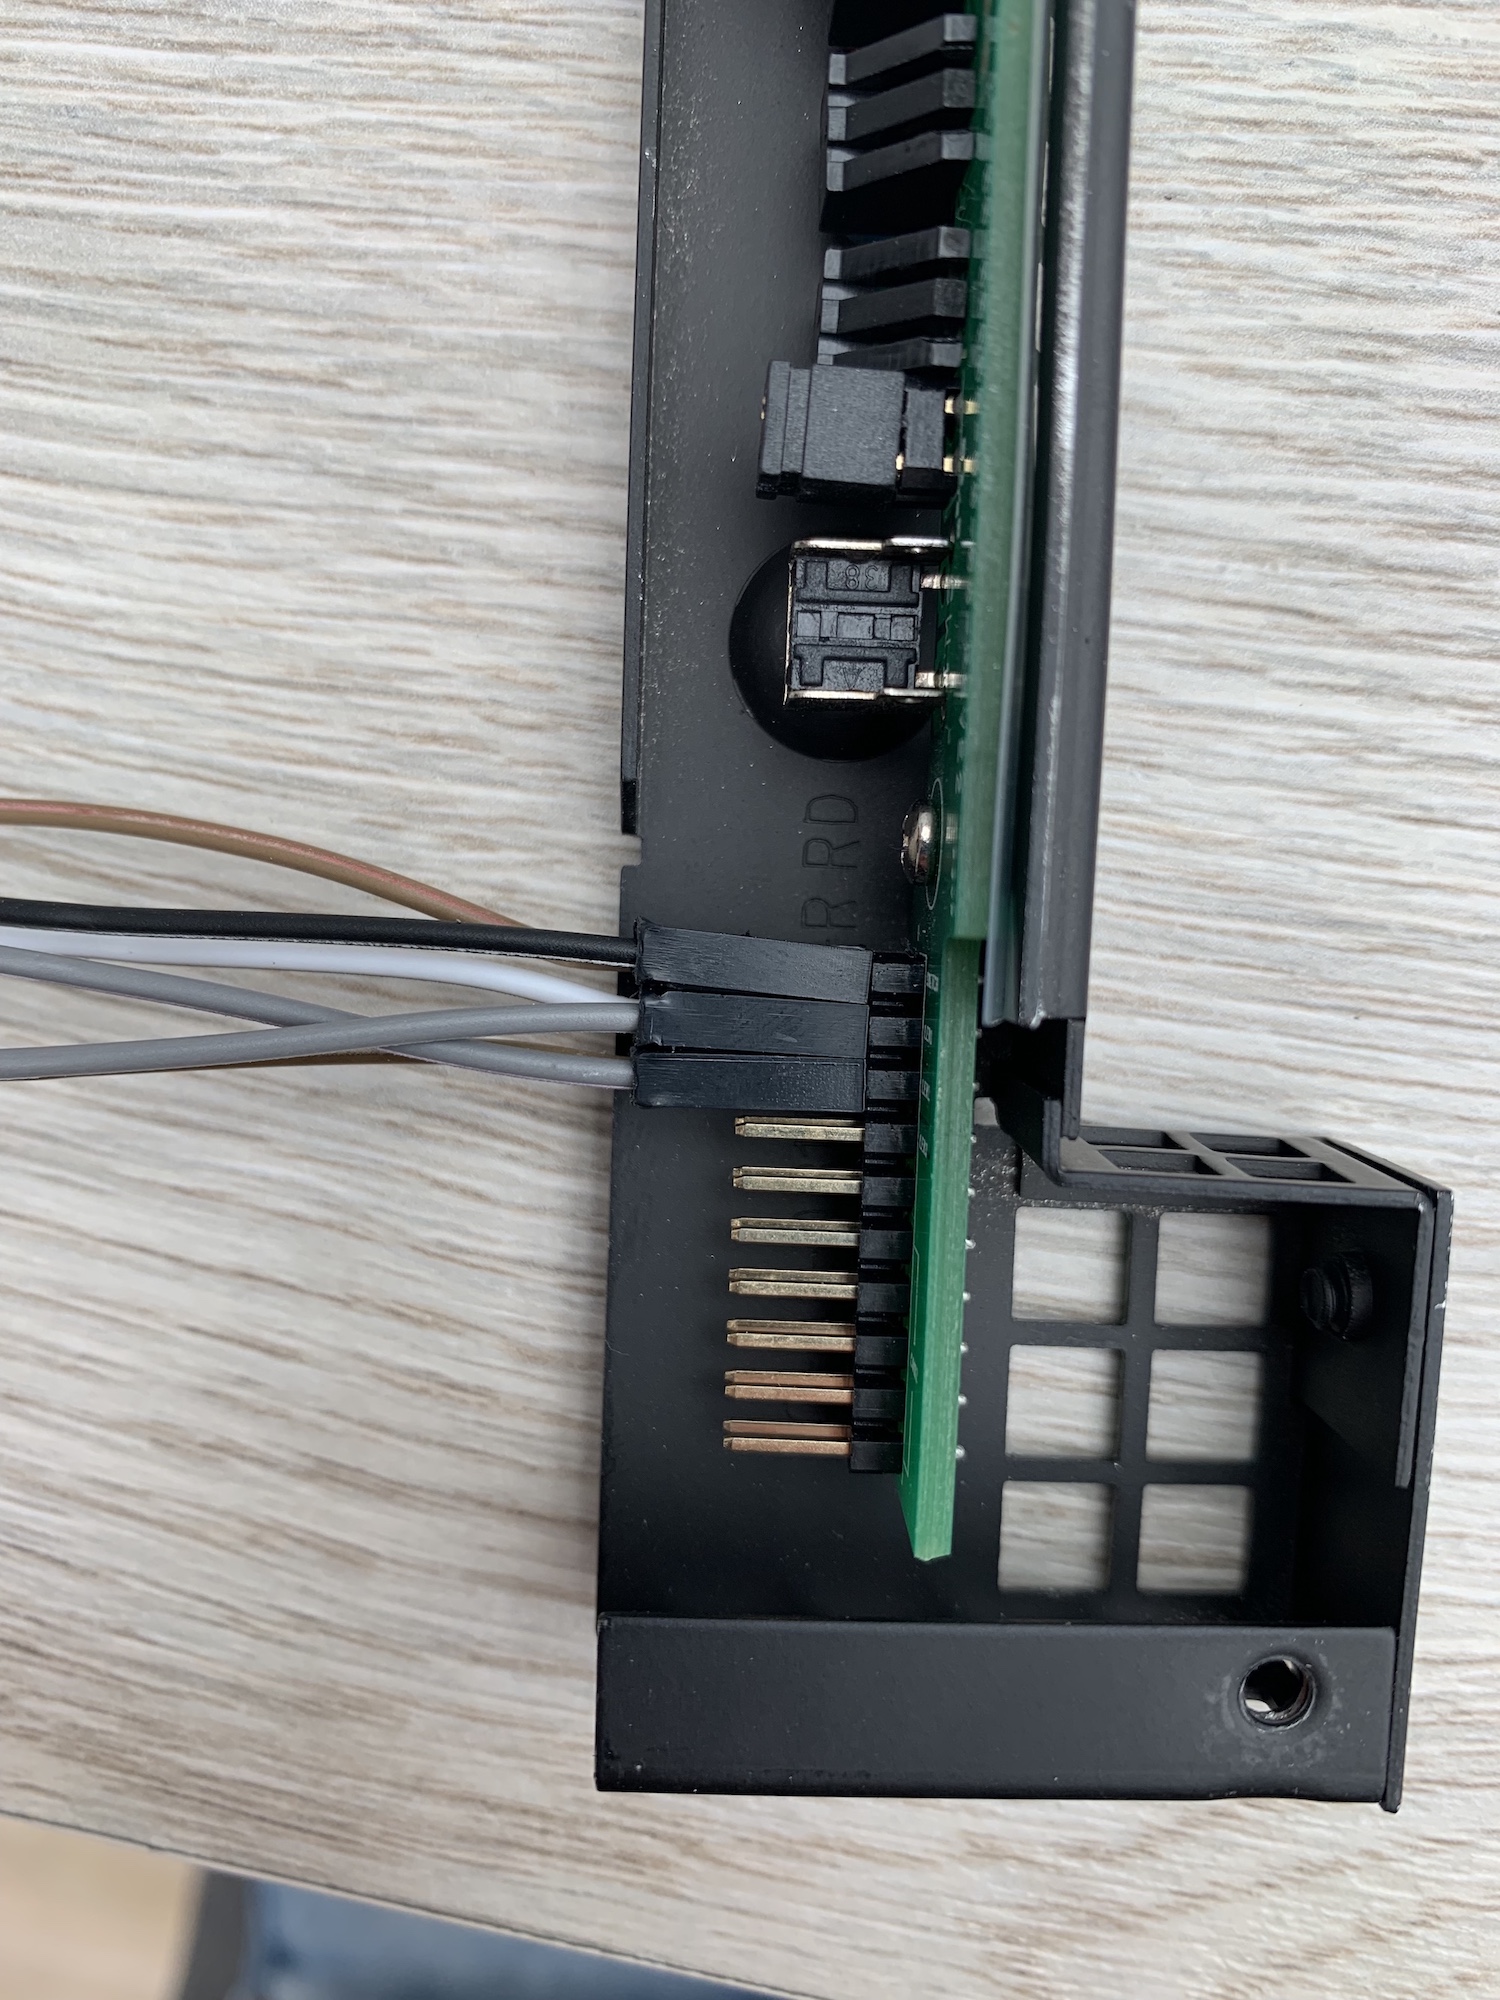
Then I powered on the server with the button, and everything was working fine.
New hardware
Before putting everything back together, I decided to install Proxmox and configure the server. I then discovered that my old Hackintosh hardware has no support for IOMMU. This means that I can't pass through hardware to a virtual machine, which I'll need for the RAID card that I plan to buy.
So my only option was to buy a more modern motherboard and CPU. Here's what I went with:
- Motherboard: Gigabyte H410M S2 V2 (µATX)
- CPU: Intel Pentium Gold G6405 (Dual-core, 4 threads, 4.1GHz)
- Memory: 8GB DDR4 2666MHz (Crucial)
- CPU cooler: SilverStone SST-NT07-115X.
- Case fans: 2x Arctic F8 PWM PST CO (80mm)
Those are some very weak specs. But remember: I don't need powerful hardware. All it needs to run is Proxmox with a virtual machine for Home Assistant and a storage VM.
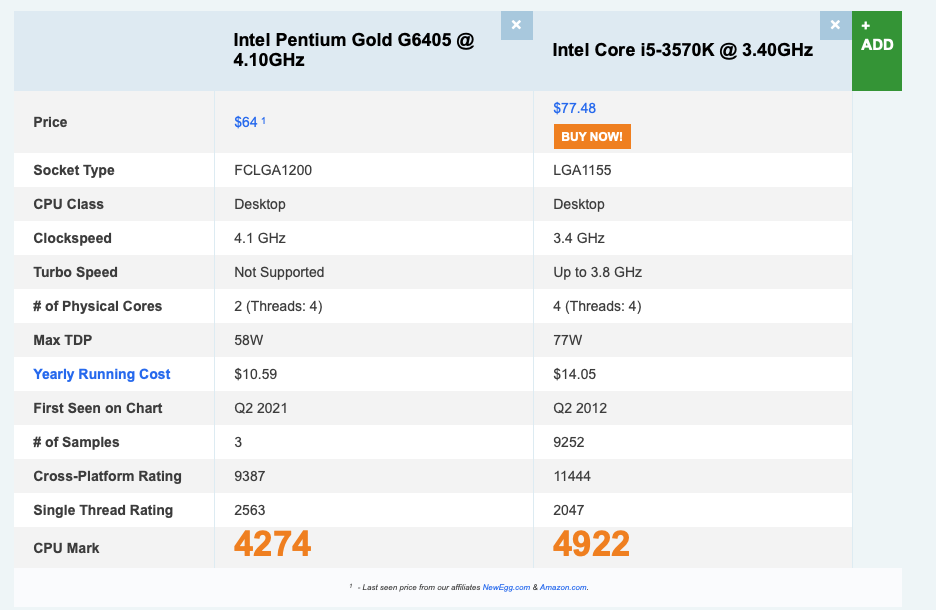
I did try to buy the latest generation Core i3, but those seemed to be sold out everywhere. But that seemed to be no problem. To my surprise, the Pentium performs almost just as well as my old quad-core i5 while using less power.
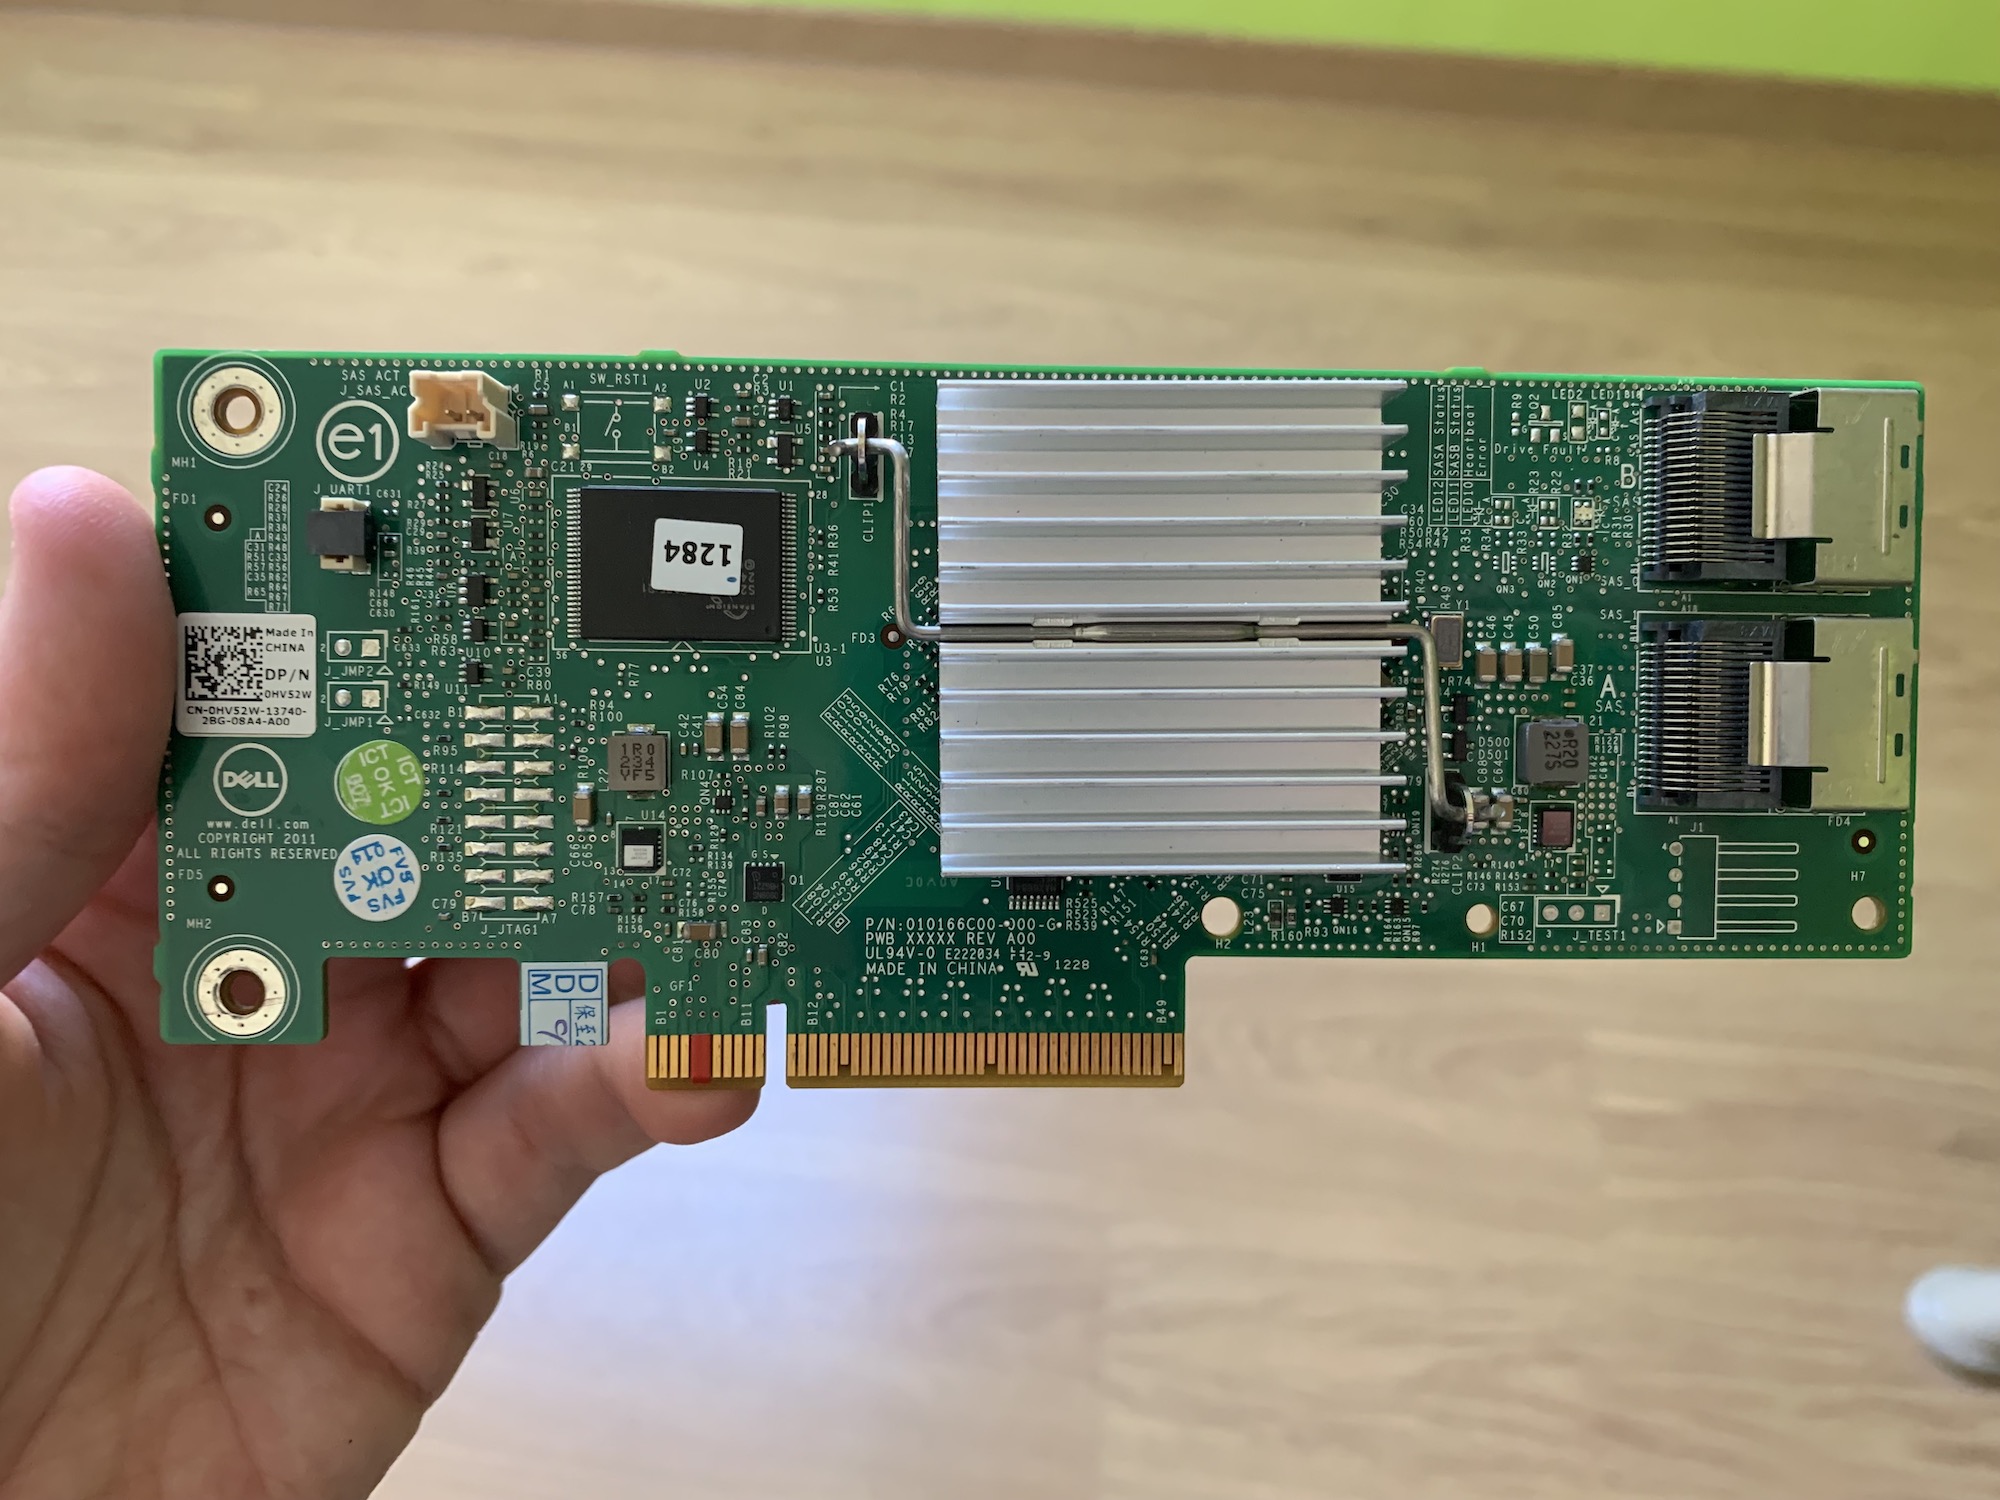
I also bought a Dell H310 RAID controller on eBay for about €70. The seller flashed it to IT mode, which meant that the attached disks would be passed through without any RAID magic happening on the card.
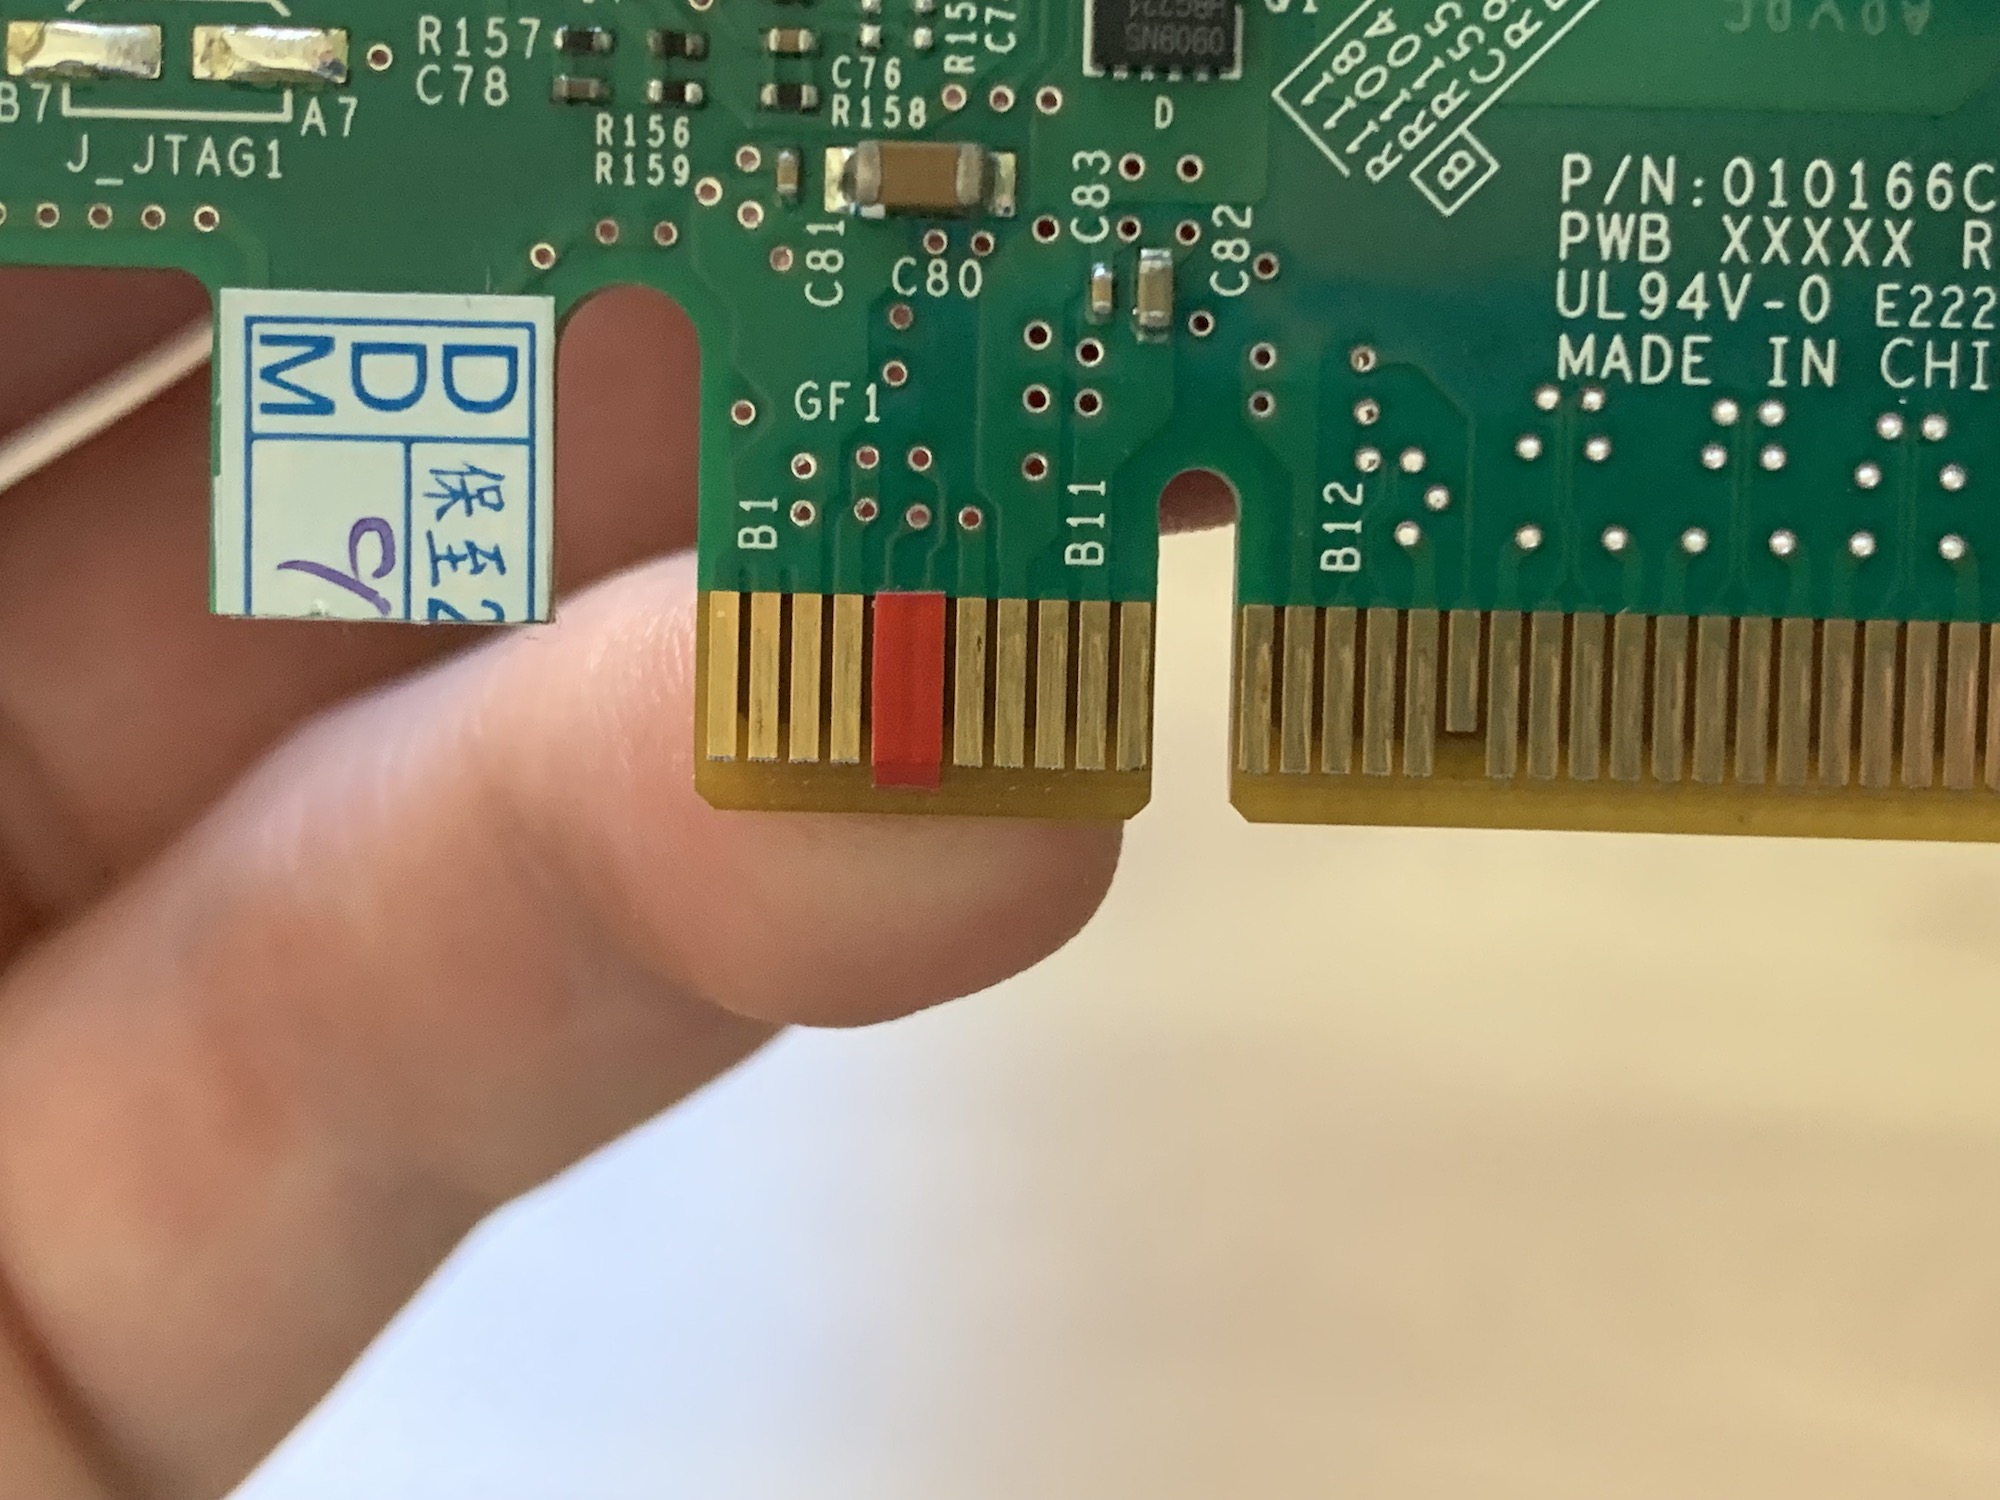
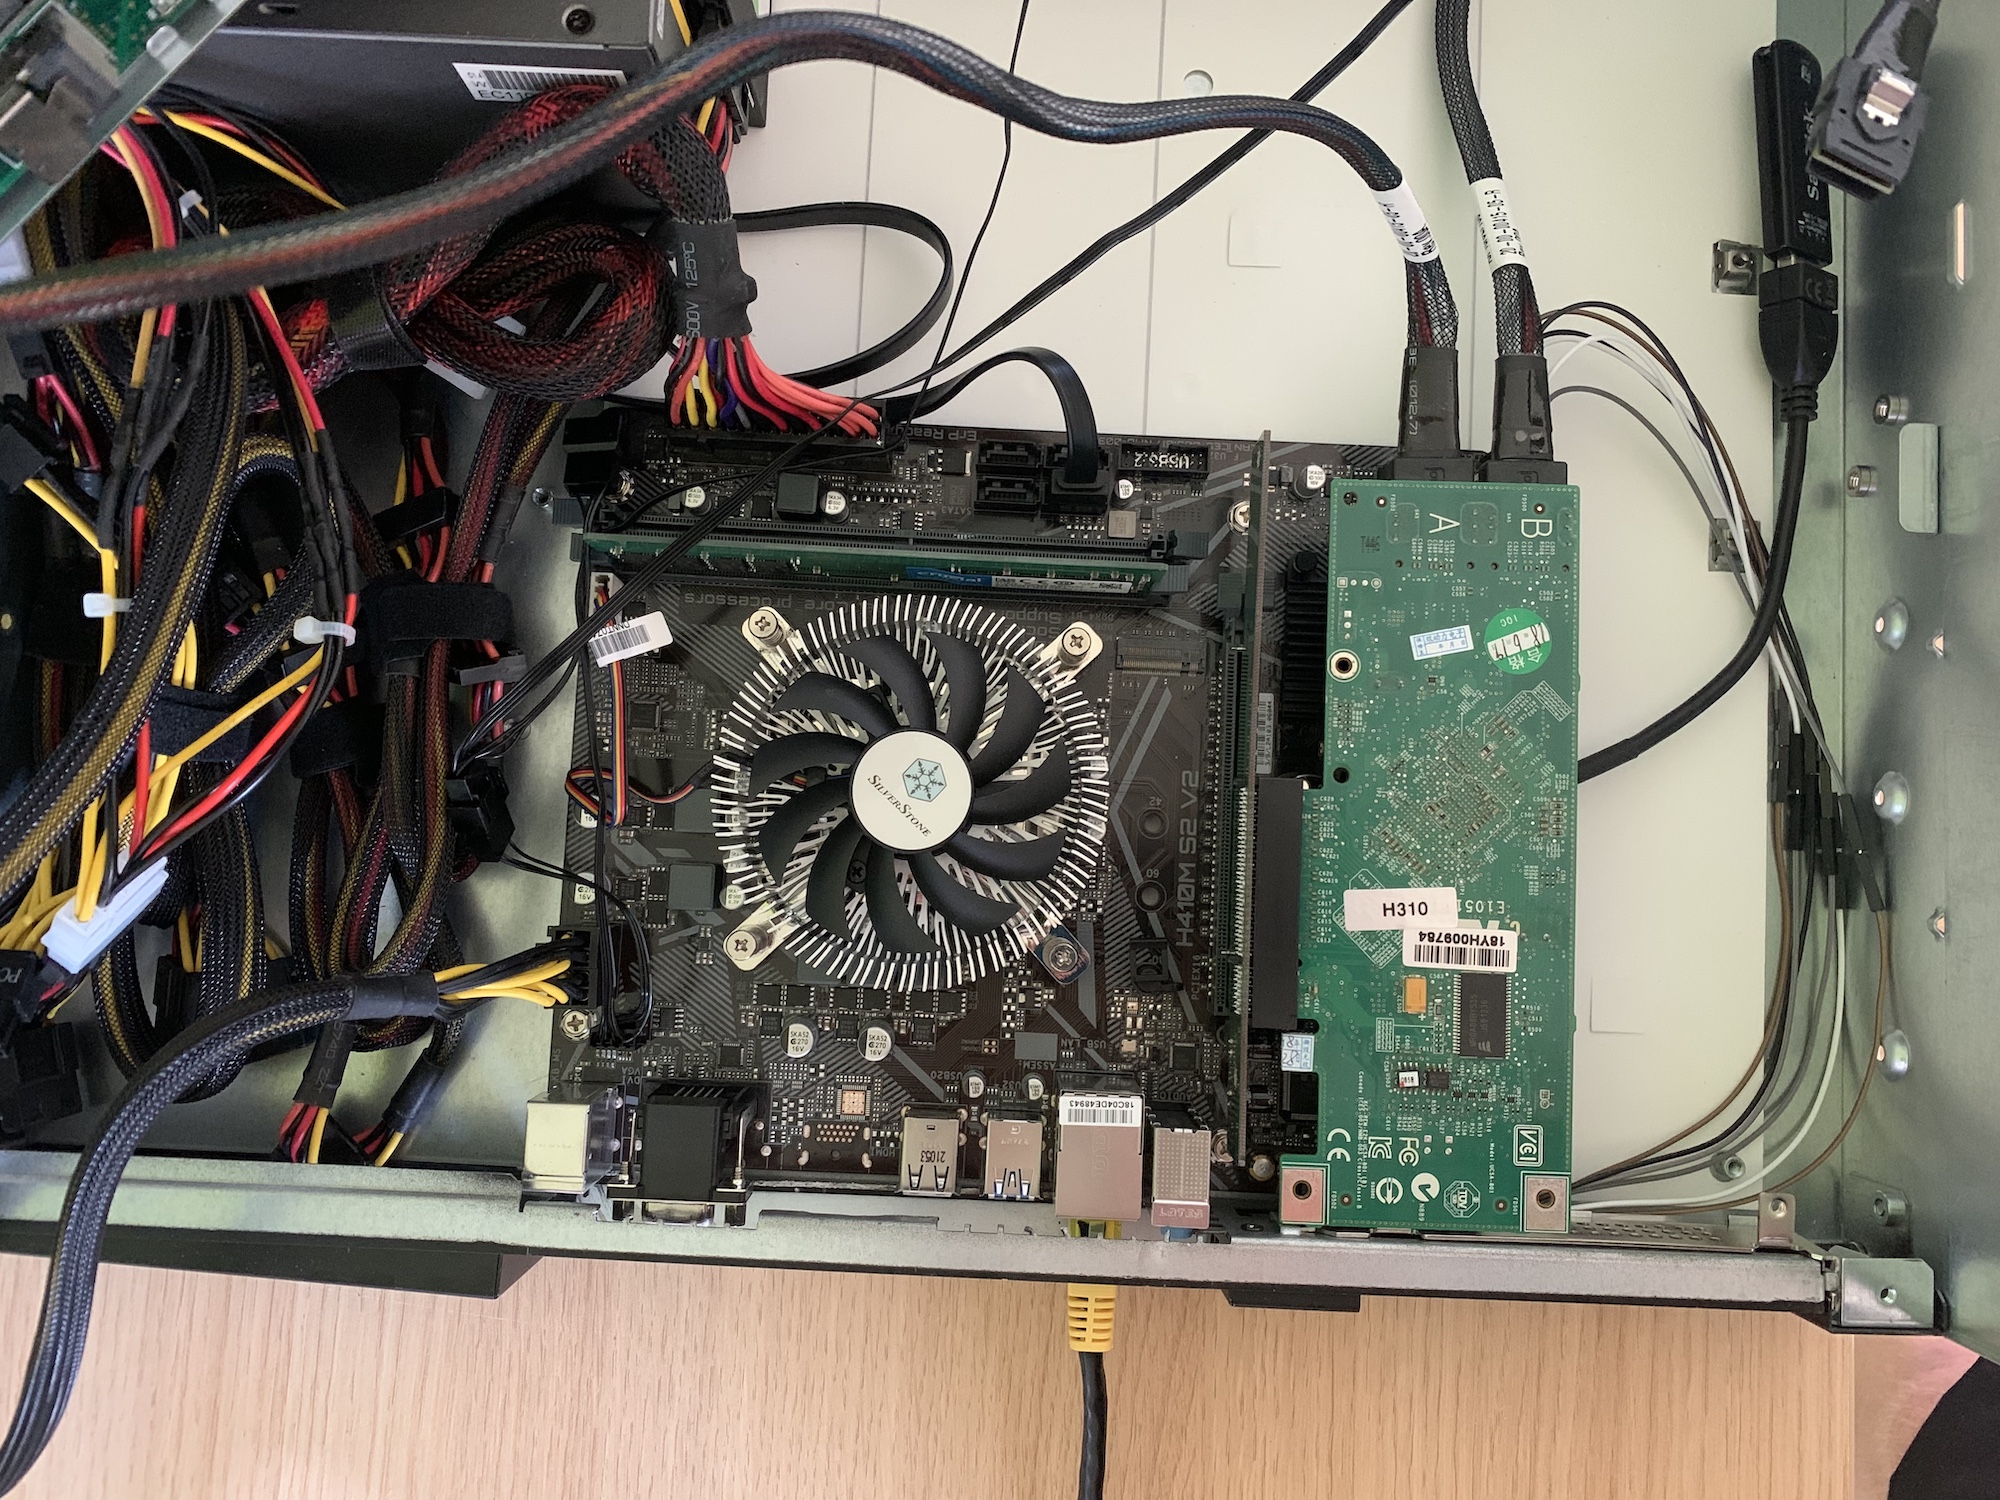
Upon arrival, I noticed that my system wouldn't boot when the card was installed. Apparently, that's normal when this card is installed in a non-Dell machine. To fix it, you need to tape off the fifth and sixth pin on the PCI header:
Then I threw everything in the case and powered it on. Excuse the cable mess here; I did clean it up a little bit afterward. Promise!
Installing UnRAID & migrating my VMs
Once everything was installed in the case, I installed Proxmox and created a virtual machine for UnRAID. I thought about rolling my own MergerFS + SnapRAID setup but ultimately decided against it.
UnRAID has everything I need out of the box. It's not a RAID solution and yet offers parity protection. It's easy to create users, SMB/NFS shares, and it monitors your disks and notifies you if something is about to go wrong. Yes, it does cost money, but I'll happily pay the license fee if it gets out of my way and does its job.
One downside is that UnRAID is not designed to run as a virtual machine. You have to boot it from a USB drive, which is a bit clunky in my case. I've hidden the USB drive with this special cable.
Once the storage array was up and running, I migrated all my other virtual machines to this server by restoring Proxmox backups. Overall, this setup has been running for the last 3 months and has been rock solid!
Total cost
Here's a breakdown of all the costs:
| Item | Price |
|---|---|
| Rackable server | €52,22 |
| Shipping cost | €62,67 |
| CPU Cooler: SilverStone SST-NT07-115X | €23,17 |
| 2x Arctic F8 PWM PST CO - 80mm | €10,52 |
| 2x Molex splitter | €2,12 |
| DeLOCK 83291: Internal USB2 port | €3,04 |
| Dell H310 RAID Controller | €70,00 |
| Motherboard: H410M S2 V2 | €62,90 |
| CPU: Intel Pentium Gold G6405 | €69,90 |
| 8GB DDR4 Memory | €37,00 |
| UnRAID license | €50,53 |
| Total | €444,07 |
In total, I spent €440 (about $525), which is about the same as a good 4-bay Synology or QNAP NAS. I was able to recover €30 by selling the motherboard to a collector, €10 for selling the original RAID controller, and I've sold my old Home Assistant server for €160. That brings the total down to €166 or $167.
| Total bought | €444,07 |
| Sold: Arima motherboard | - €30,00 |
| Sold: RAID controller | - €10,00 |
| Sold: Sunon 80mm fans | - €10,00 |
| Sold: Yottamaster 4-bay USB enclosure | - €68,00 |
| Sold: HP ProDesk Mini (old server) | - €160,00 |
| Net cost: | €166,07 |
The other old components are still listed for sale, so that might drop even further.
The end result
And here's the server inside my home cabinet:
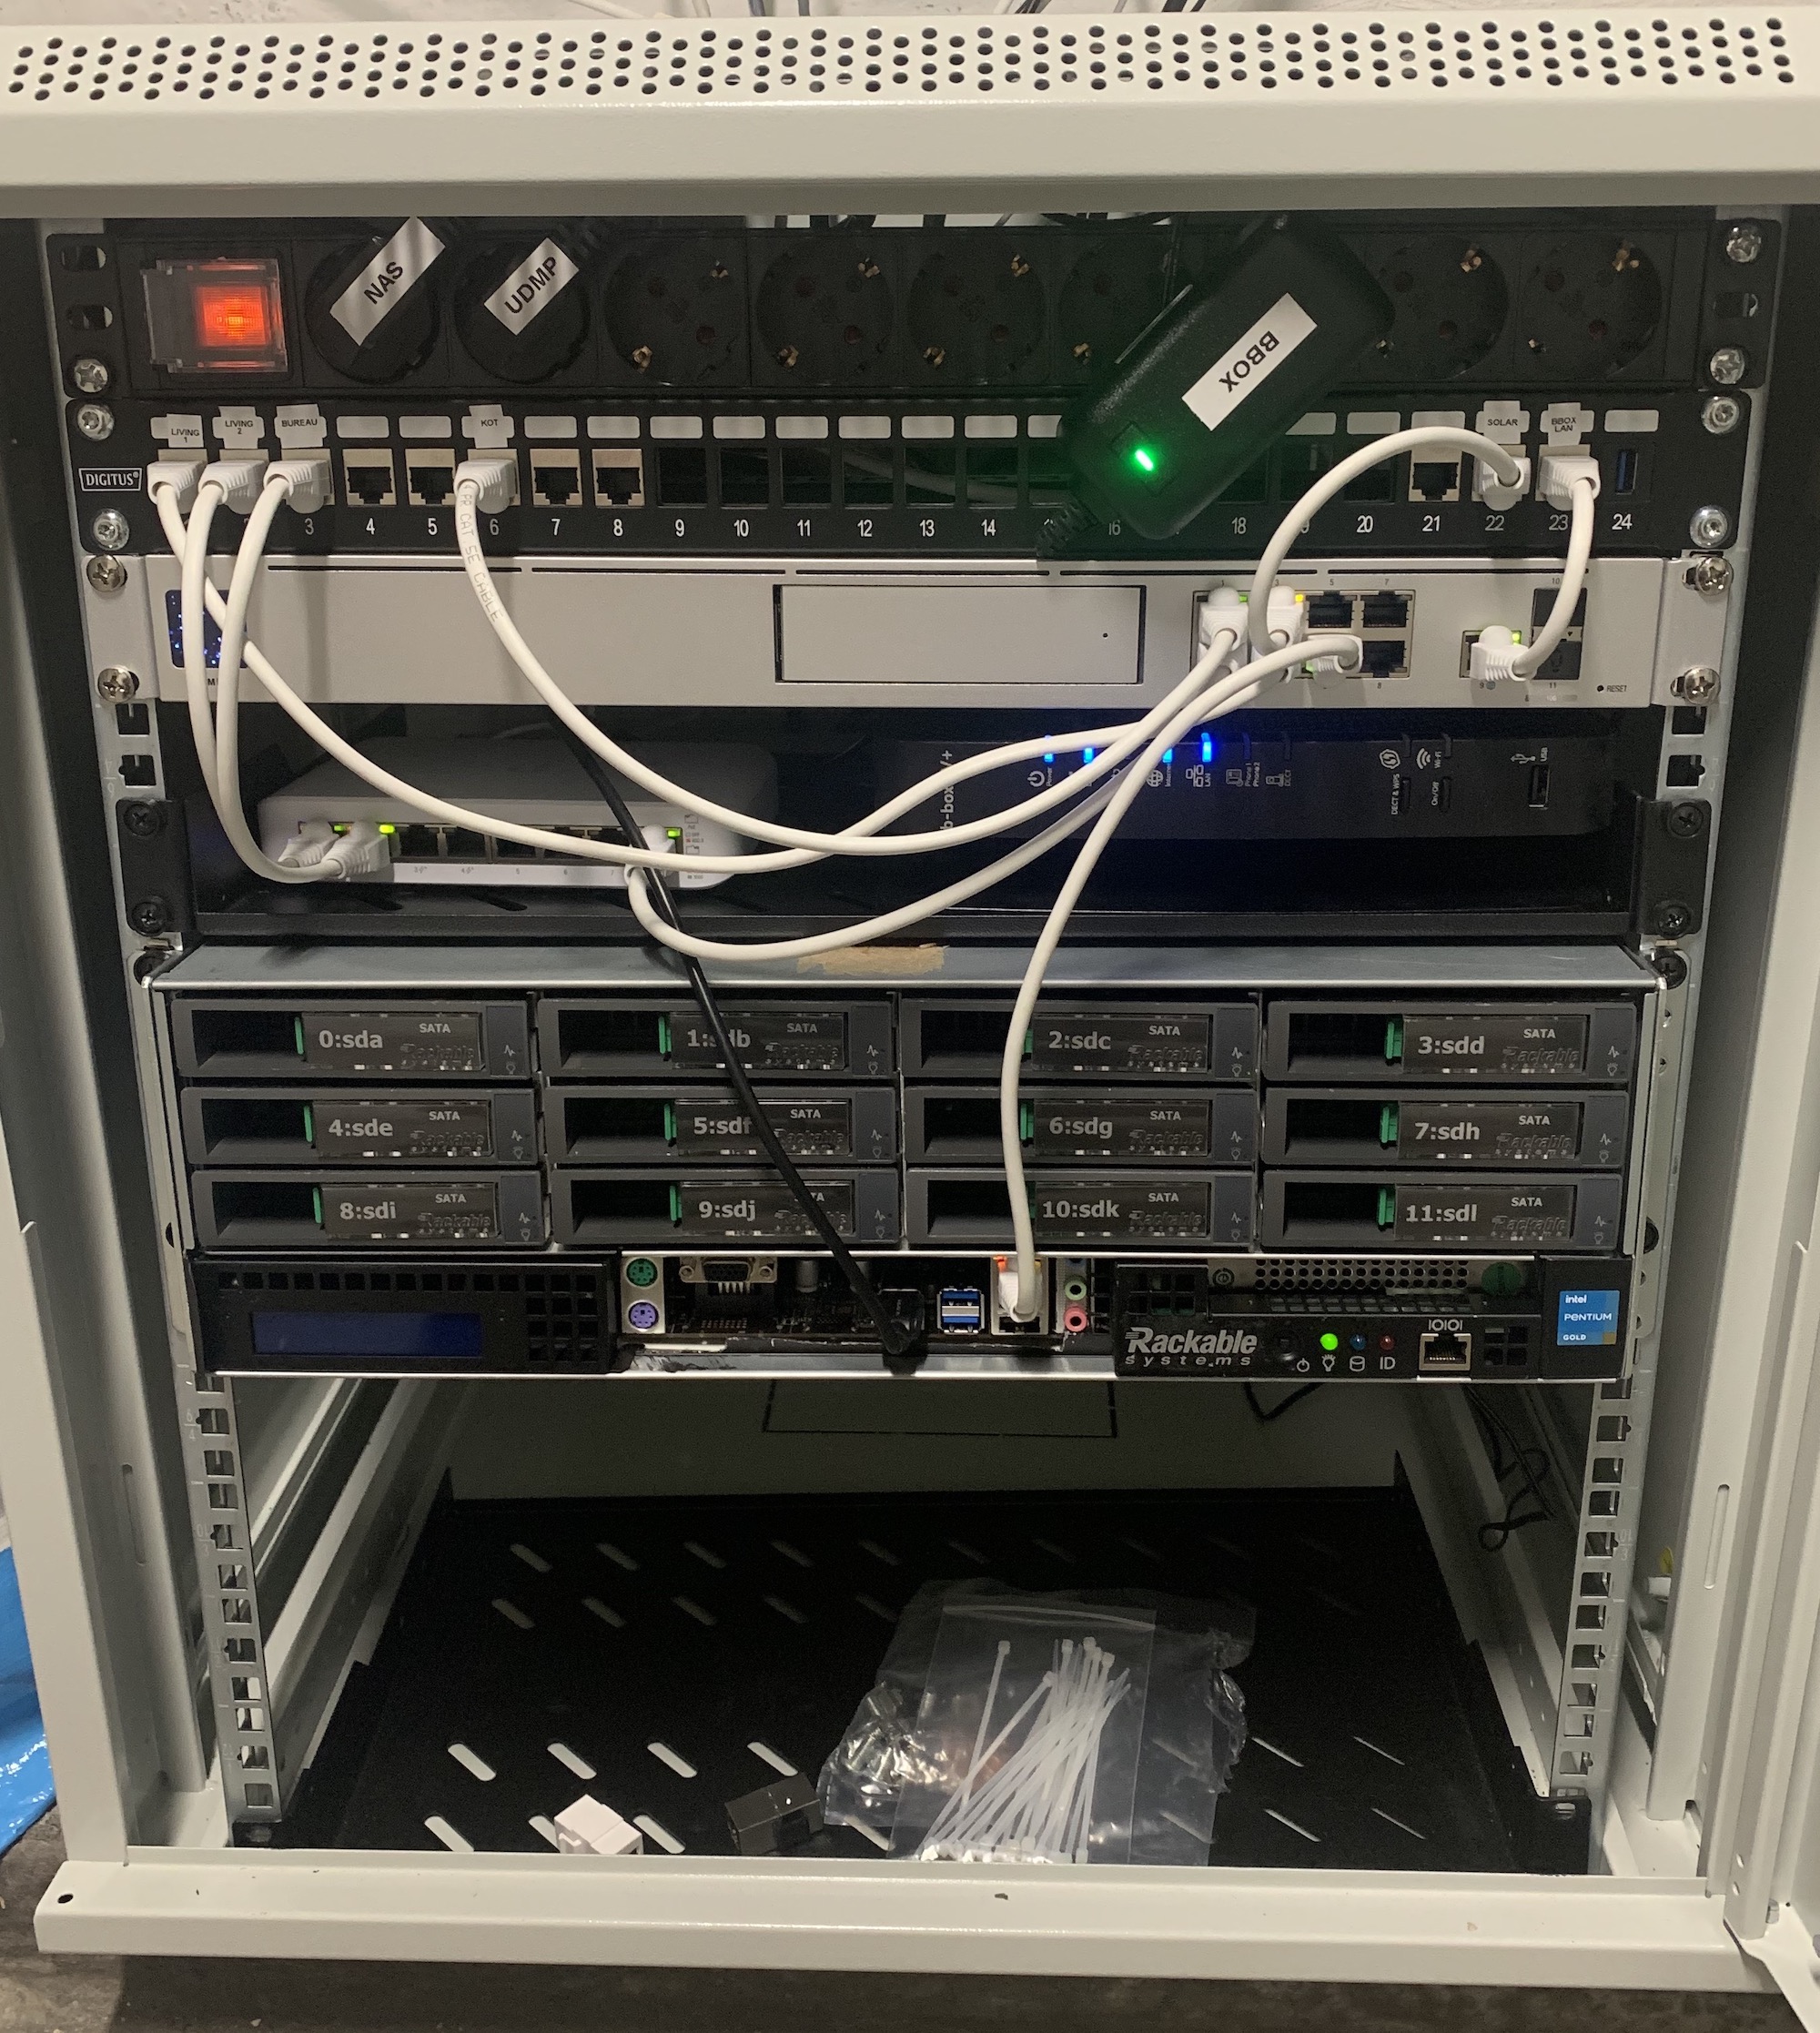
Old server, brand-new internals, and lots of room for expansion!
I love enterprise gear
While I was working with this server chassis, I fell in love with enterprise hardware. Everything is designed to be taken apart, serviced or replaced, and put back together. It all feels robust and well thought out. No fragile parts that might break and no proprietary screws.
I wish all devices were like this.
I feel like this might not be the last bit of enterprise gear that I buy on eBay.
Conclusion
And that concludes my adventure of buying an old server and retrofitting it with modern hardware. This has been a very hands-on project, but I think it has been worth it.
Would I recommend it? Absolutely. If you can buy a server on the cheap, have the necessary skills to cut metal, and have a bit of patience, go for it! Otherwise, stick with a pre-built NAS.

