Migrating This Blog From Jekyll to Eleventy
Jekyll has been powering this site for many years now. It replaced my WordPress setup, and I haven't looked back. Over the last few months, I have become fed up with Jekyll. It's slowing me down. Time to replace it with something new and shiny!
Why I'm ditching Jekyll
There are two reasons for me to ditch Jekyll.
First: it became slow. Building my site took around 30 seconds. Not so bad for production builds, but horrible while developing. I'm not sure why it has gotten so slow. I only have 65 blog posts and 151 video pages.
Jekyll 4.0 was meant to improve performance, but I couldn't use it. Some of my plugins weren't compatible, and some were outright abandoned.
Secondly, I'm not a Ruby developer. Sure, I can pick up the syntax and write a small plugin. But it takes me a lot of time. I also don't know the ecosystem of tools around it. Updates would cause plugins to break, which meant looking for new ones or fighting with Bundler to get beta versions of plugins.
So I didn't bother. I stuck to Jekyll 3 with ever-increasing build times.
Enter Eleventy
To improve this, I decided to look for a static website generator built with a language that I master. Javascript seemed like the most logical choice as I'm very familiar with the language and the ecosystem. There's no shortage of Javascript-based generators, but I ultimately decided on Eleventy.
Why? Well, it's a new shiny tool. I like new and shiny.
Okay, not really. Eleventy is praised because it's an engine that can take many types of inputs and run it through any template engine to generate your site. It's very flexible. It also has built-in support for Liquid, which meant that I could carry over my Jekyll template without much effort.
And most importantly: Eleventy is fast.
The plan
My goal was simple: migrate from Jekyll to Eleventy without breaking anything. All of my content should remain accessible with the same URLs. Re-use the existing CSS code and HTML structure. Don't pull anything fancy, just focus on migrating from one platform to the other.
Spoiler alert: that didn't go entirely according to plan. I did tweak a few things left and right, but overall, the new site is very similar to the old one.
LiquidJS madness
Because Eleventy supports Liquid, I thought that all my templates could be ported over without any hassle. Boy, was I wrong!
It turns out that Eleventy uses an older version of LiquidJS . A broken version. Here are a few issues I stumbled upon and how I fixed them.
Broken reverse filter
First up: the reverse filter is broken. It's supposed to reverse the order of items in a collection. My blog posts and videos are sorted based on the date they were published (oldest to newest). So when you want to display the latest ones, you have to reverse it:
{{ assign latest_to_newest = collections.posts | reverse }}Except that this reverses the collection in place. It permanently alters the sorting of a collection for all subsequent templates using it, which created all sorts of weird issues on my site. On one page, the order would be correct. On another, it would be reversed without me using the filter.
It took me a while to figure out that an outdated version of LiquidJS was causing this issue. You can upgrade to newer versions, but there seem to be some compatibility issues with Eleventy.
Instead, I defined my own reverse filter and overwrote the existing one:
config.addLiquidFilter("reverse", (collection) => {
    return [...collection];
});
Inconsistent template variables
Secondly, accessing template variables is very inconsistent. For instance: the title of your page is available as a global variable in your templates:
<h1>{{ title }}</h1>But the URL of the page is stored underneath the page variable:
<a href="{{ page.url }}">My page</a>Another example: when you fetch a page from a collection, its title is stored underneath data.title and the URL is stored directly underneath the object itself. Kind of opposite to how it works in the example above.
{% assign randomVideo = collections.videos[3] %}

Video title: {{ randomVideo.data.title }}
Video URL: {{ randomVideo.url }}
This behavior is more logical than the first example. Everything generated by Eleventy (such as the URL) is stored directly under the root object. Everything coming out of the front matter of your posts is stored underneath data.
Different include syntax
Liquid includes are also slightly different between Jekyll and Eleventy. I changed this syntax with the search & replace feature of Visual Studio Code (using a regex)
<!-- Jekyll -->
{% render youtube-embed.html videoId='y6yD2-ZIllQ' %}
{{include.videoId}}

<!-- Eleventy -->
{% render "youtube-embed.html", videoId:'y6yD2-ZIllQ' %}
{{videoId}}
In the example above, I include the YouTube player and pass along a videoId variable.
The way you use this variable inside your include is different yet again. In Jekyll, everything is stored underneath the include variable:
The video ID is: {{ include.videoId }}While in Eleventy they become global variables:
The video ID is: {{ videoId }}Once again, search & replace helped me to sort this out quickly.
Liquid or Nunjucks?
These minor discrepancies caused me a few headaches, but ultimately I got everything working. It seems like Eleventy prefers Nunjucks, and some people even suggest dropping support for other templating engines.
I will start porting my templates to Nunjucks in the future. The syntax is similar to Liquid, and it should be more consistent. But the best part is: I can do it gradually because Eleventy allows you to mix template engines!
Trouble with post_url
I also faced problems with internal links to my blog posts or videos. In Jekyll, you could link to a post by using the link tag:
[link to a post]({% link _posts/2016-07-26-name-of-post.md %})But this isn't supported by Eleventy. This is because Eleventy developers believe that links should never change. Therefore, you have no need for dynamically linking to another post. Hard code the URL, and you're fine.
While I agree that links shouldn't change, I don't agree with not offering this capability. The benefit of Jekyll's link tag is that it will spit out errors at build time. Made a typo? No problem, the build will fail, and you can fix it. If you manually link pages, you don't have this safety net.
So I wrote my own link tag -- which is called a "shortcode" in Eleventy:
/**
 * Define a post_url Liquid tag for cross-referencing
 *
 * Original creator: https://rusingh.com/articles/2020/04/24/implement-jekyll-post-url-tag-11ty-shortcode/
 * Adapted by me to work with filename instead of slug.
 *
 * @param {*} collection
 * @param {*} filename
 * @returns
 */
eleventyConfig.addShortcode("link", (collection, filename) => {
  if (collection.length < 1) {
    throw "Collection appears to be empty";
  }
  if (!Array.isArray(collection)) {
    throw "Collection is an invalid type - it must be an array!";
  }
  if (typeof filename !== "string") {
    throw "Filename is an invalid type - it must be a string!";
  }
  const found = collection.find(p => p.template.inputPath.indexOf(filename) > -1);
  if (found === 0 || found === undefined) {
    // When nothing was found, throw an error to break the build.
    // Broken links should not be allowed!
    throw new Error(`File ${this.page.inputPath} wants to link to ${filename}, but it does not exist.`);
  } else {
    return found.url;
  }
});
Because shortcodes don't have access to collections, it takes two parameters. First, the collection in which the post you want to link is stored. Secondly, the filename of the post.
[Here's a link to my Home Energy monitor]({% link collections.posts, '2019-07-07-Home-Energy-Monitor-ESP32-CT-Sensor-Emonlib.md' %})This works for other collections as well:
[mRNA Vaccines - Simply Explained]({% link collections.videos, 'mrna-vaccines.md' %})Once again I used the search & replace feature to migrate from the Jekyll syntax to my shortcode:

Markdown customization
All my content is written in Markdown and is converted to HTML by Eleventy with the markdown-it library. By default, Eleventy takes care of this, but I wanted to customize some aspects.
Since Eleventy is so flexible, you can switch to different Markdown libraries if you want. Or, you can use the same one with custom options. I chose the latter.
I started by including the markdown-it library in my Eleventy config file and made a new instance of it.
const markdownIt = require("markdown-it");
const markdownLib = markdownIt();
Then I told Eleventy to use my instance of markdown-it, instead of the built-in one.
eleventyConfig.setLibrary("md", markdownLib);In between these code blocks, I can tweak the options of the library and add plugins.
Open external links in a new tab
I want all externals links on my website to open in a new tab and have the rel="noopener noreferrer" attribute. I used to do this client-side with some Javascript, but I wanted to get rid of that.
Instead, I used the markdown-it-link-attributes plugin. Tell it which links you want to replace and what attributes you want to add to them. And lastly, you have to tell markdown-it to use() the plugin. That's it!
// Options for markdown-it-link-attributes
const milaOptions = {
	pattern: /^https?:/,
	attrs: {
		target: "_blank",
		rel: "noopener noreferrer"
	}
};

const markdownLib = markdownIt()
		// Makes sure that each external link opens in a new tab
		.use(require("markdown-it-link-attributes"), milaOptions)
Lazy load images
In the same way, I added the markdown-it-image-lazy-loading plugin to lazy load all images in my posts.
const markdownLib = markdownIt()
		// Lazy load all images by default (browser support needed)
		.use(require('markdown-it-image-lazy-loading'))
This plugin rewrites the HTML code of images to include the loading attribute and sets it to lazy. This tells the browser that it can wait to download images until they are a certain distance from the viewport. In other words: the browser only loads your image when it's about to appear (while the user is scrolling, for instance).
<img src="..." loading="lazy">This feature is well supported by many browsers, and it saves you bandwidth!
Table of contents
The last plugin I added to the Markdown library is markdown-it-table-contents. As the name suggests, it generates a table of contents whenever you type [[TOC]] in your post.
const markdownLib = markdownIt()
        // Generates anchors for all headings
        .use(require('markdown-it-anchor'))

        // Generate table of contents when asked (needs anchors to work)
        .use(require("markdown-it-table-of-contents"))
Just make sure to also include markdown-it-anchor. Otherwise the items in your table of contents will not be clickable.
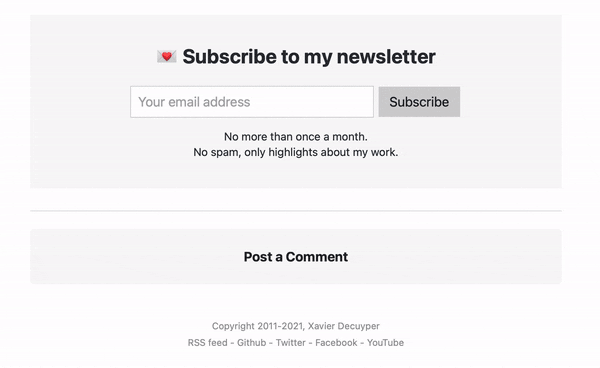
Click to load comments
Next pain point to tackle: the heavy Disqus comments script. Previously, I would only load Disqus when a visitor had scrolled down to the bottom of the page. That script didn't work very well, though. Scrolling quickly or reloading the browser near the bottom of the page would cause it to stop working.
Also, I want to limit the amount of code that runs when the page is loaded as much as possible. Instead, I added a button saying "Post a comment" that only loads Disqus when you click on it.
Naturally, this has already been done before. I took this script from W3Bits:
/**
 * Loads Disqus comments when the user clicks on "Post a Comment"
 * No need to load their heavy library for every visitor (most don't comment anyway).
 *
 * Based on W3Bits blog post:
 * https://w3bits.com/load-disqus-on-click/
 */
window.load_disqus = function () {
	// Prepare the trigger and target
	const disqus_trigger = document.getElementById('disqus_trigger');
	const disqus_target = document.getElementById('disqus_thread');
	const disqus_embed = document.createElement('script');
	const disqus_hook = (document.getElementsByTagName('head')[0] || document.getElementsByTagName('body')[0]);

	// Load script asynchronously only when the trigger and target exist
	if (disqus_target && disqus_trigger) {
		disqus_embed.type = 'text/javascript';
		disqus_embed.async = true;
		disqus_embed.src = '//savjee.disqus.com/embed.js';
		disqus_hook.appendChild(disqus_embed);
		disqus_trigger.remove();
	} else {
		console.error("Could not load comments because target or trigger is not defined.");
	}
}
All it needs to work is these HTML elements:
<div id="comments">
    <div id="disqus_thread"></div>
    <button id="disqus_trigger" onclick="load_disqus()">Post a Comment</button>
</div>
See the script in action (or scroll down to the bottom of the page and try it yourself):
Adding more structured data
No website is done without SEO, so the last improvement I made was to add more structured data . This allows Google to understand the contents on your pages and display richer features in search results.
I already have structured data for my video pages ( VideoObject ), but I also wanted to add breadcrumbs to clarify that my videos belong to a series. Something that can be seen from the structure of my URL's:
https://savjee.be/videos/simply-explained/mrna-vaccines/
This video about mRNA vaccines belongs to the "Simply Explained" series. Unfortunately, there was no easy way to generate the "Simply Explained" page in Jekyll.
In Eleventy, this is pretty straightforward. I already had a data file containing data about each series _data/video_series.json:
[
    {
        "title": "Simply explained",
        "playlistId": "PLzvRQMJ9HDiSbvXWQ7OdgVccdr7Wni5Qw",
        "description": "Simply Explained is all about taking a complex subject and explaining it in plain English."
    },
    {
        "title": "Programming ESP32 with Arduino",
        "playlistId": "PLzvRQMJ9HDiQ3OIuBWCEW6yE0S0LUWhGU",
        "description": "Start using the ESP32 microcontroller to build your own IoT projects!"
    }
    // ...
]
I used this, along with the pagination feature , to generate a page for each entry in this data file:
---
layout: page
pagination:
    data: video_series
    size: 1
    alias: serie
permalink: "videos/{{ serie.title | slug }}/"
---
<!-- This is generated for each video series. Shows an overview of videos in the series.-->
Done! All video series now have their own page, and suddenly these URL's start to work as well:
https://savjee.be/videos/simply-explained/
Breadcrumbs
Now we can implement breadcrumbs so that Google understands the structure and can show it to their visitors.
Videos > Series > Video title
Here's how I implemented it in Liquid:
<script type="application/ld+json">
[
    {
      "@context": "https://schema.org",
      "@type": "BreadcrumbList",
      "itemListElement": [{
        "@type": "ListItem",
        "position": 1,
        "name": "Videos",
        "item": "https://savjee.be/videos/"
      },{
        "@type": "ListItem",
        "position": 2,
        "name": "{{series}}",
        "item": "https://savjee.be/videos/{{series | slug }}"
      },{
        "@type": "ListItem",
        "position": 3,
        "name": "{{ title }}"
      }]
    }
]
</script>
About two days after publishing these changes, Google started to pick them up. I followed this up through the Search Console:

This is how it looks in the search results:

Both the breadcrumbs and the video object are shown. This makes the search result a lot more compelling to click on. At least that's the theory ;)
Does everything still work?
At this point, I was done with the migration, and I wanted to test if everything still worked.
I started by checking if all the URLs in my sitemap still worked on the new site. I found this handy script on StackOverflow that accomplishes this with curl.
I took my existing sitemap, changed to the URL's to point to localhost, and ran the script.
#!/bin/bash
while read LINE; do
  curl -o /dev/null --silent --head --write-out "%{http_code} $LINE\n" "$LINE"
done < sitemap.txt
Sure enough, all URL's returned HTTP code 200. Awesome! No content became inaccessible.
200 http://localhost:8080/2021/04/good-home-automation-should-be-boring/
200 http://localhost:8080/2021/02/esp32-cam-cropping-images-on-device/
200 http://localhost:8080/2021/01/fifth-year-on-youtube-retrospective/
200 http://localhost:8080/2020/12/secure-home-assistant-access-with-cloudflare-and-ubiquiti-dream-machine/
200 http://localhost:8080/2020/11/shelly25-esphome-potential-fire-hazard-fix/
Check visual differences
I also wanted to make sure that all my pages still looked the same. I wrote a simple NodeJS script that uses Puppeteer to navigate to each page in my sitemap and take a screenshot of the current website, as well as the new one. Then, I used Resemble.js to compare both screenshots and calculate the difference in percentage.
Capturing index.html - L R - Diff: 4.07%
Capturing about.html - L R - Diff: 0.07%
Capturing posts.html - L R - Diff: 14.12%
Capturing videos/ - L R - Diff: 6.31%
Capturing courses/ - L R - Diff: 0.00%
Capturing 2021/04/good-home-automation-should-be-boring/ - L R - Diff: 1.62%
Capturing 2021/02/esp32-cam-cropping-images-on-device/ - L R - Diff: 1.83%
Capturing 2021/01/fifth-year-on-youtube-retrospective/ - L R - Diff: 1.83%
Note that because I implemented a different way of loading comments, no page would have a 0% difference.
I went through the list and manually checked each page with a high diff percentage. Resemble.js not only calculates the difference it also generates a visual representation of the difference. Here's the homepage, and you can see an extra line break, shifting some content downwards.

These images came in handy to spot various issues and even uncovered me missing a CSS import.
Here's the full script:
const filenamifyUrl = require('filenamify-url');
const puppeteer = require('puppeteer');
const fullPageScreenshot = require("puppeteer-full-page-screenshot").default;

const fs = require('fs');
const fsPromises = fs.promises;
const compareImages = require("resemblejs/compareImages");

const localUrl = "http://localhost:8080/";
const remoteUrl = "https://savjee.be/";

async function capture(browser, path){
    process.stdout.write(`Capturing ${path} - `);
    const filename = __dirname + '/shots/' + filenamifyUrl(path);
    const fileLocal = filename + '-local.png';
    const fileRemote = filename + '-remote.png';
    const fileDiff = filename + '-diff.png';

    const page = await browser.newPage();
    await page.setViewport({ width: 1920, height: 1080 });

    await page.goto(localUrl + path);
    await fullPageScreenshot(page, { path: fileLocal });
    process.stdout.write(`L `); // Local image captured

    await page.goto(remoteUrl + path);
    await fullPageScreenshot(page, { path: fileRemote });
    process.stdout.write(`R `); // Remote image captured

    // There is something really weird going on with APFS and Nodejs.
    // Files are created, and yet cannot be read. So here, we wait
    // until node sees that both files exist.
    while(!fs.existsSync(fileLocal) || !fs.existsSync(fileRemote)){
        await new Promise(r => setTimeout(r, 50));
    }

    // Compare both
    const diff = await compareImages(
        await fsPromises.readFile(fileLocal),
        await fsPromises.readFile(fileRemote),
        {
            // I switched to a different syntax highlighting theme,
            // so better to ignore colors to avoid high diffs.
            ignore: "colors",
        }
    );

    process.stdout.write(`- Diff: ${diff.misMatchPercentage}%`);
    await fsPromises.writeFile(fileDiff, diff.getBuffer());
    await page.close();
    console.log(); // Line break
}

async function main(){
    // List all your URLs here
    const urls = [
         "index.html",
         "about.html",
    ];

    const browser = await puppeteer.launch({ headless: true });
    for(const url of urls){
        await capture(browser, url);
    }

    await browser.close();
}

main();
With this check complete, I felt confident to deploy my changes to production. I merged my eleventy branch into the master branch, and my CI workflow did the rest.
Next steps
Overall, the migration to Eleventy went pretty smoothly. But this was only the start. Now that I have a better platform to develop my site, here are some things I want to work on in the future:
- Migrate templates from Liquid to Nunjucks.
- Tweak the typography. I want bolder fonts and tune the spacing between lines, paragraphs, and headings.
- Optimize CSS to minimize Cumulative Layout Shift. I got some warnings in Google Search Console (and this can potentially affect your ranking)
- Decide if I should ditch AWS S3 + CloudFront for the newly announced Cloudflare Pages.
By the way, the source code of this site is still available on GitHub.
